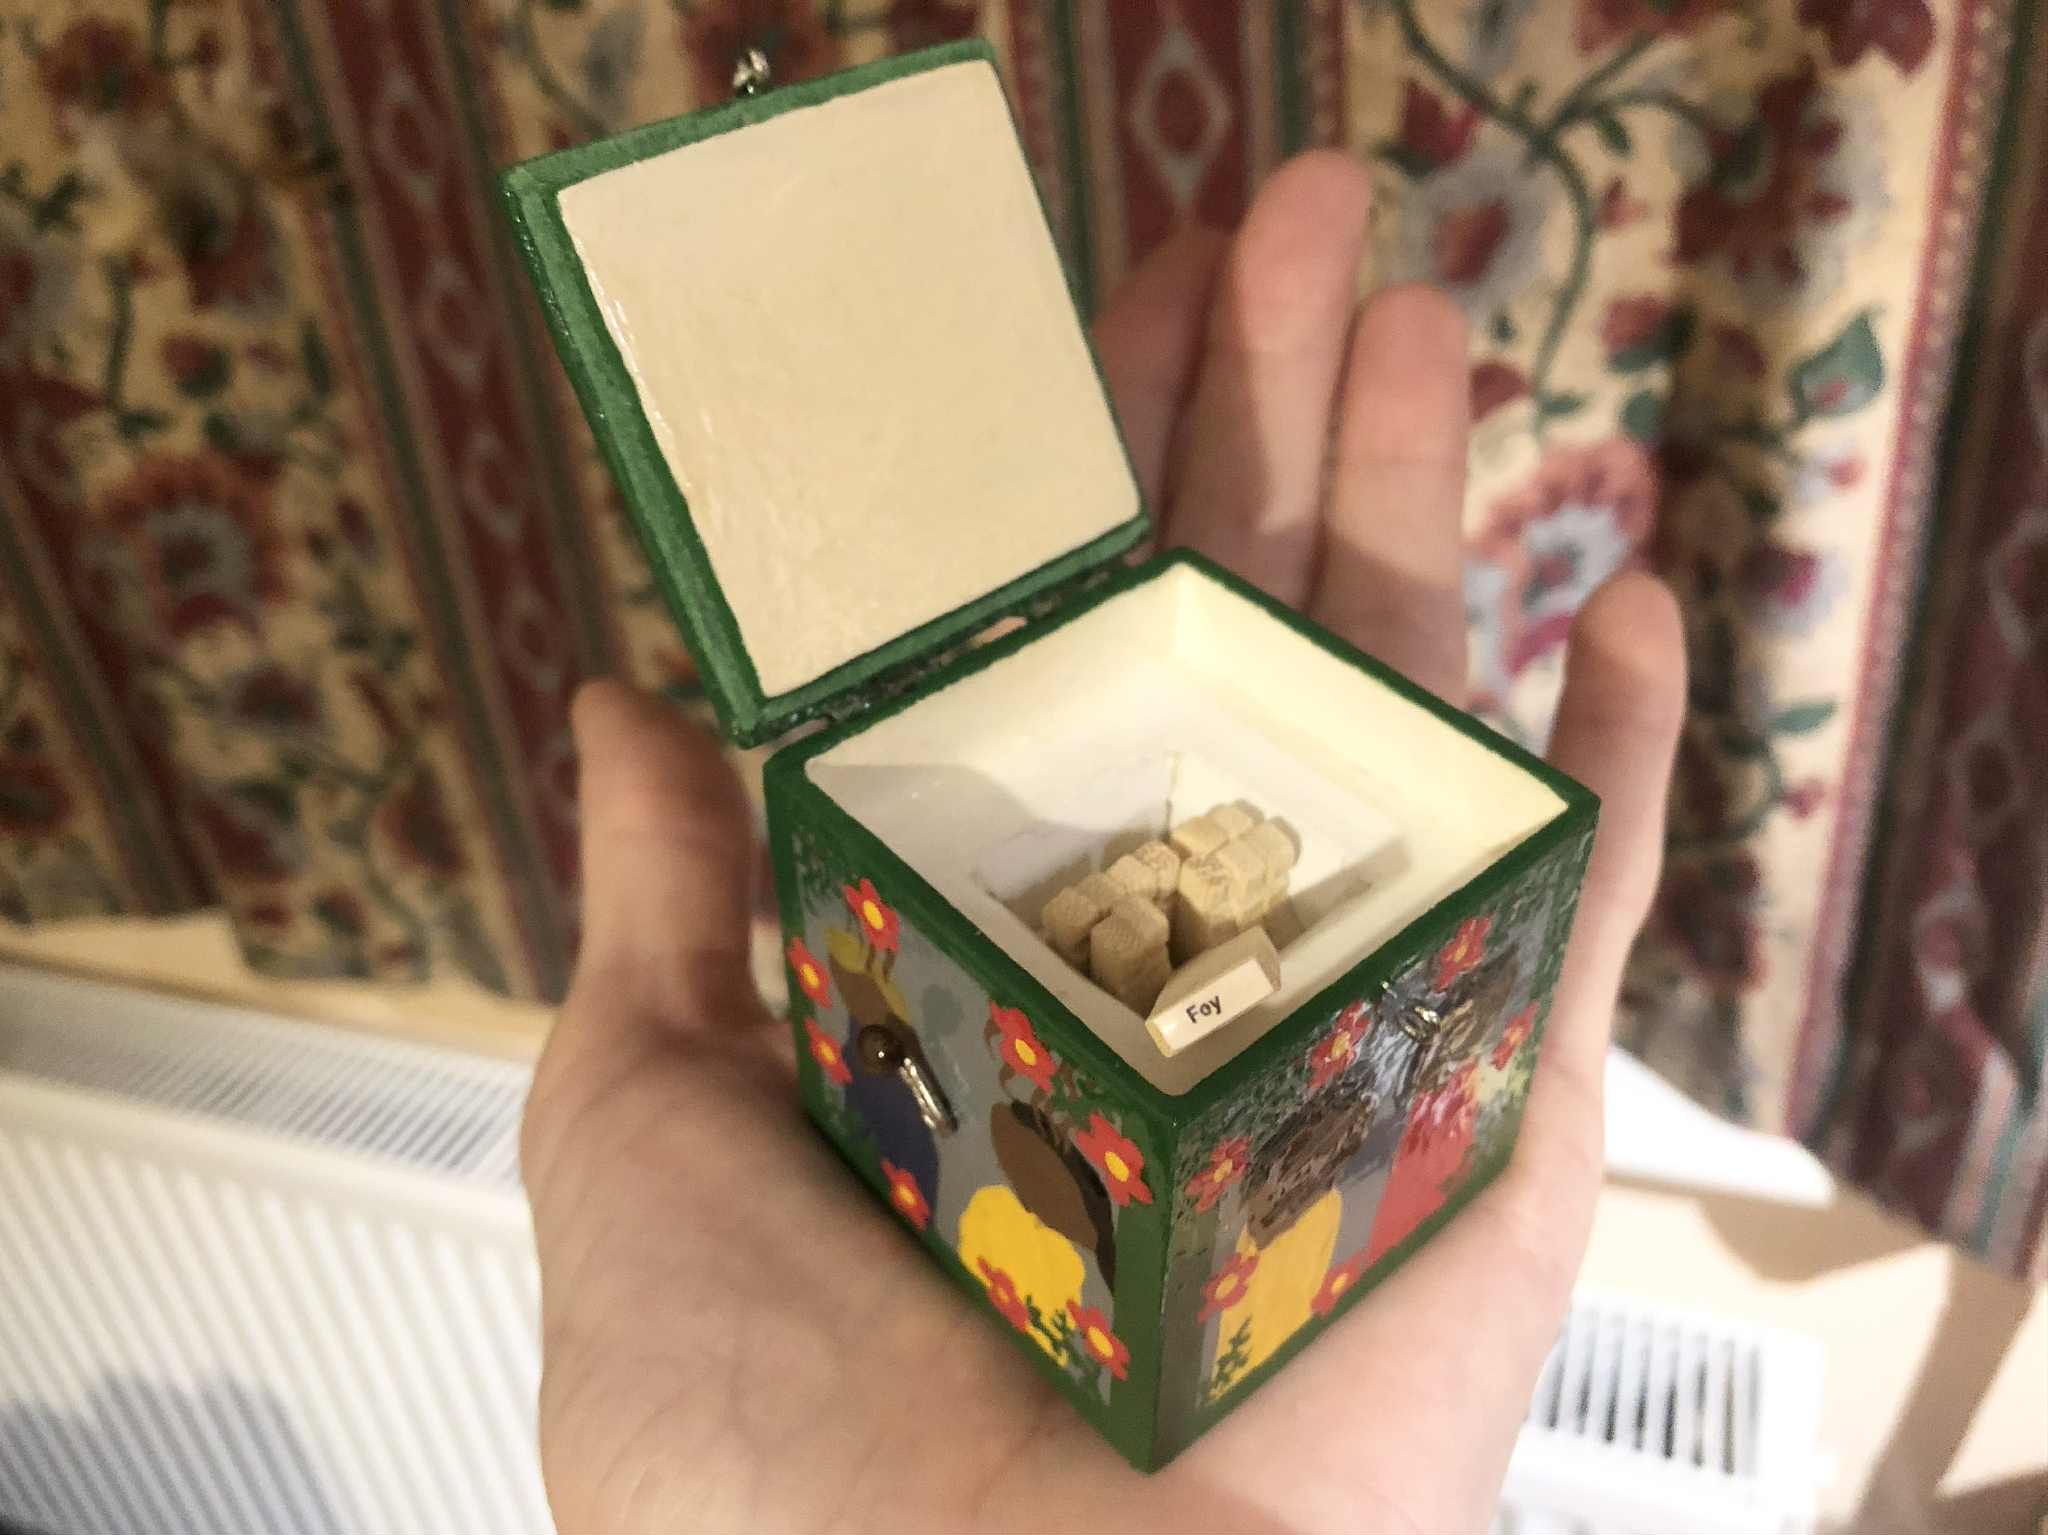
The answer: You can't. Or rather, I can't. To get it to eject a one of six random selections at the turn of a crank, that is WAY beyond my abilities. But... what I CAN do, if I simplify it down a lot, is make a box that has the six results available to pull from it! So I found a box of bamboo skewers, which would have a long enough base to be able to stick the results to, and I could hack the long stem off to the needed height! Problem, solved.
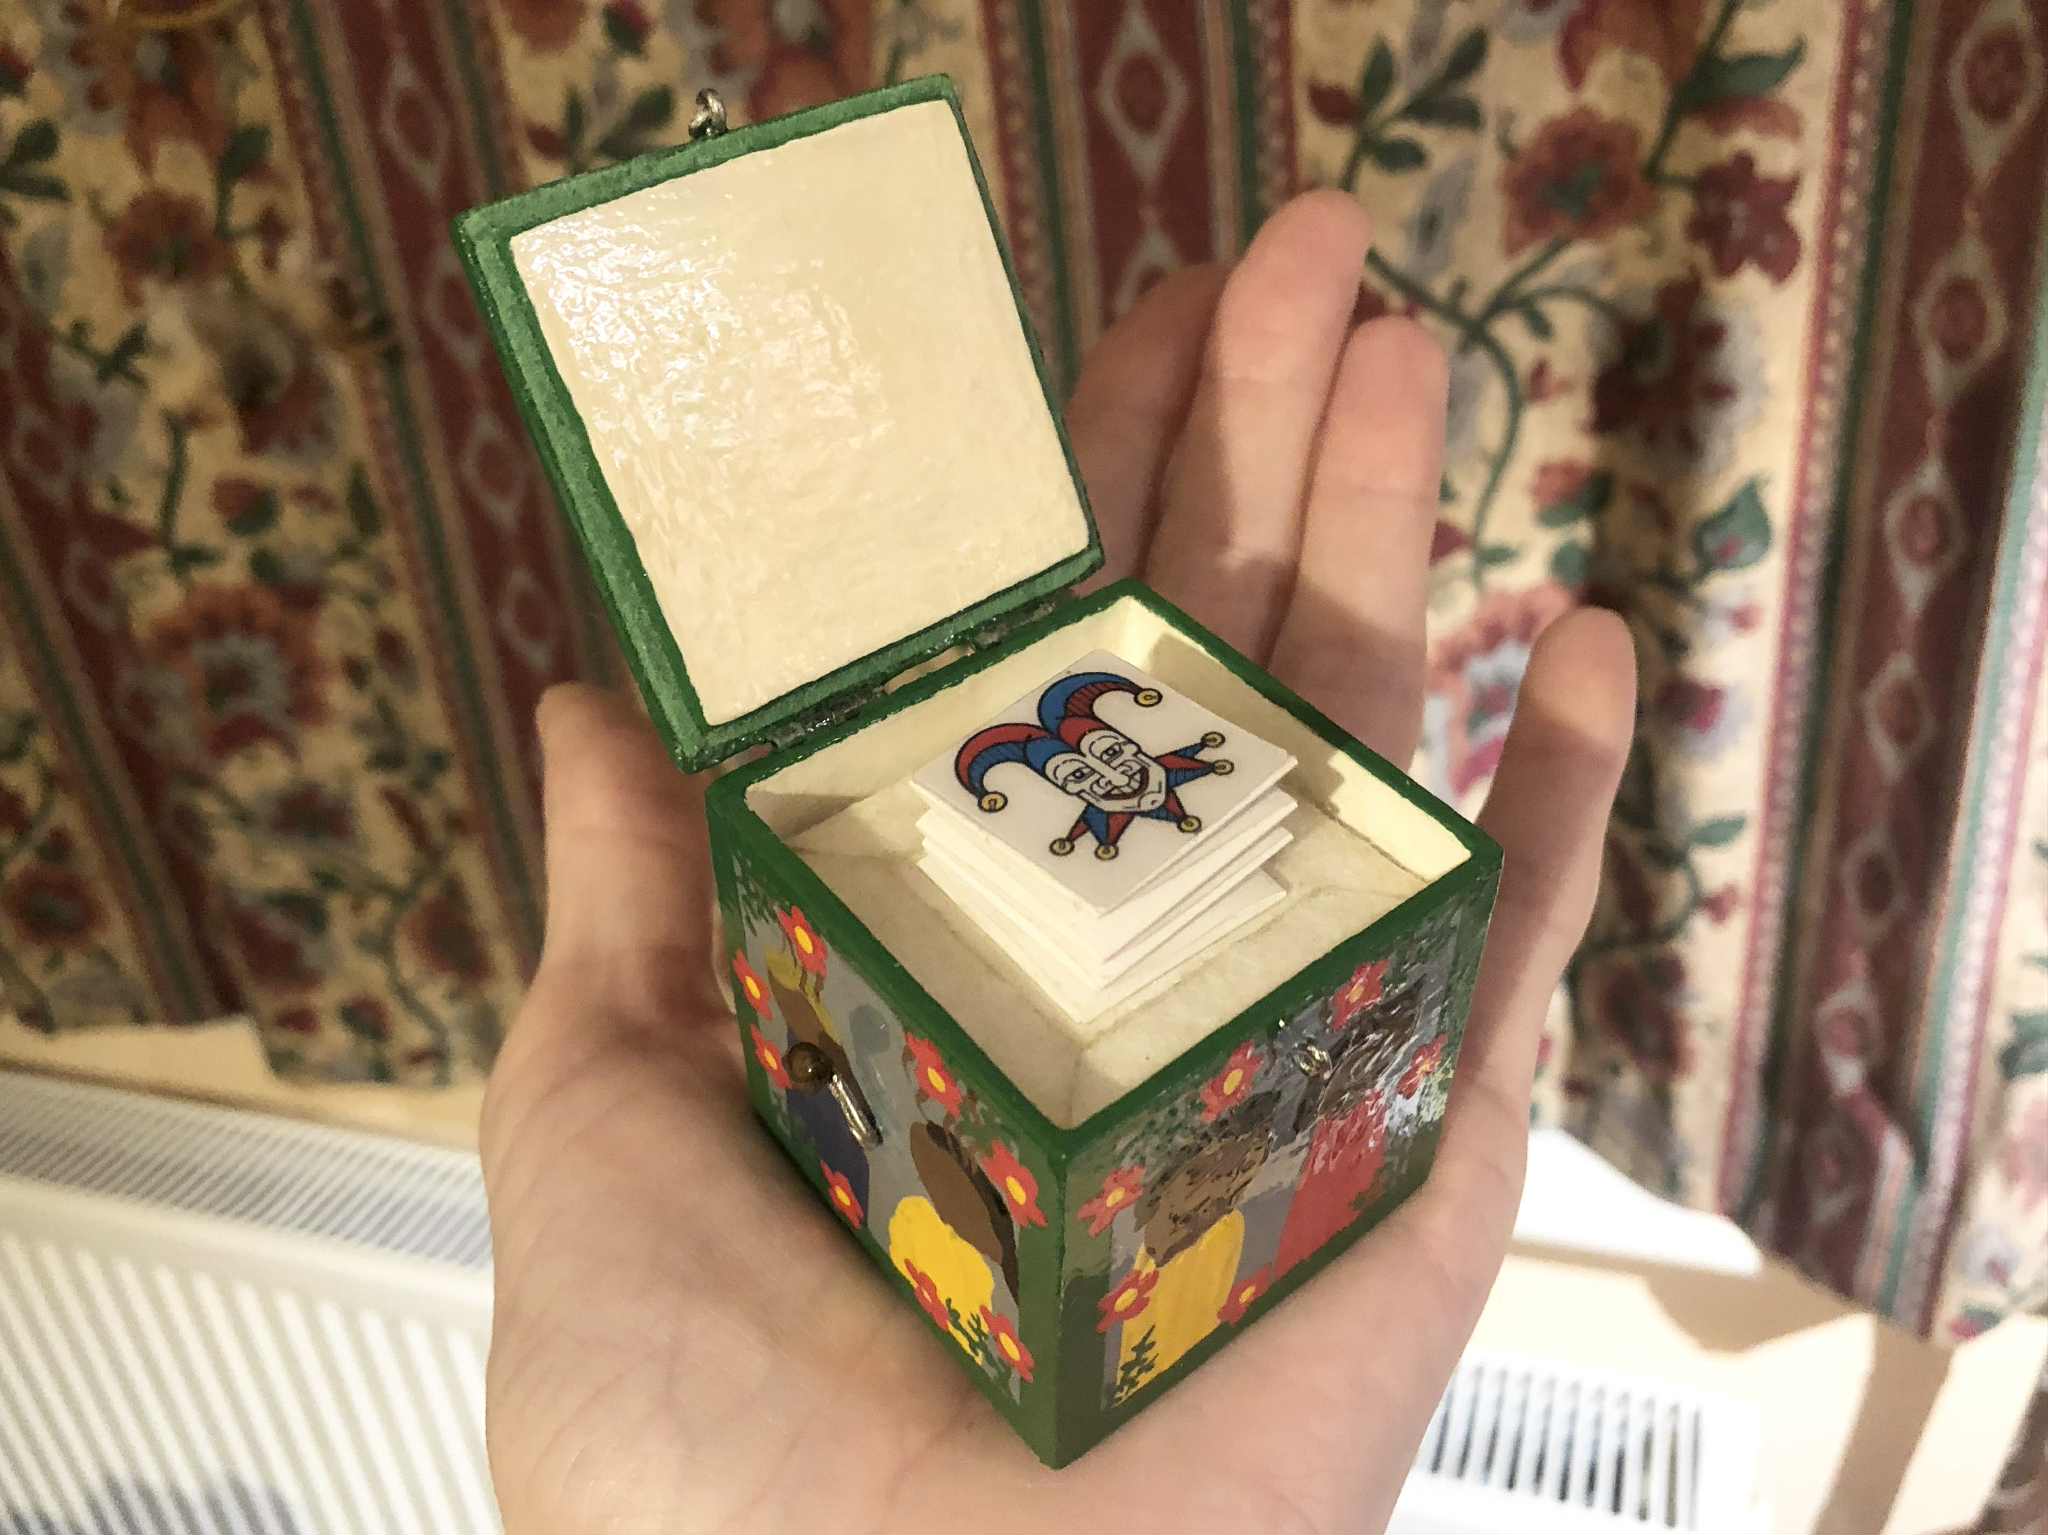
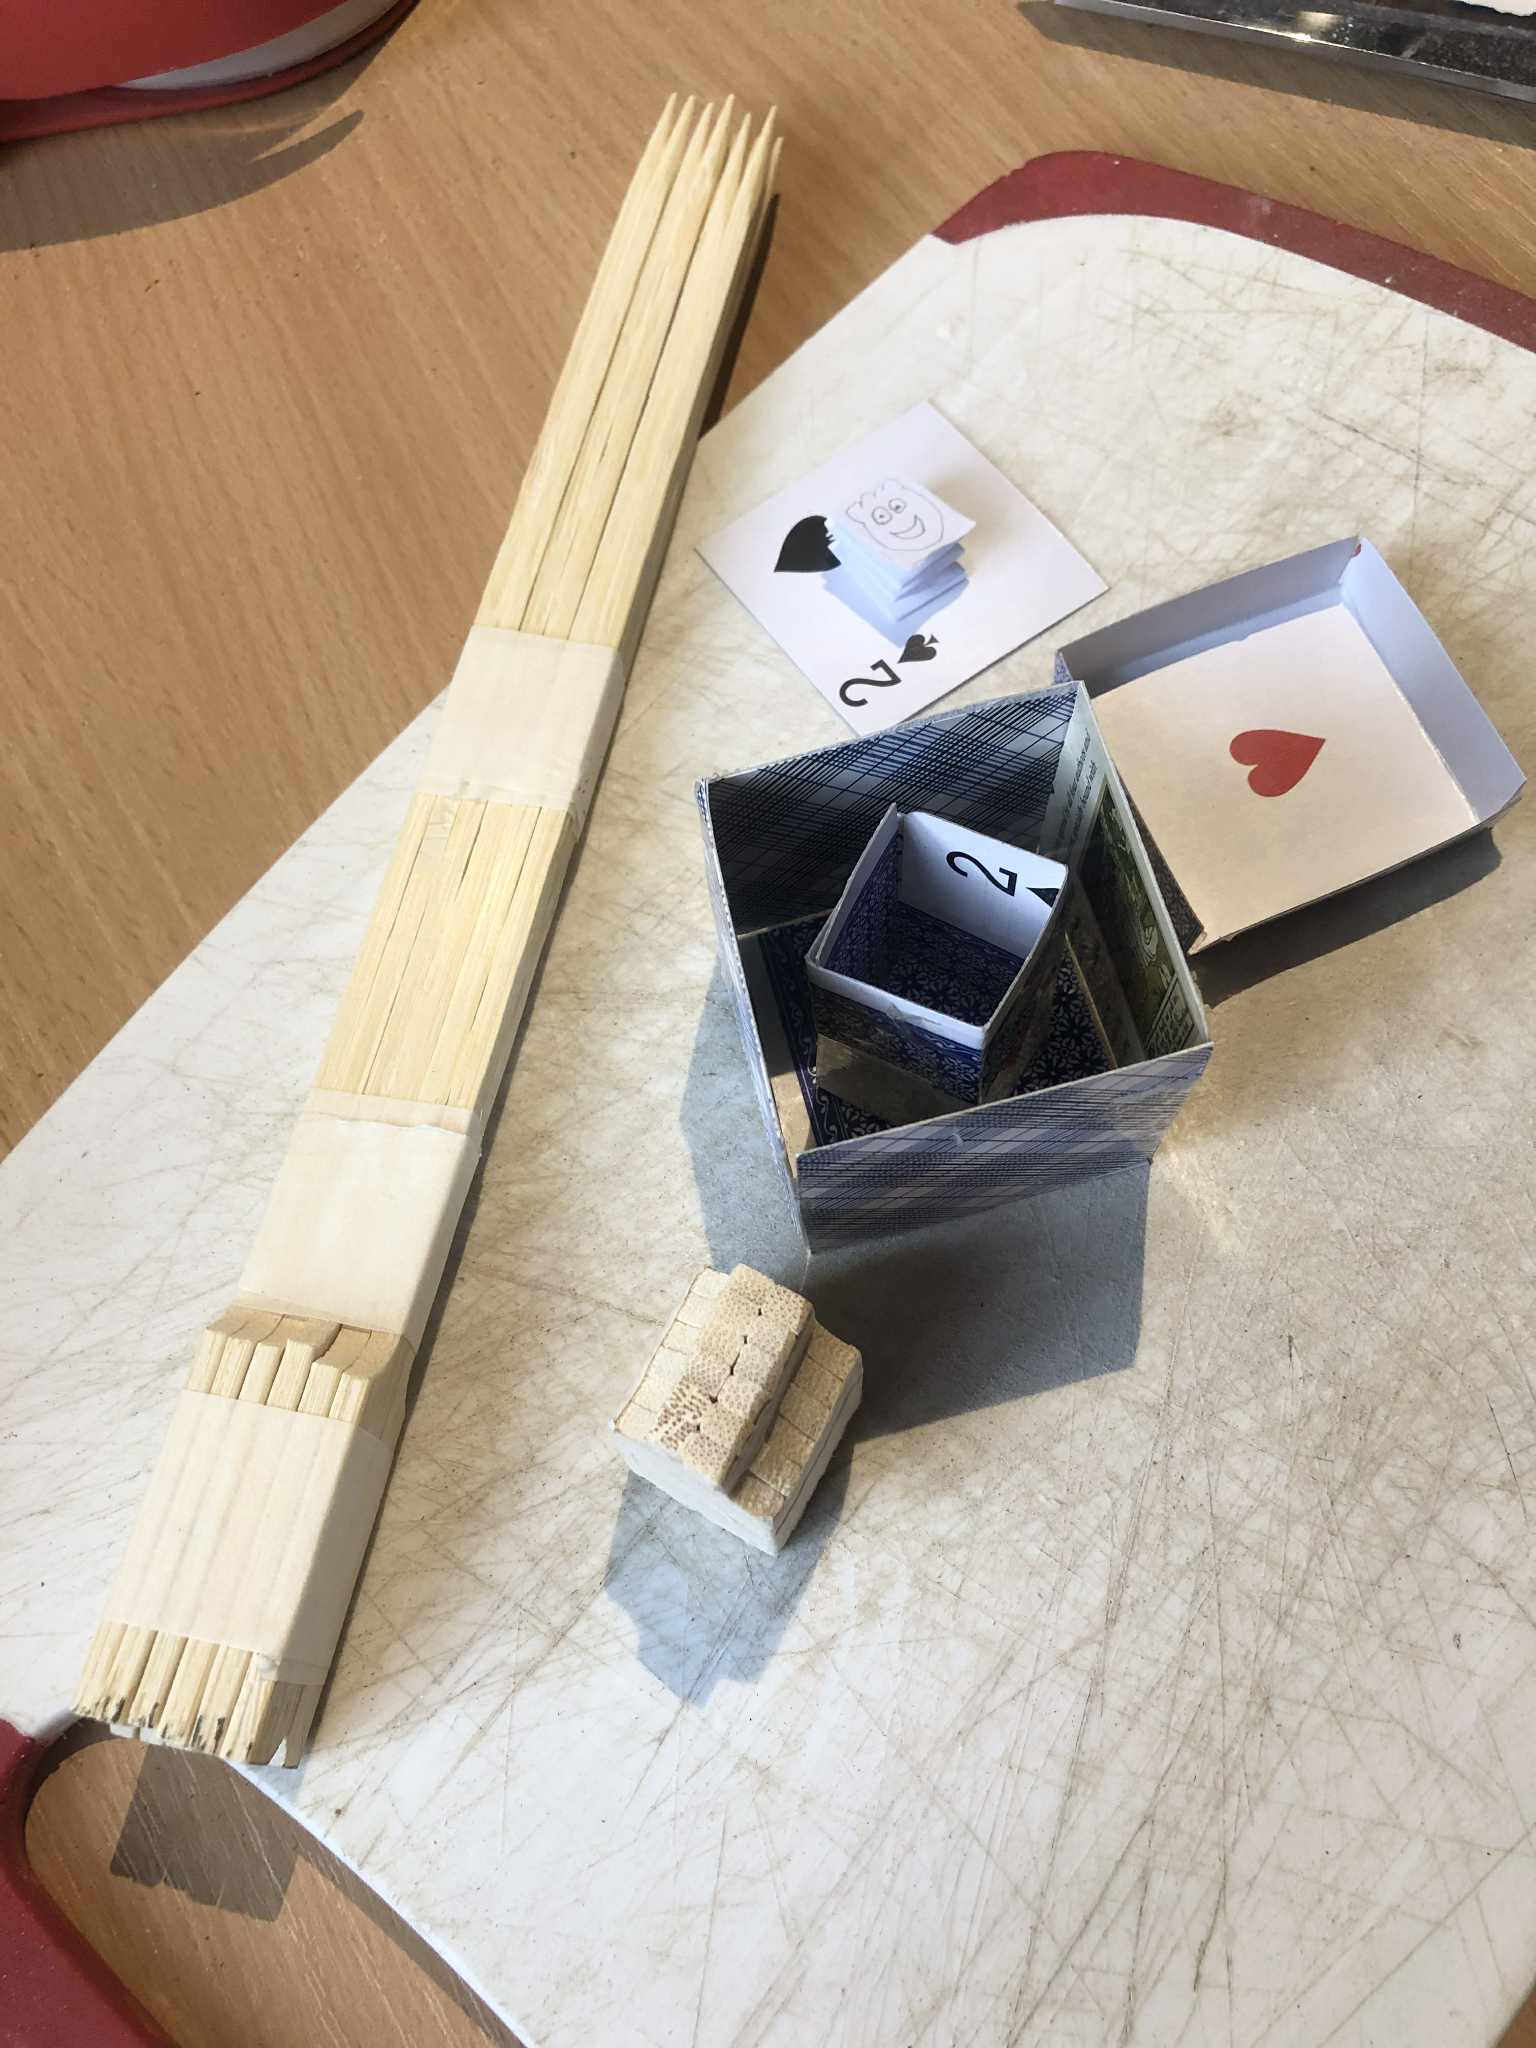
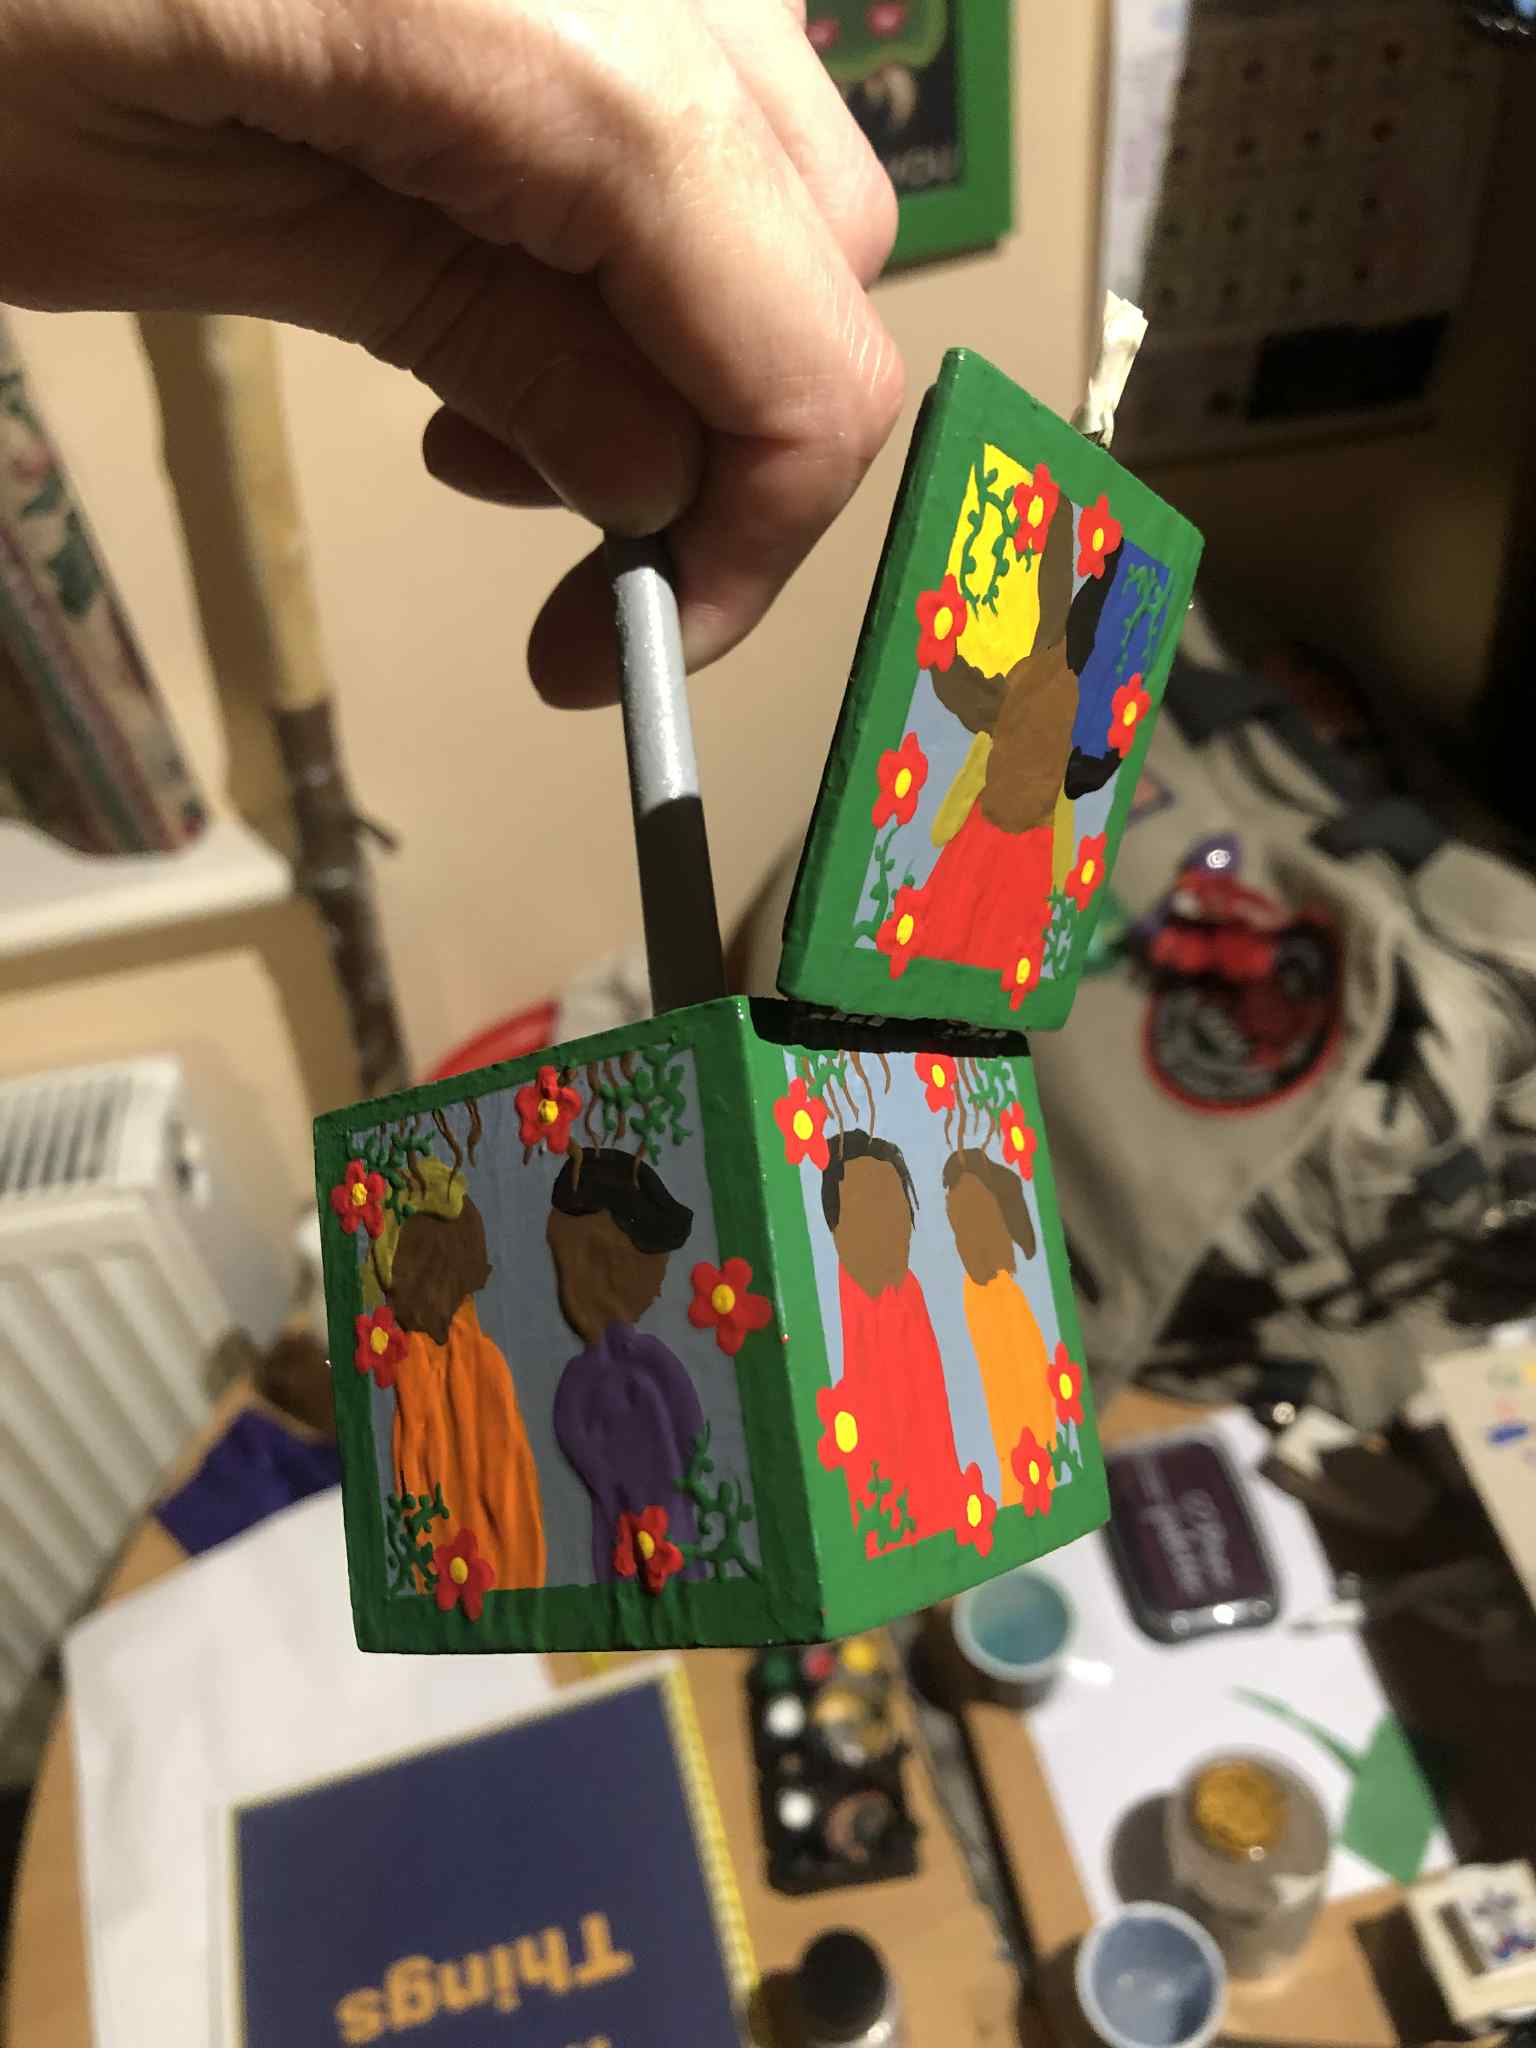
Or rather, concept conceived. I started by just using some scrap cards from the many deck builds to slap together a general idea... a small slot in the middle to hold the... ehhhh, six sticks is *really* small, and not really impressive. Also very rectangular. However, if I double it to twelve, it's more squarish, I can just double each of the results, and it looks a bit more impressive. Ahhh, better. Now, on top of the sticks, since it's supposed to be a Jack-in-the-box, I thought to just put a little clown face at the top of those... y'know those little paper springs that you made as a kid (or maybe like me, still), where you take two paper strips and fold one over the other back and forth over and over to make a spring? Well let's make one of those! It won't spring up much, but it'll be springy! And I can use waterproof paper for the strength factor! I tried plastic strips for a moment, but a) glue wouldn't hold it well, and b) it would be too thick. So waterproof paper it is!
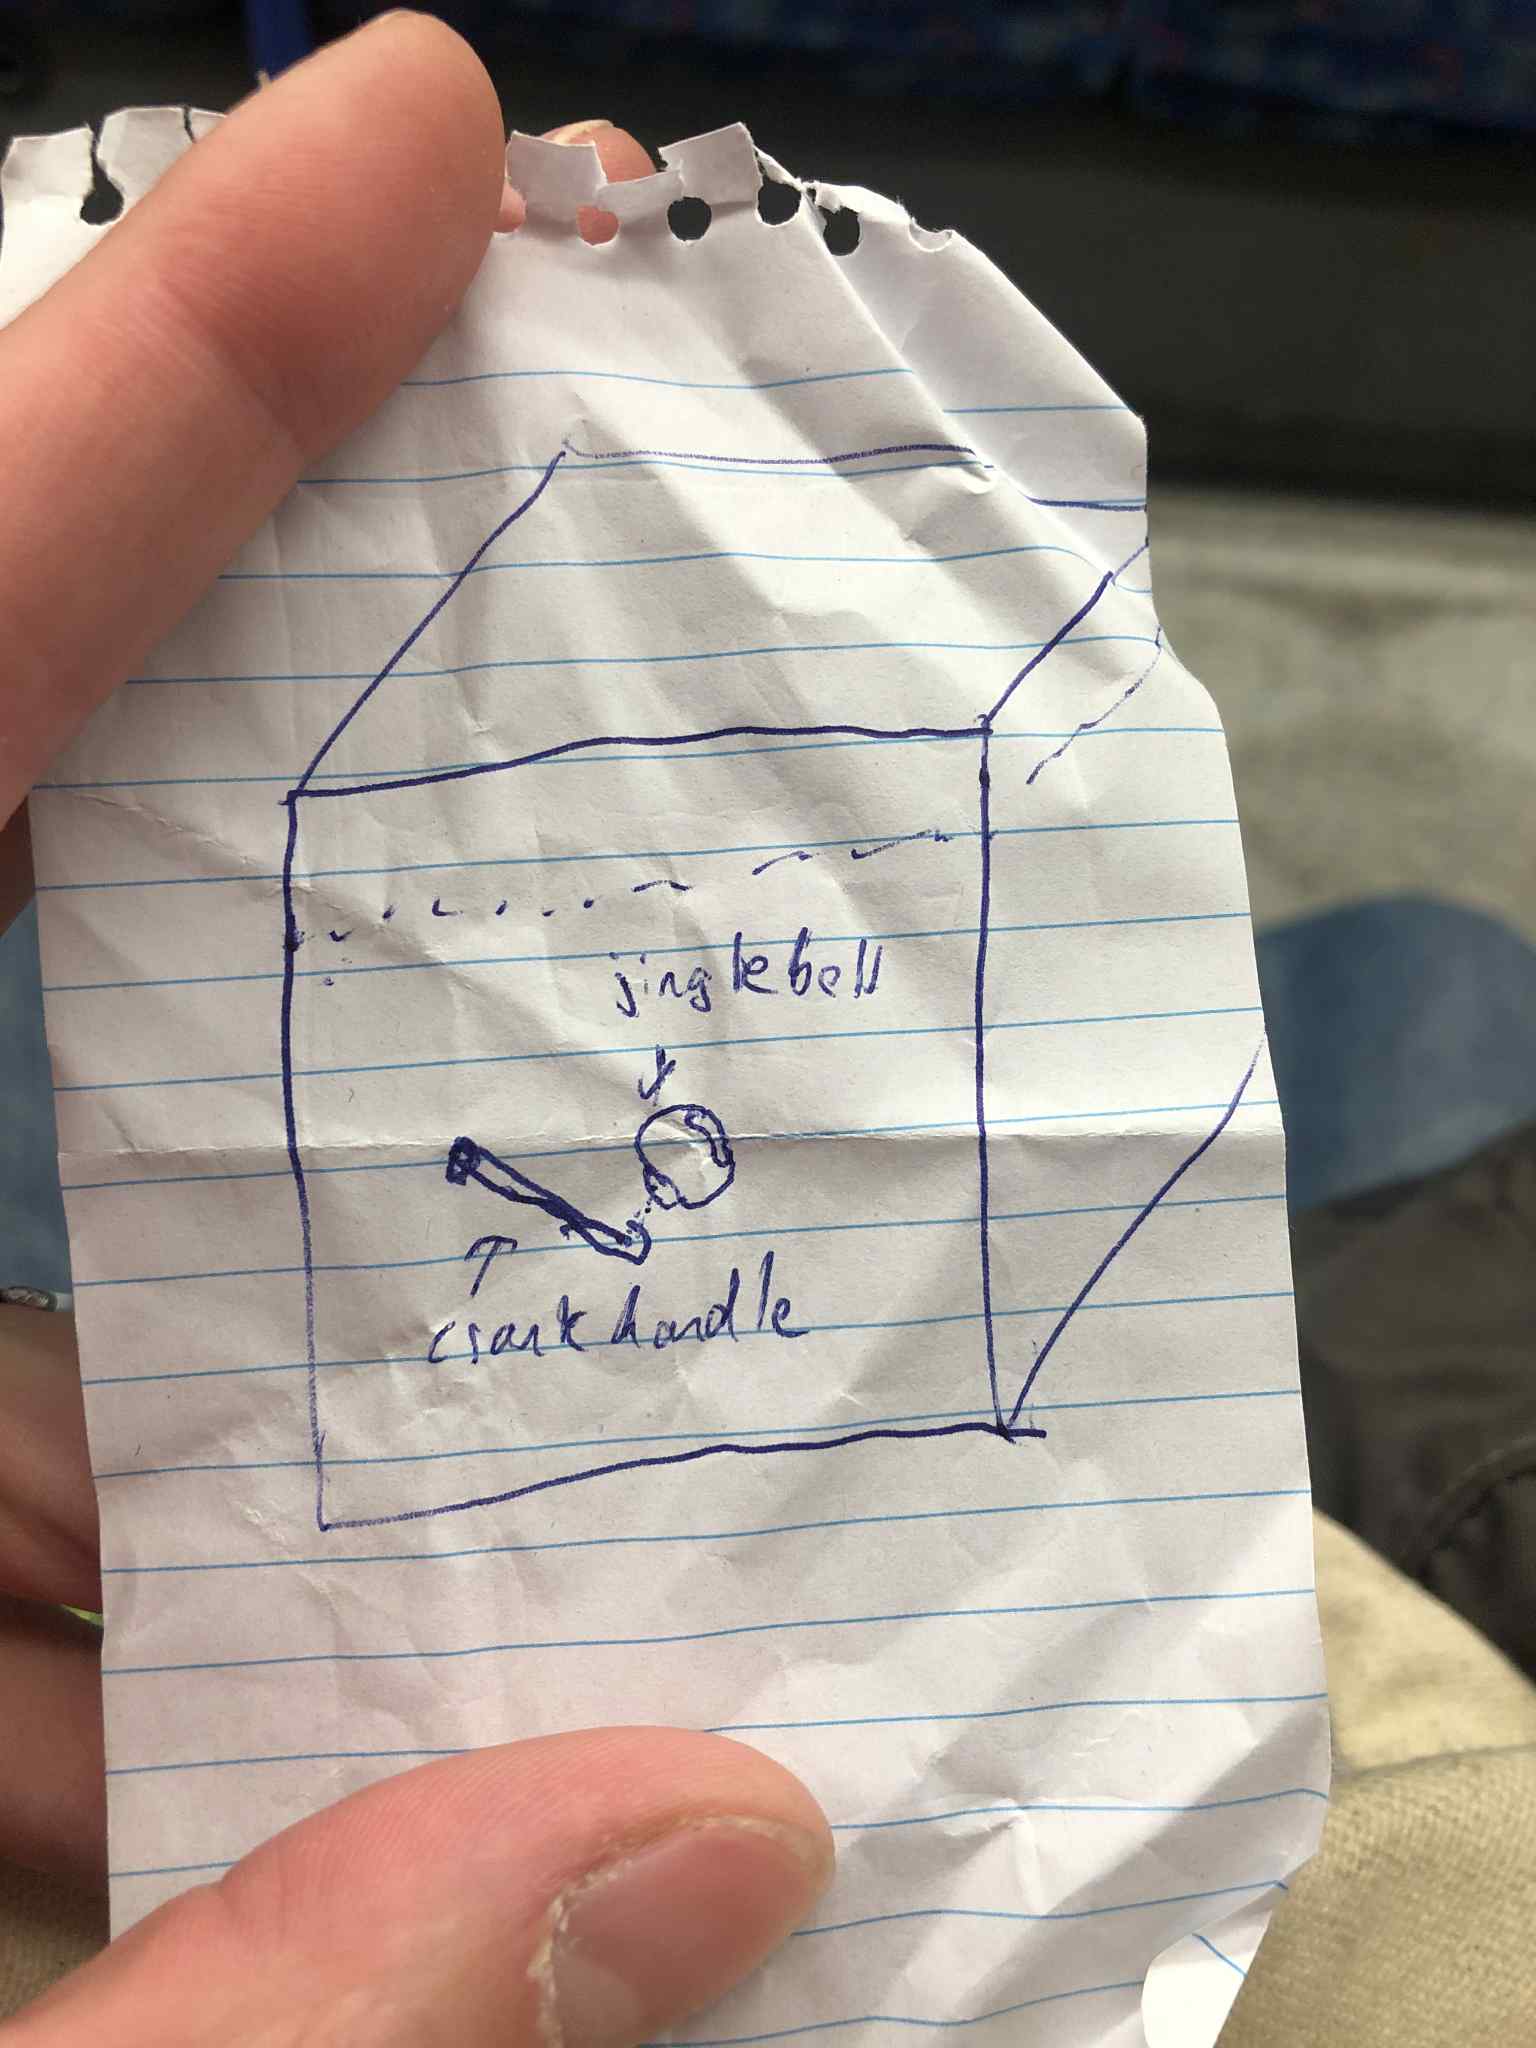
And then I had an epiphany! While I can't get a music box inside of there (at least not with my present abilities), what I could do, to at least give a crank *some* use, is put a little jingle bell on the other side, so that when you turn the crank, it will at least make a jingle sound! Yah I know it'll jingle if you shake the thing in general, but it's the principle of the thing. It was either that or glue the crank down and have little text strips beside it saying "pretend you crank this to open it". Having it turn a jingle bell is much better :D
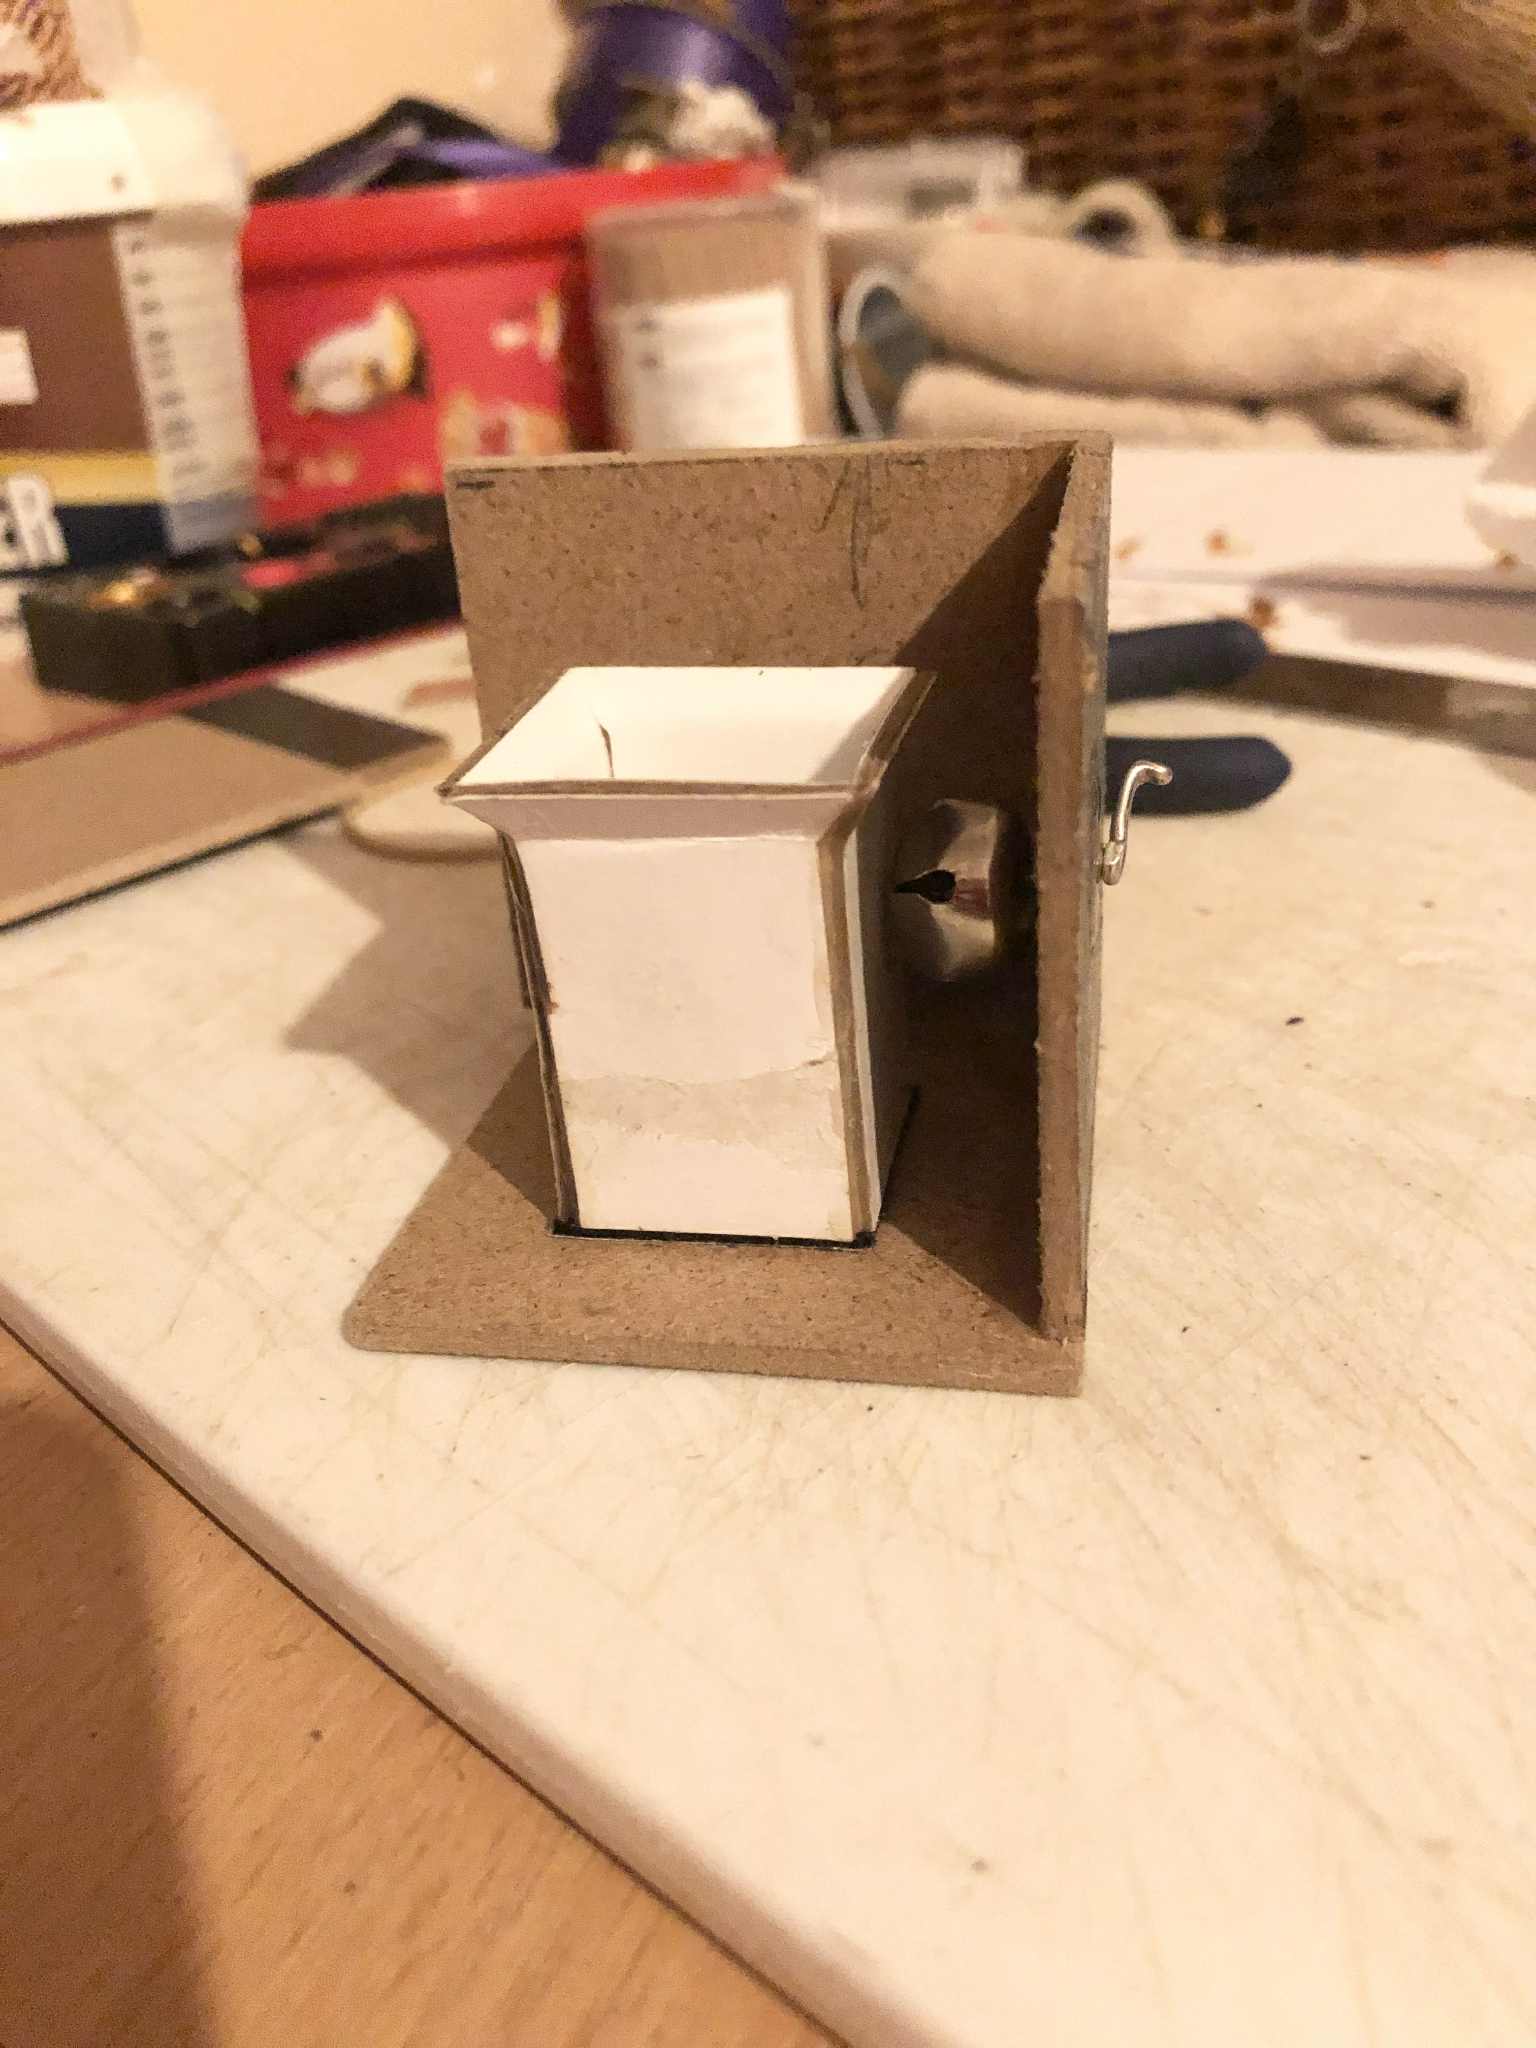
We needed to flatten the bell down slightly to fit into there, and even removed half of the cardboard from that side of the inner structure to accomodate it, but it's in there, and it's free-standing away from any surface except the crank it's jb welded to (I dunno, I figure it'll jingle better that way). The crank itself is bent 18 gauge stainless steel wire, with some tiny pieces of like... on the inside of an old broken power inverter, I disassembled it and yanked out some very thin metal plates that were used for electrical contact, trimmed those round, drilled a hole in them, and used those as support on either side of the box side sorta like a bushing. There's also glue in there (I kept cranking it occasionally as it dried) to solidify up the powdered cardboard stuff that this material is in there. So anyway, we made that as strong as we could. Gotta say, it was quite difficult to get that thing through the side to begin with, kinda mangling it through, which is also the reason for all of that, rebuild the mangled cardboard powder at the hole.
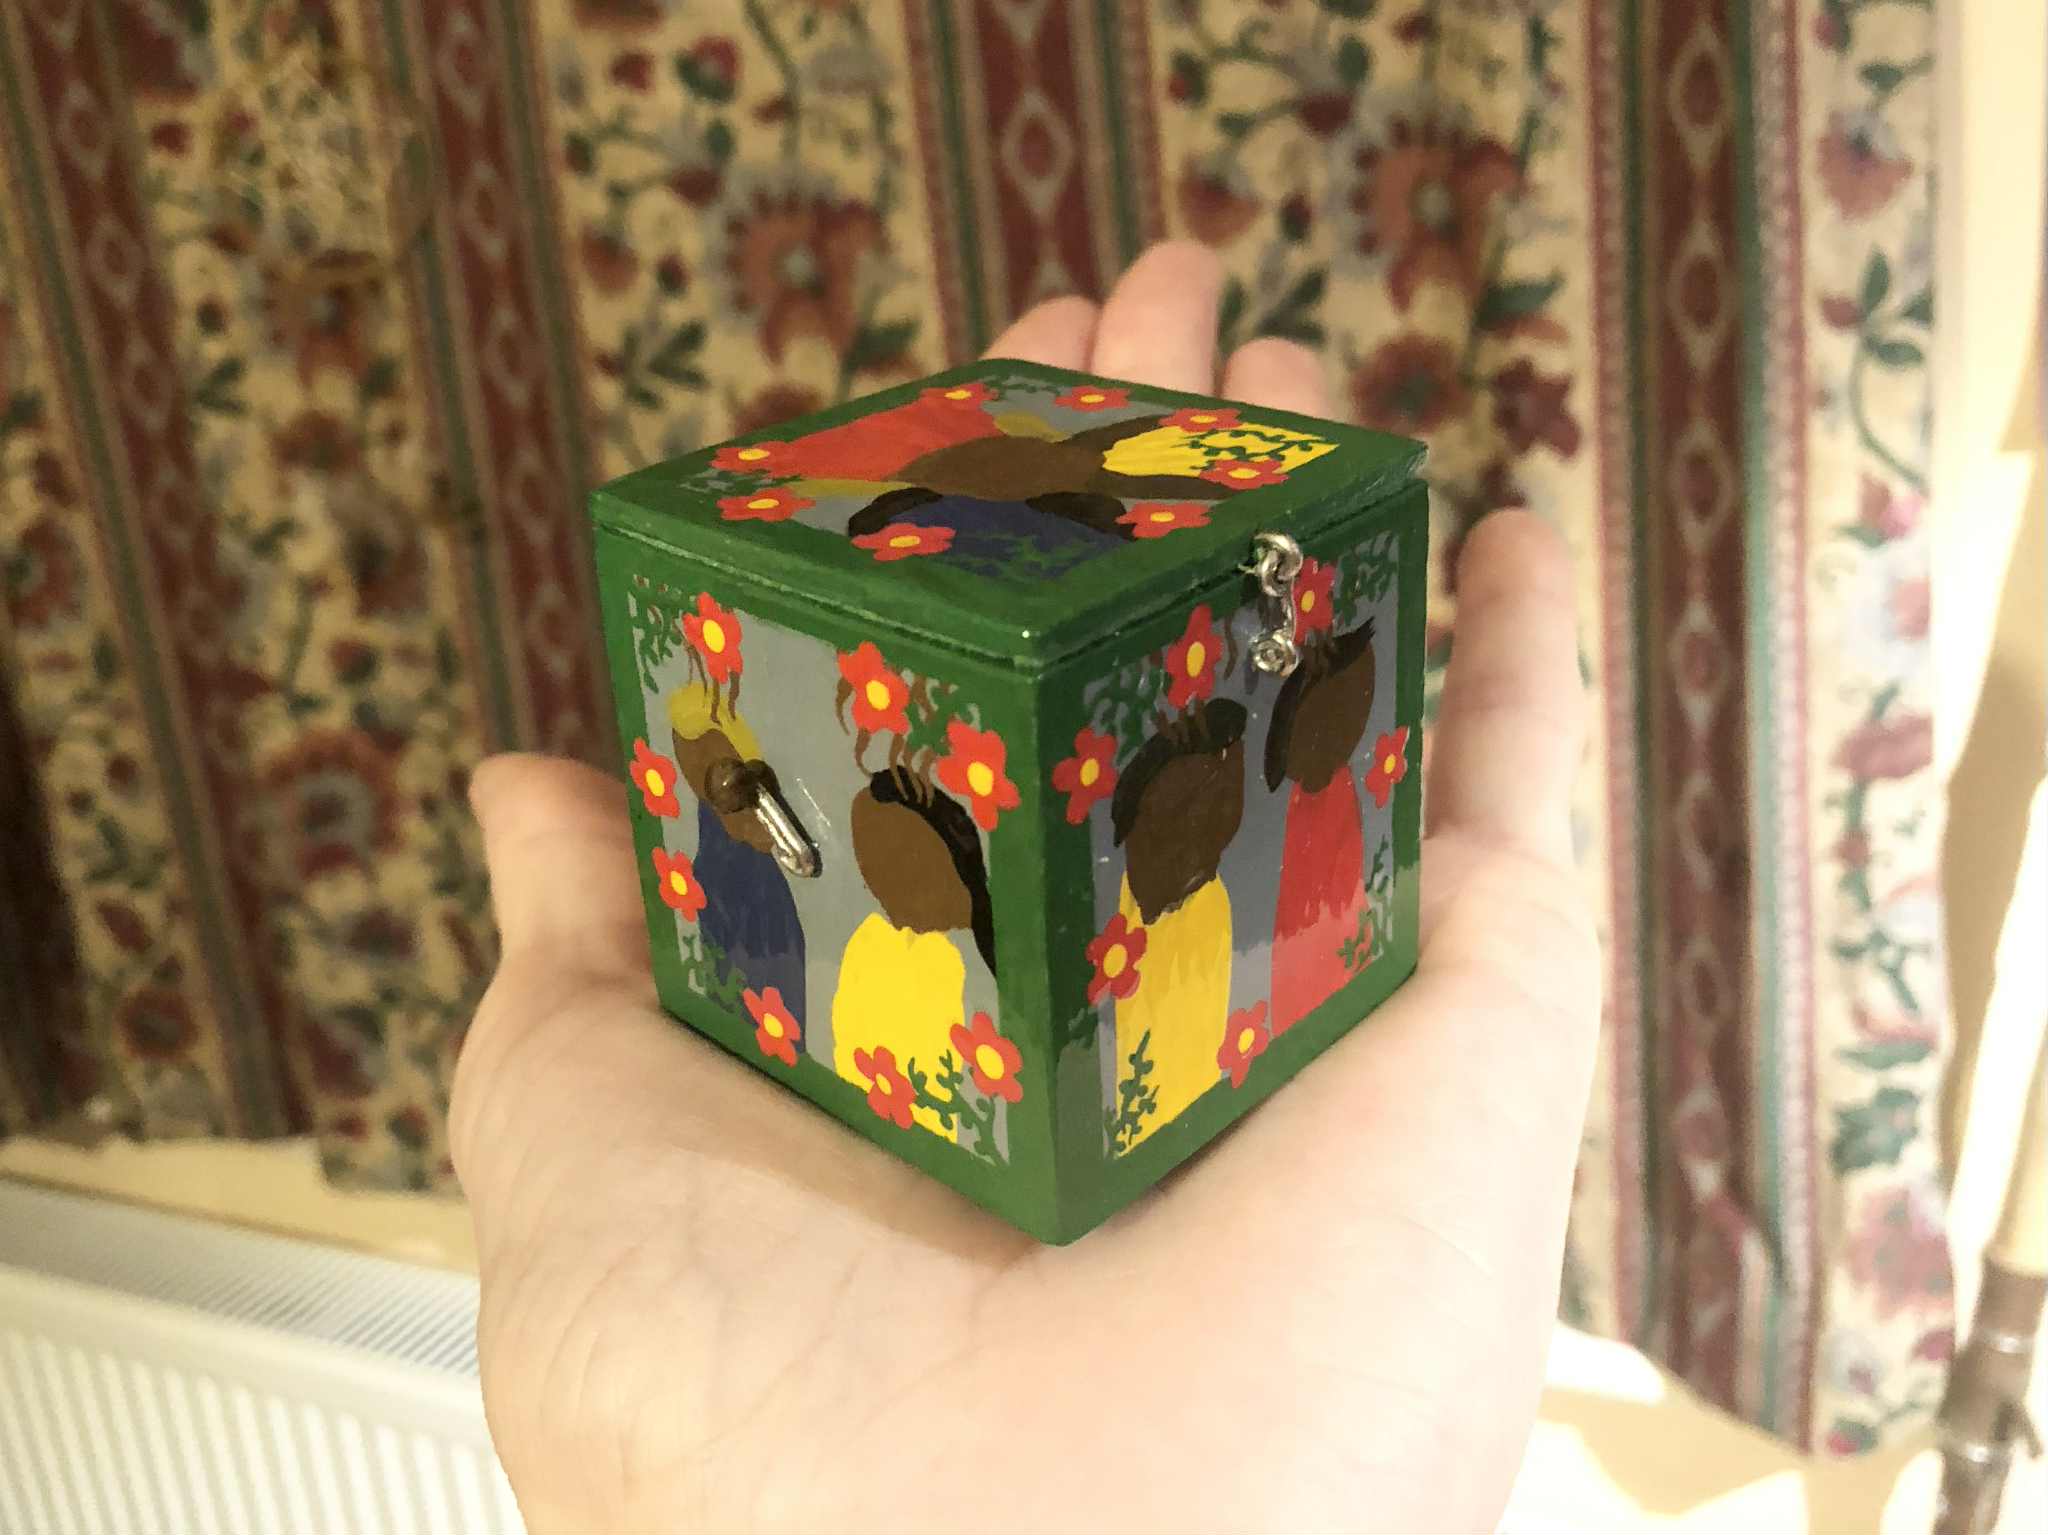
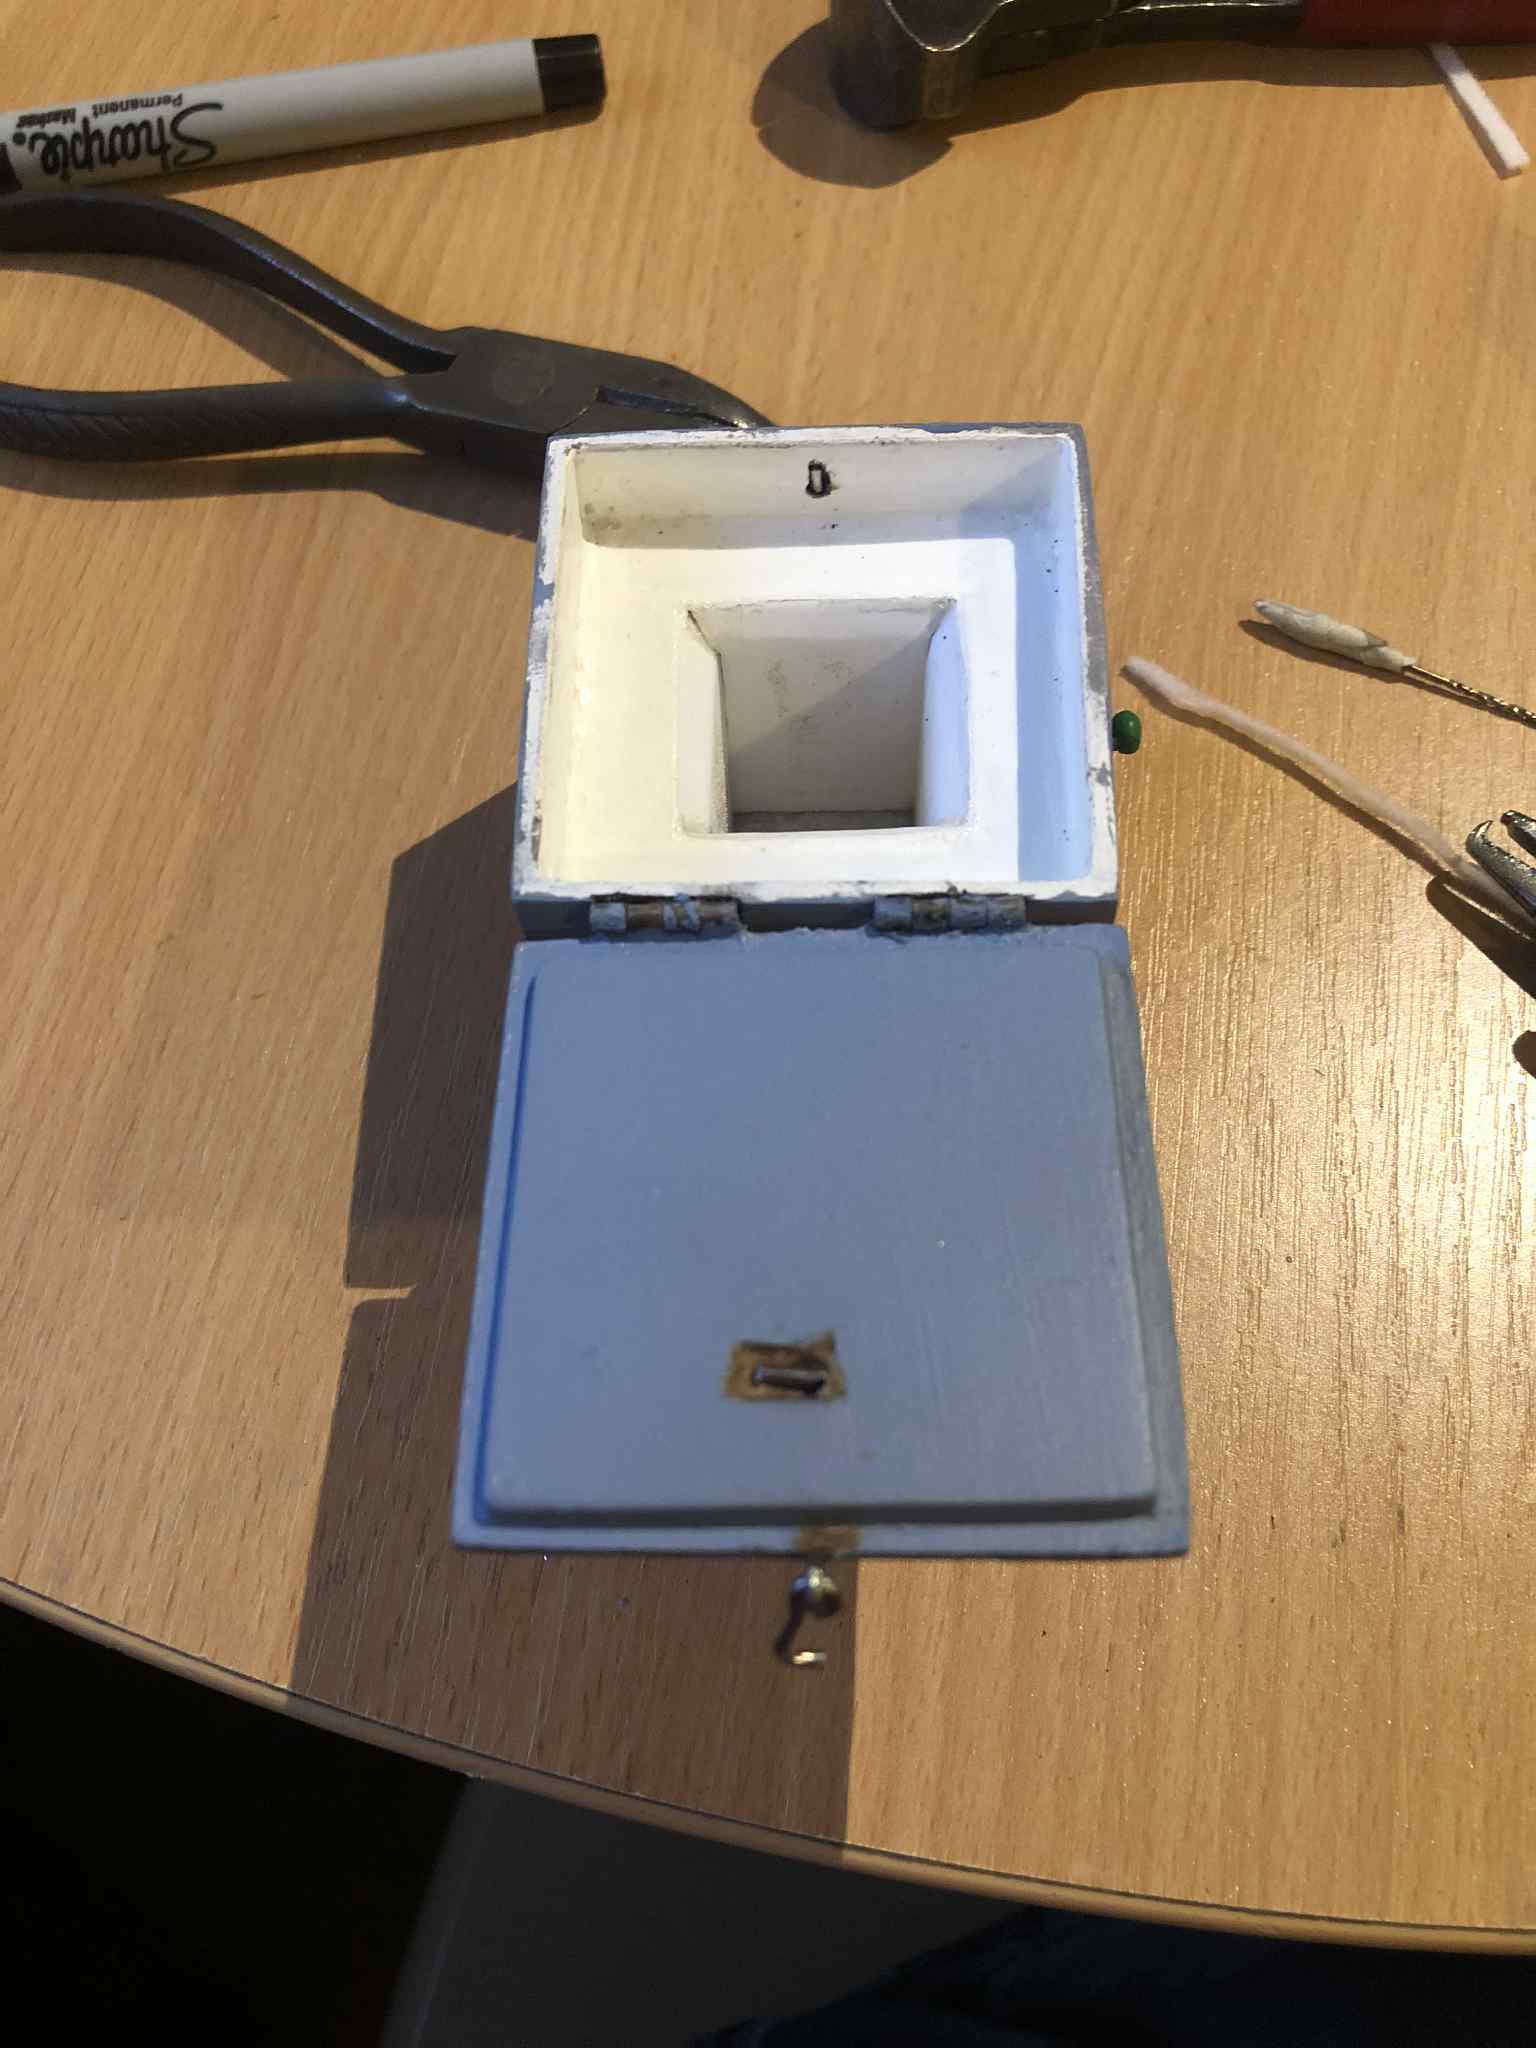
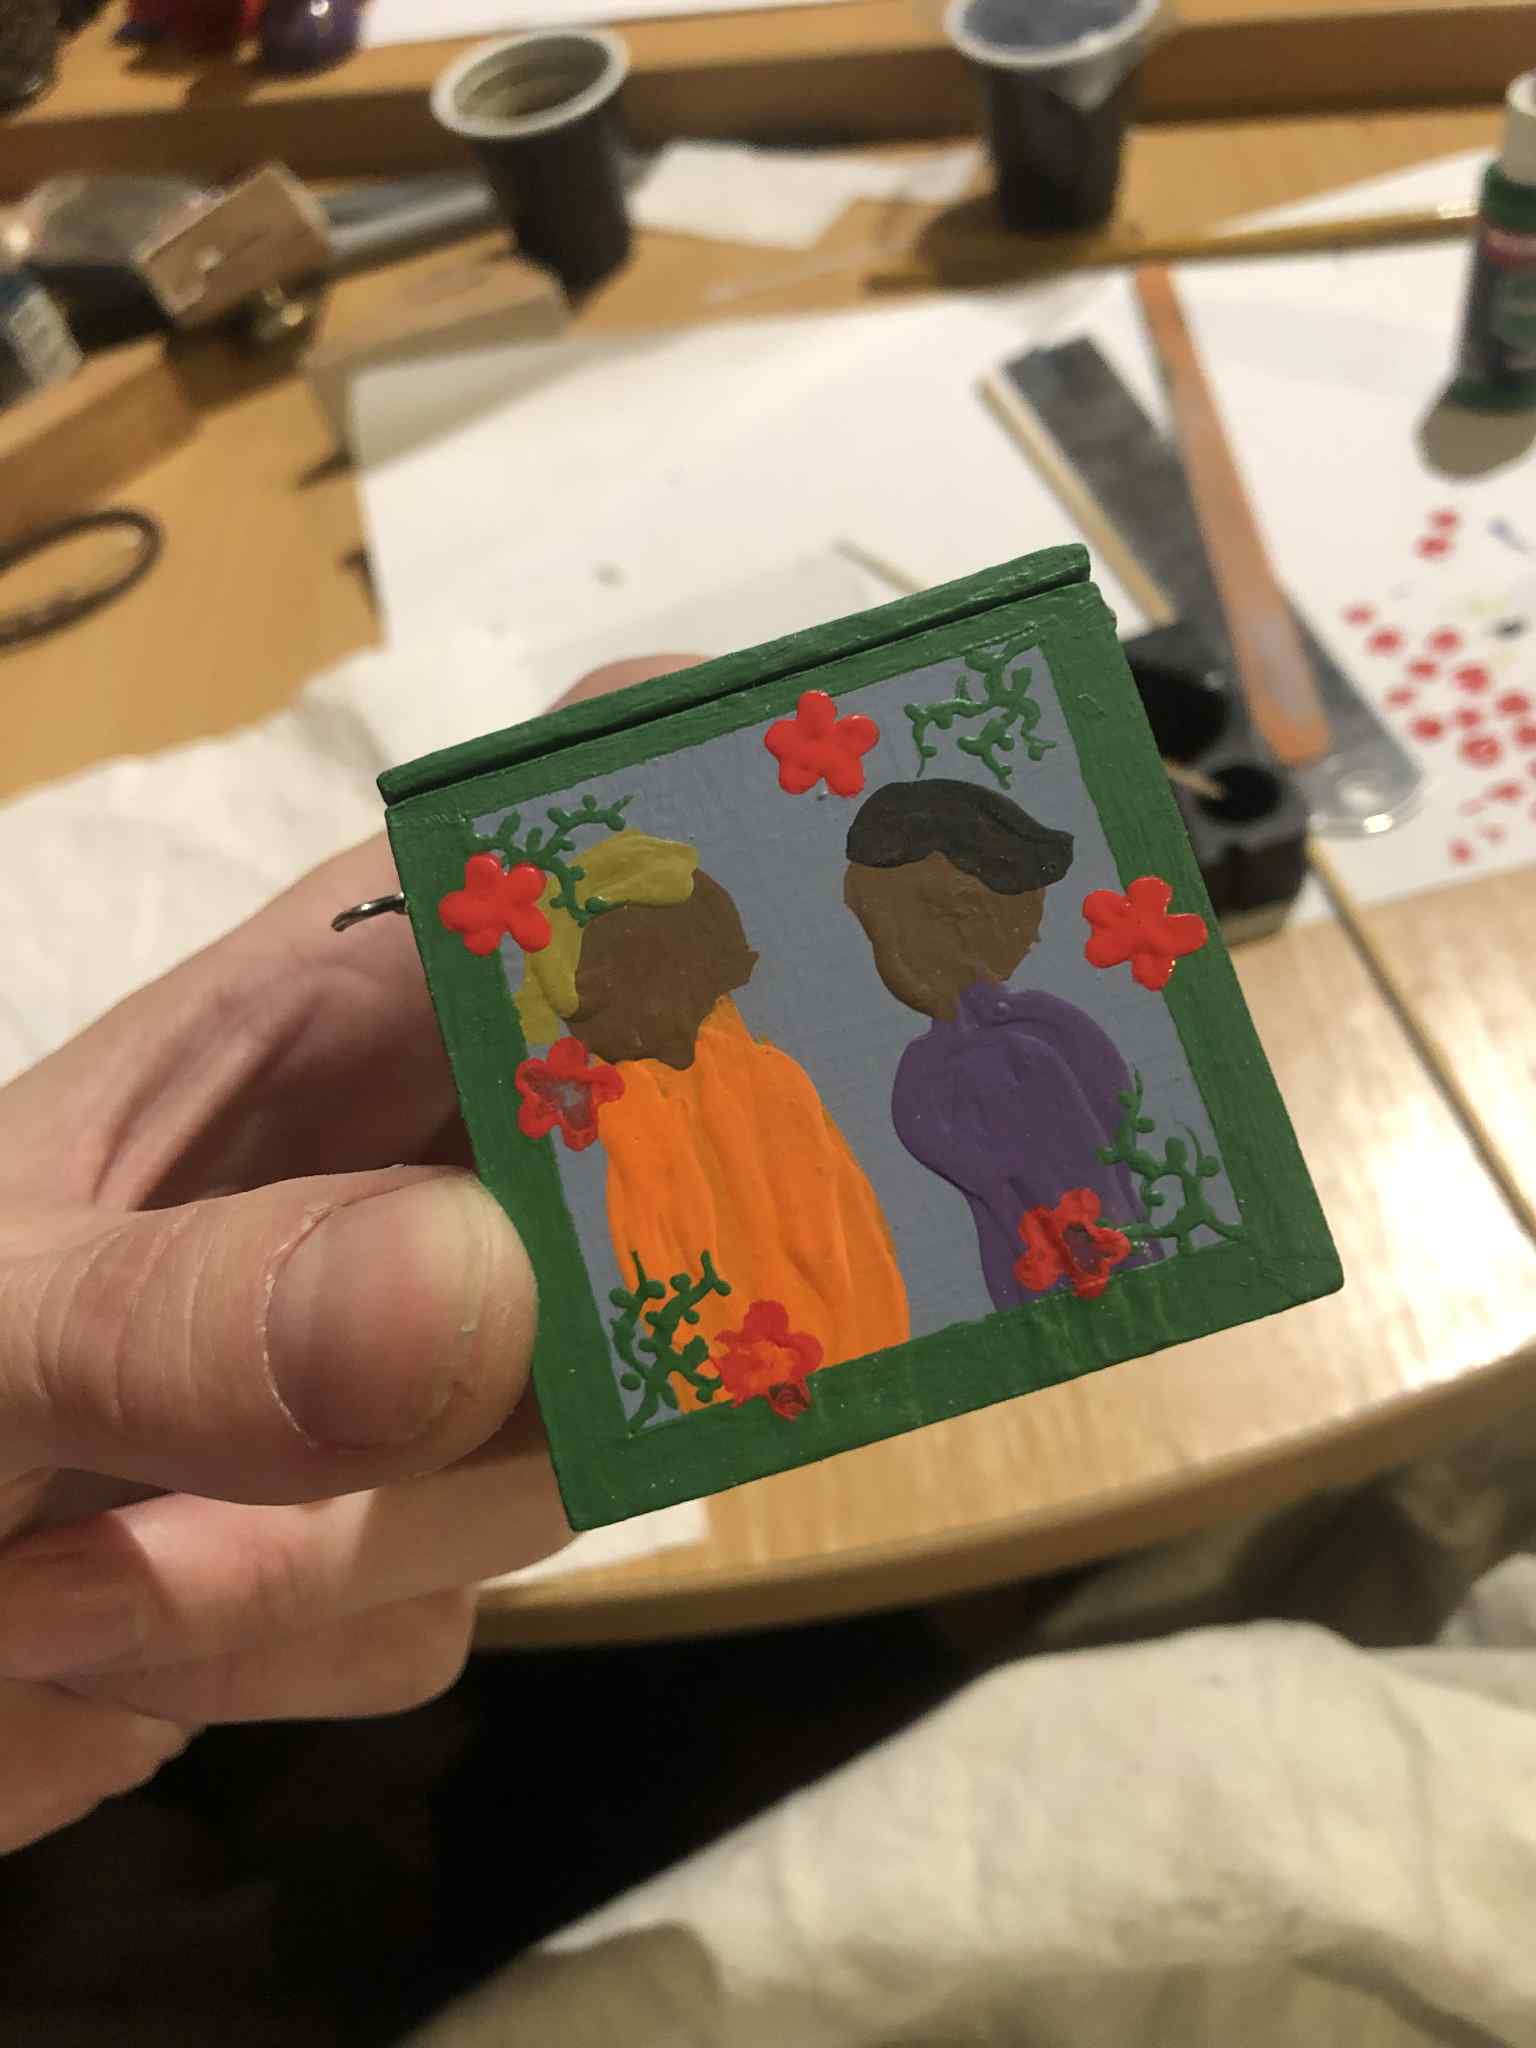
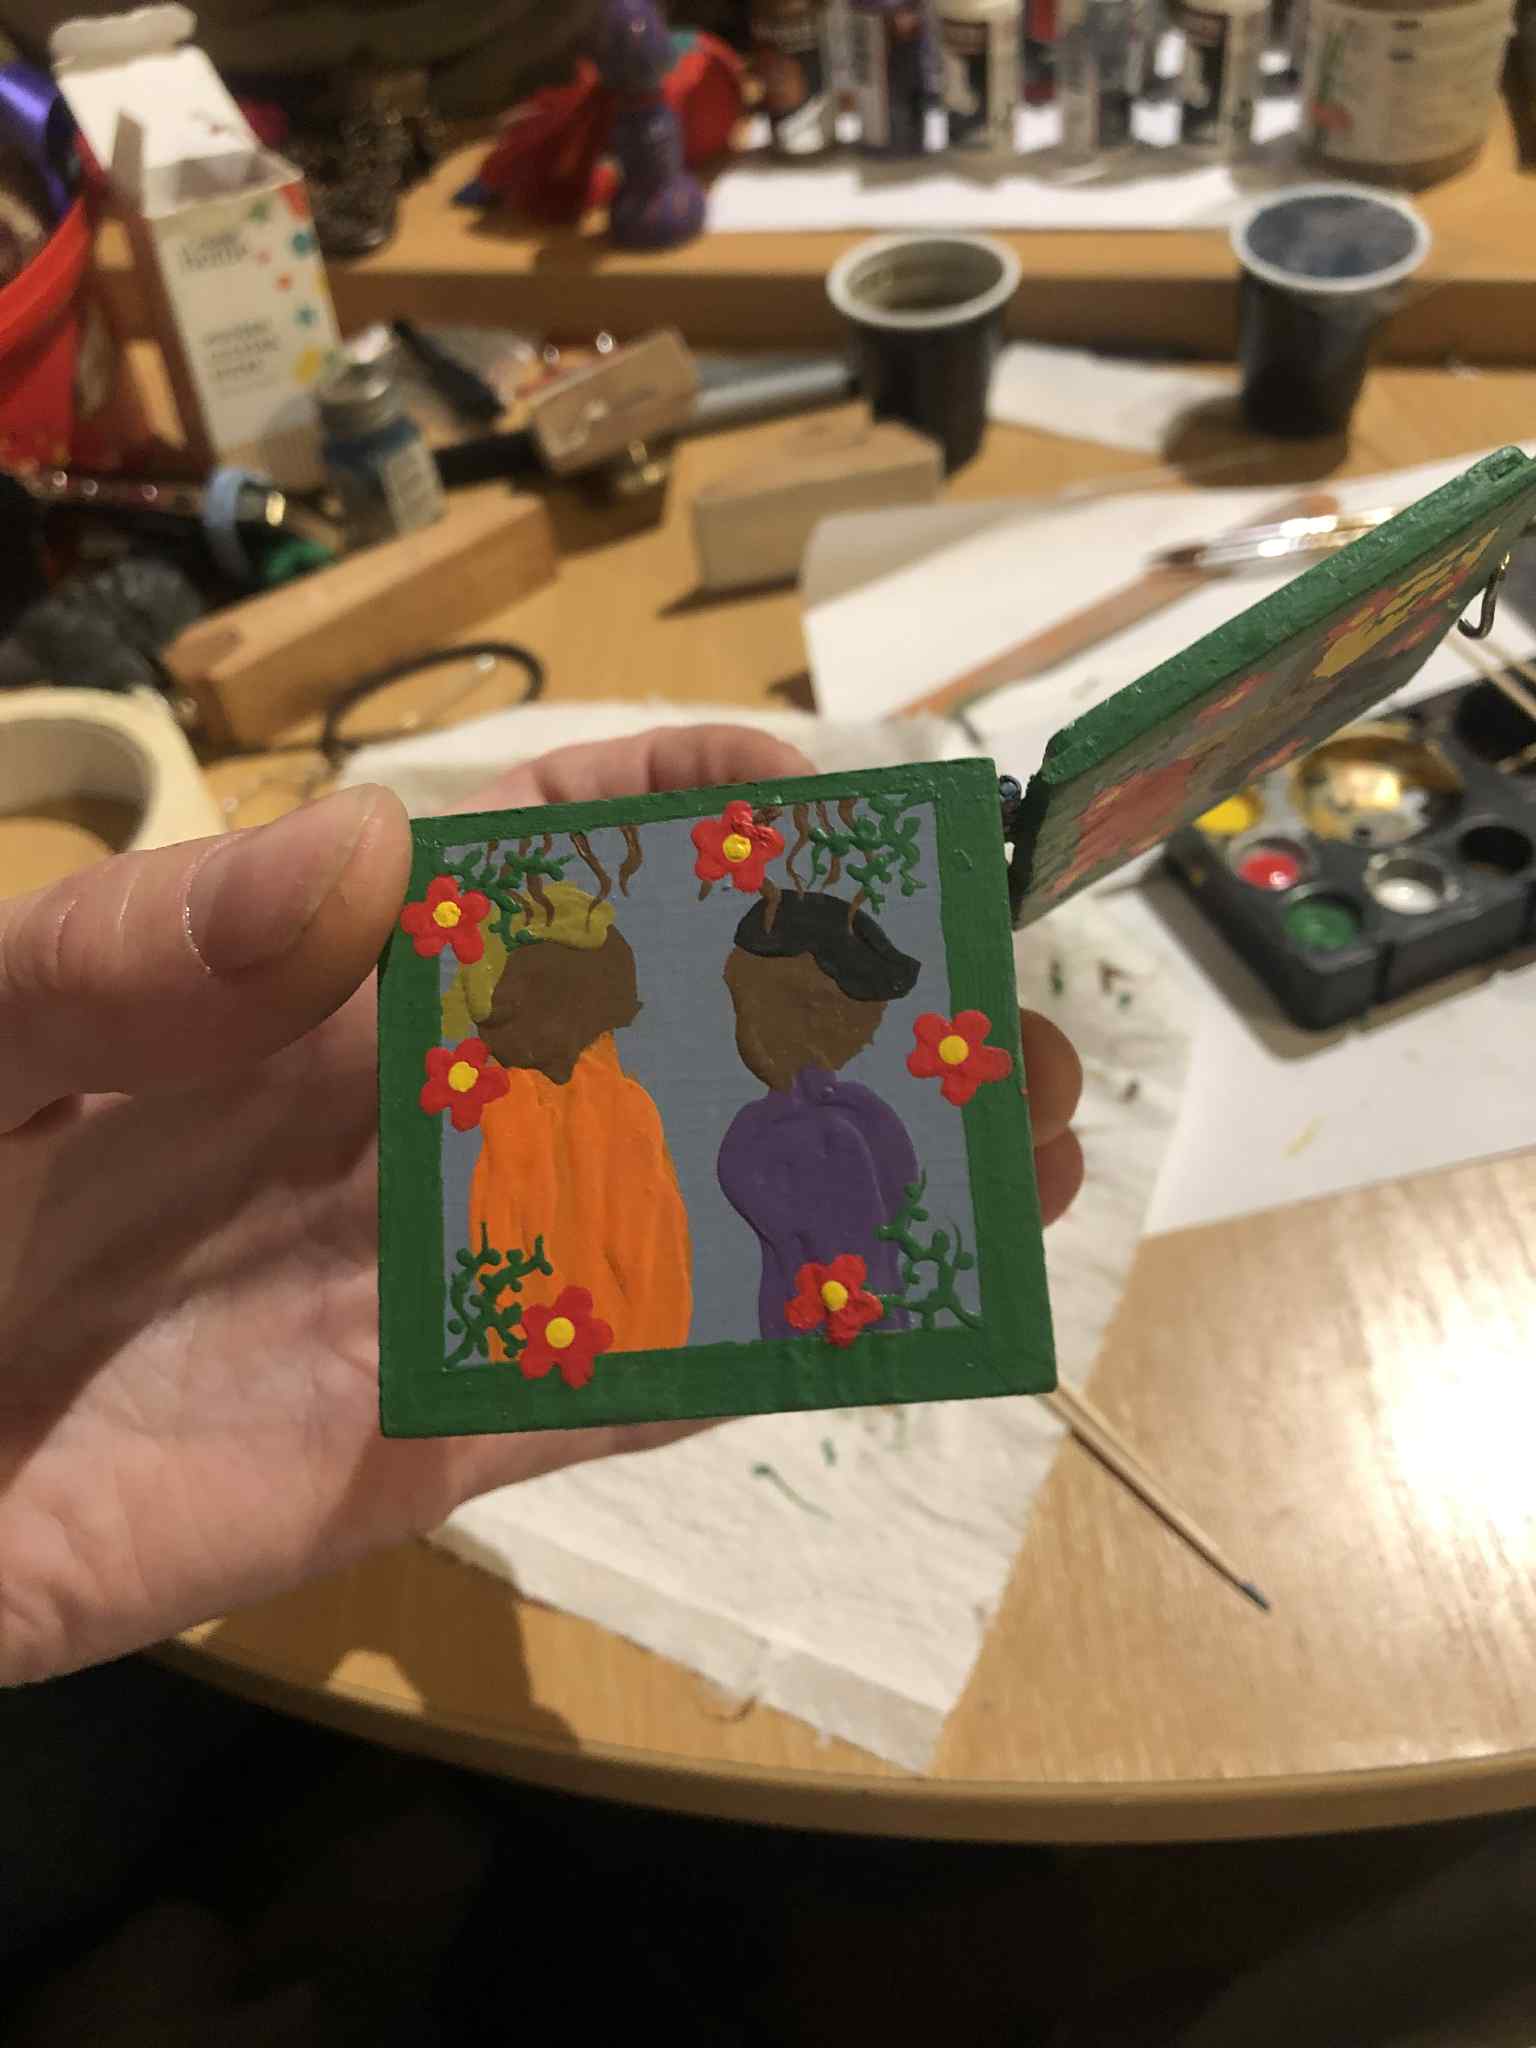
Anyways, that thing installed, we finished gluing up all the sides, and made a lid for it. Now this brought up its own decisions, since in a regular Jack-in-the-box (and indeed in the DMG image), the side walls should go all the way up, and the lid set into the center of it. But that would require an inner lip, which would shrink the opening (and make it taller), making it more difficult to get your fingers into. So we went with the outer-lip method instead. And with all of that decided, we could begin painting! We started by sanding all of the sides flat, which ended up being to the point that all of the black coating was removed, otherwise it made for weirdly different textures, and hit it with a few layers of primer, sanding between to smooth it all down again (the kinda pressboard powder simply couldn't sand smooth on its own). Since the official art (5e.tools) would be more or less impossible for me to recreate, I decided to go with a more abstract approach, searching for abstract crowd painting (Google image search), and basically did that.
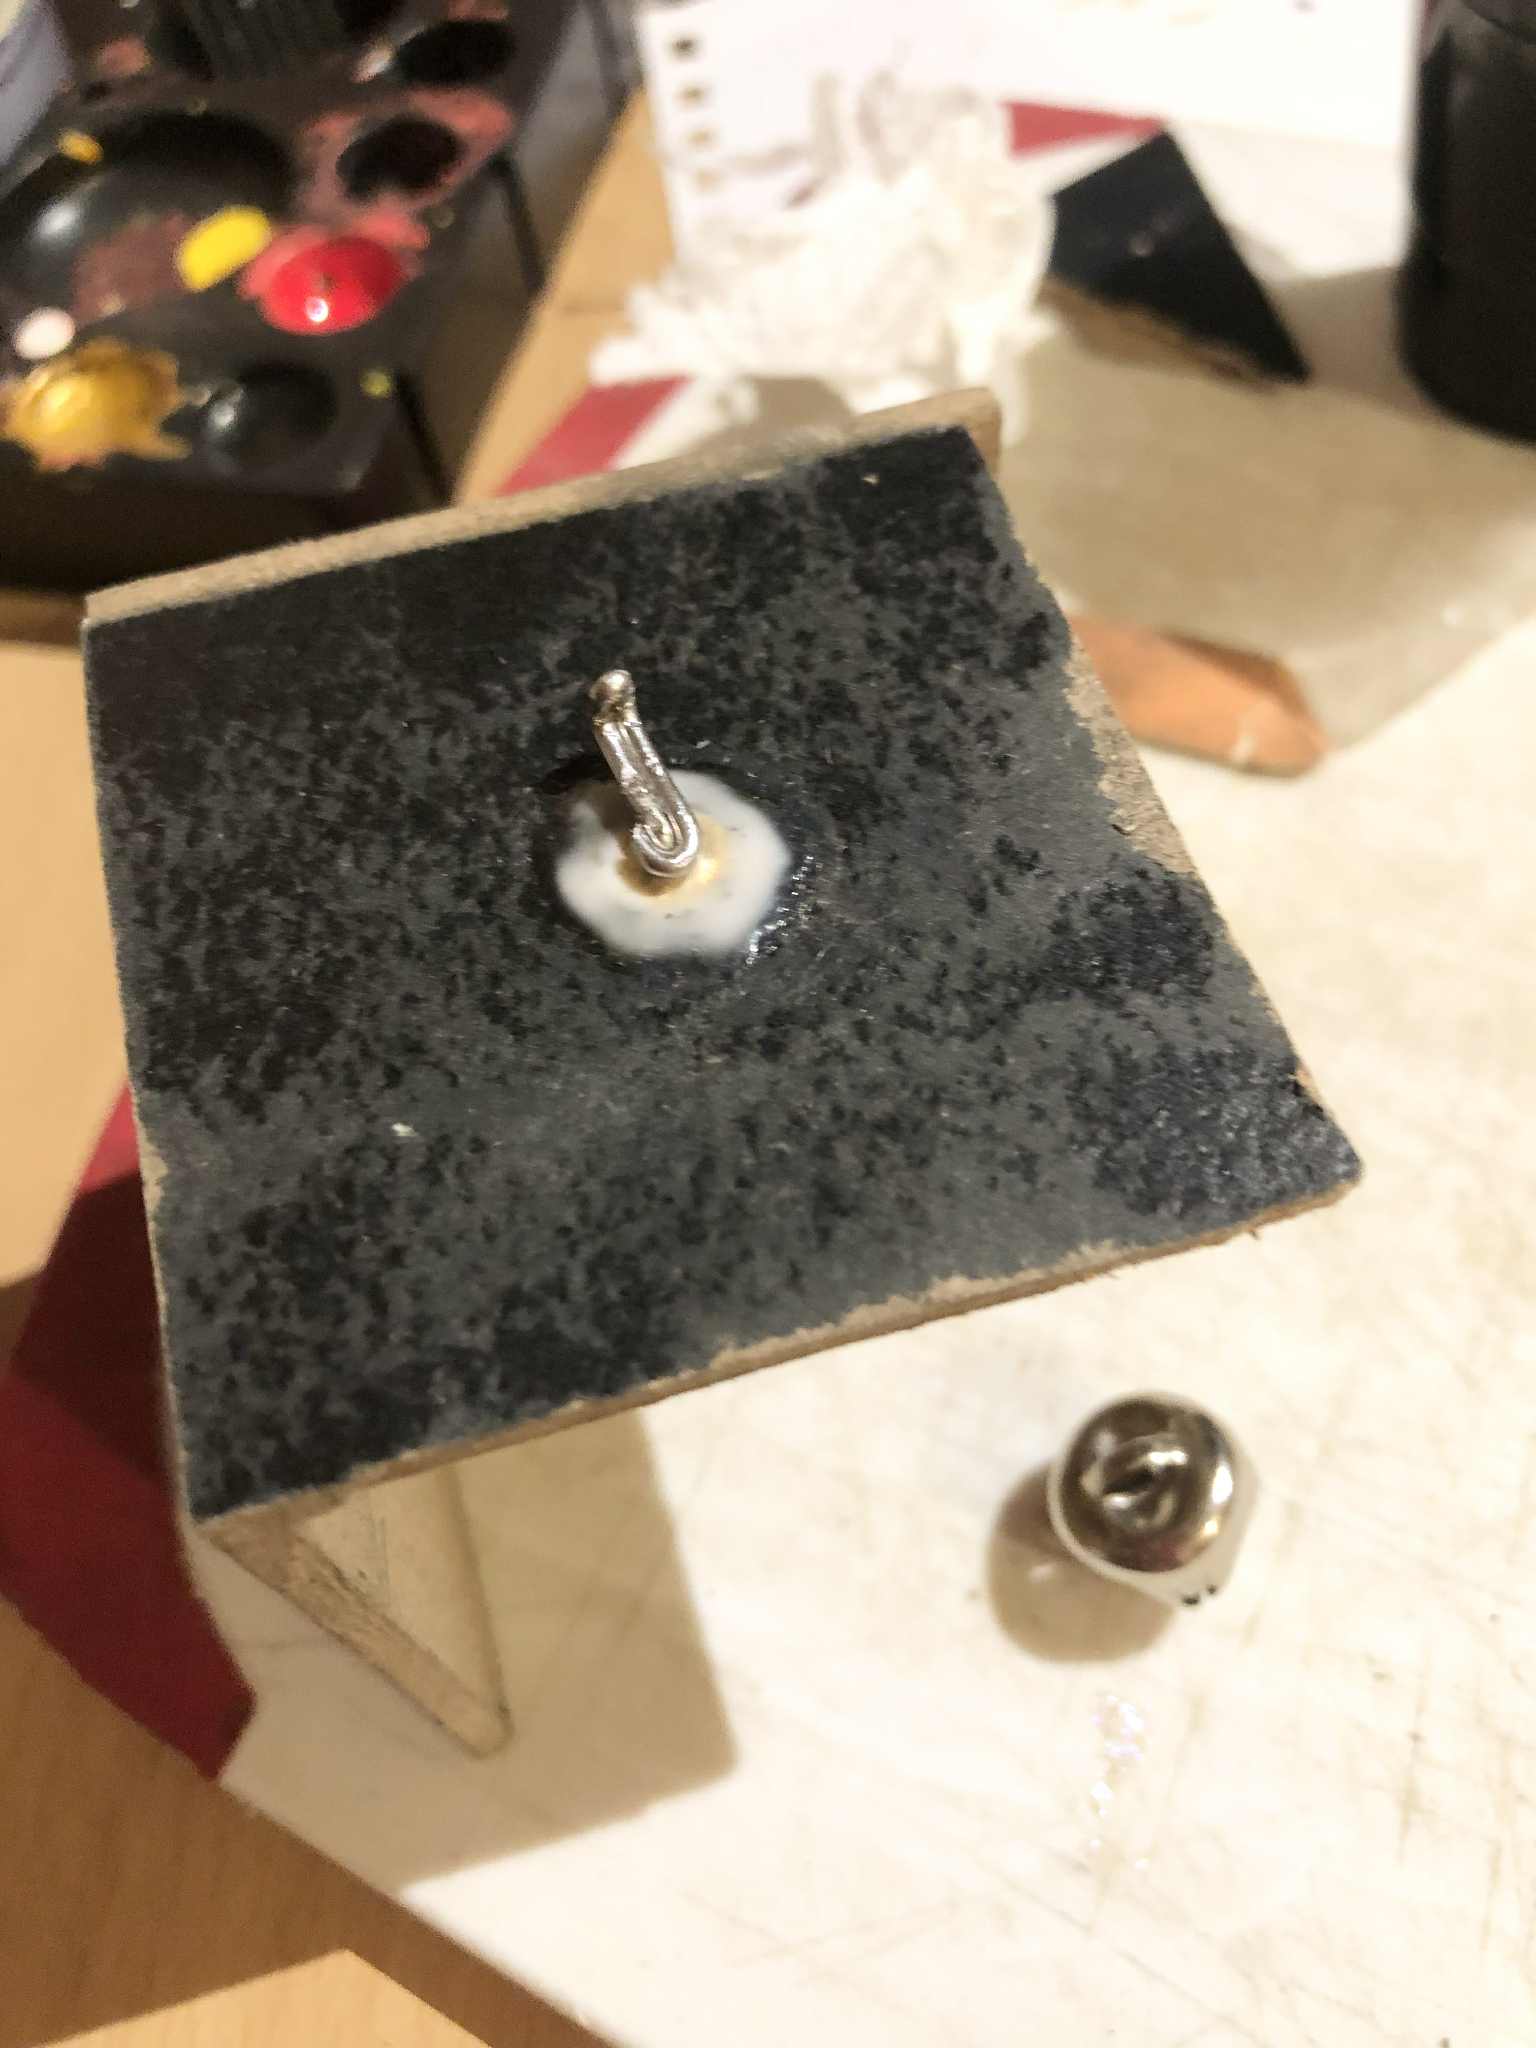
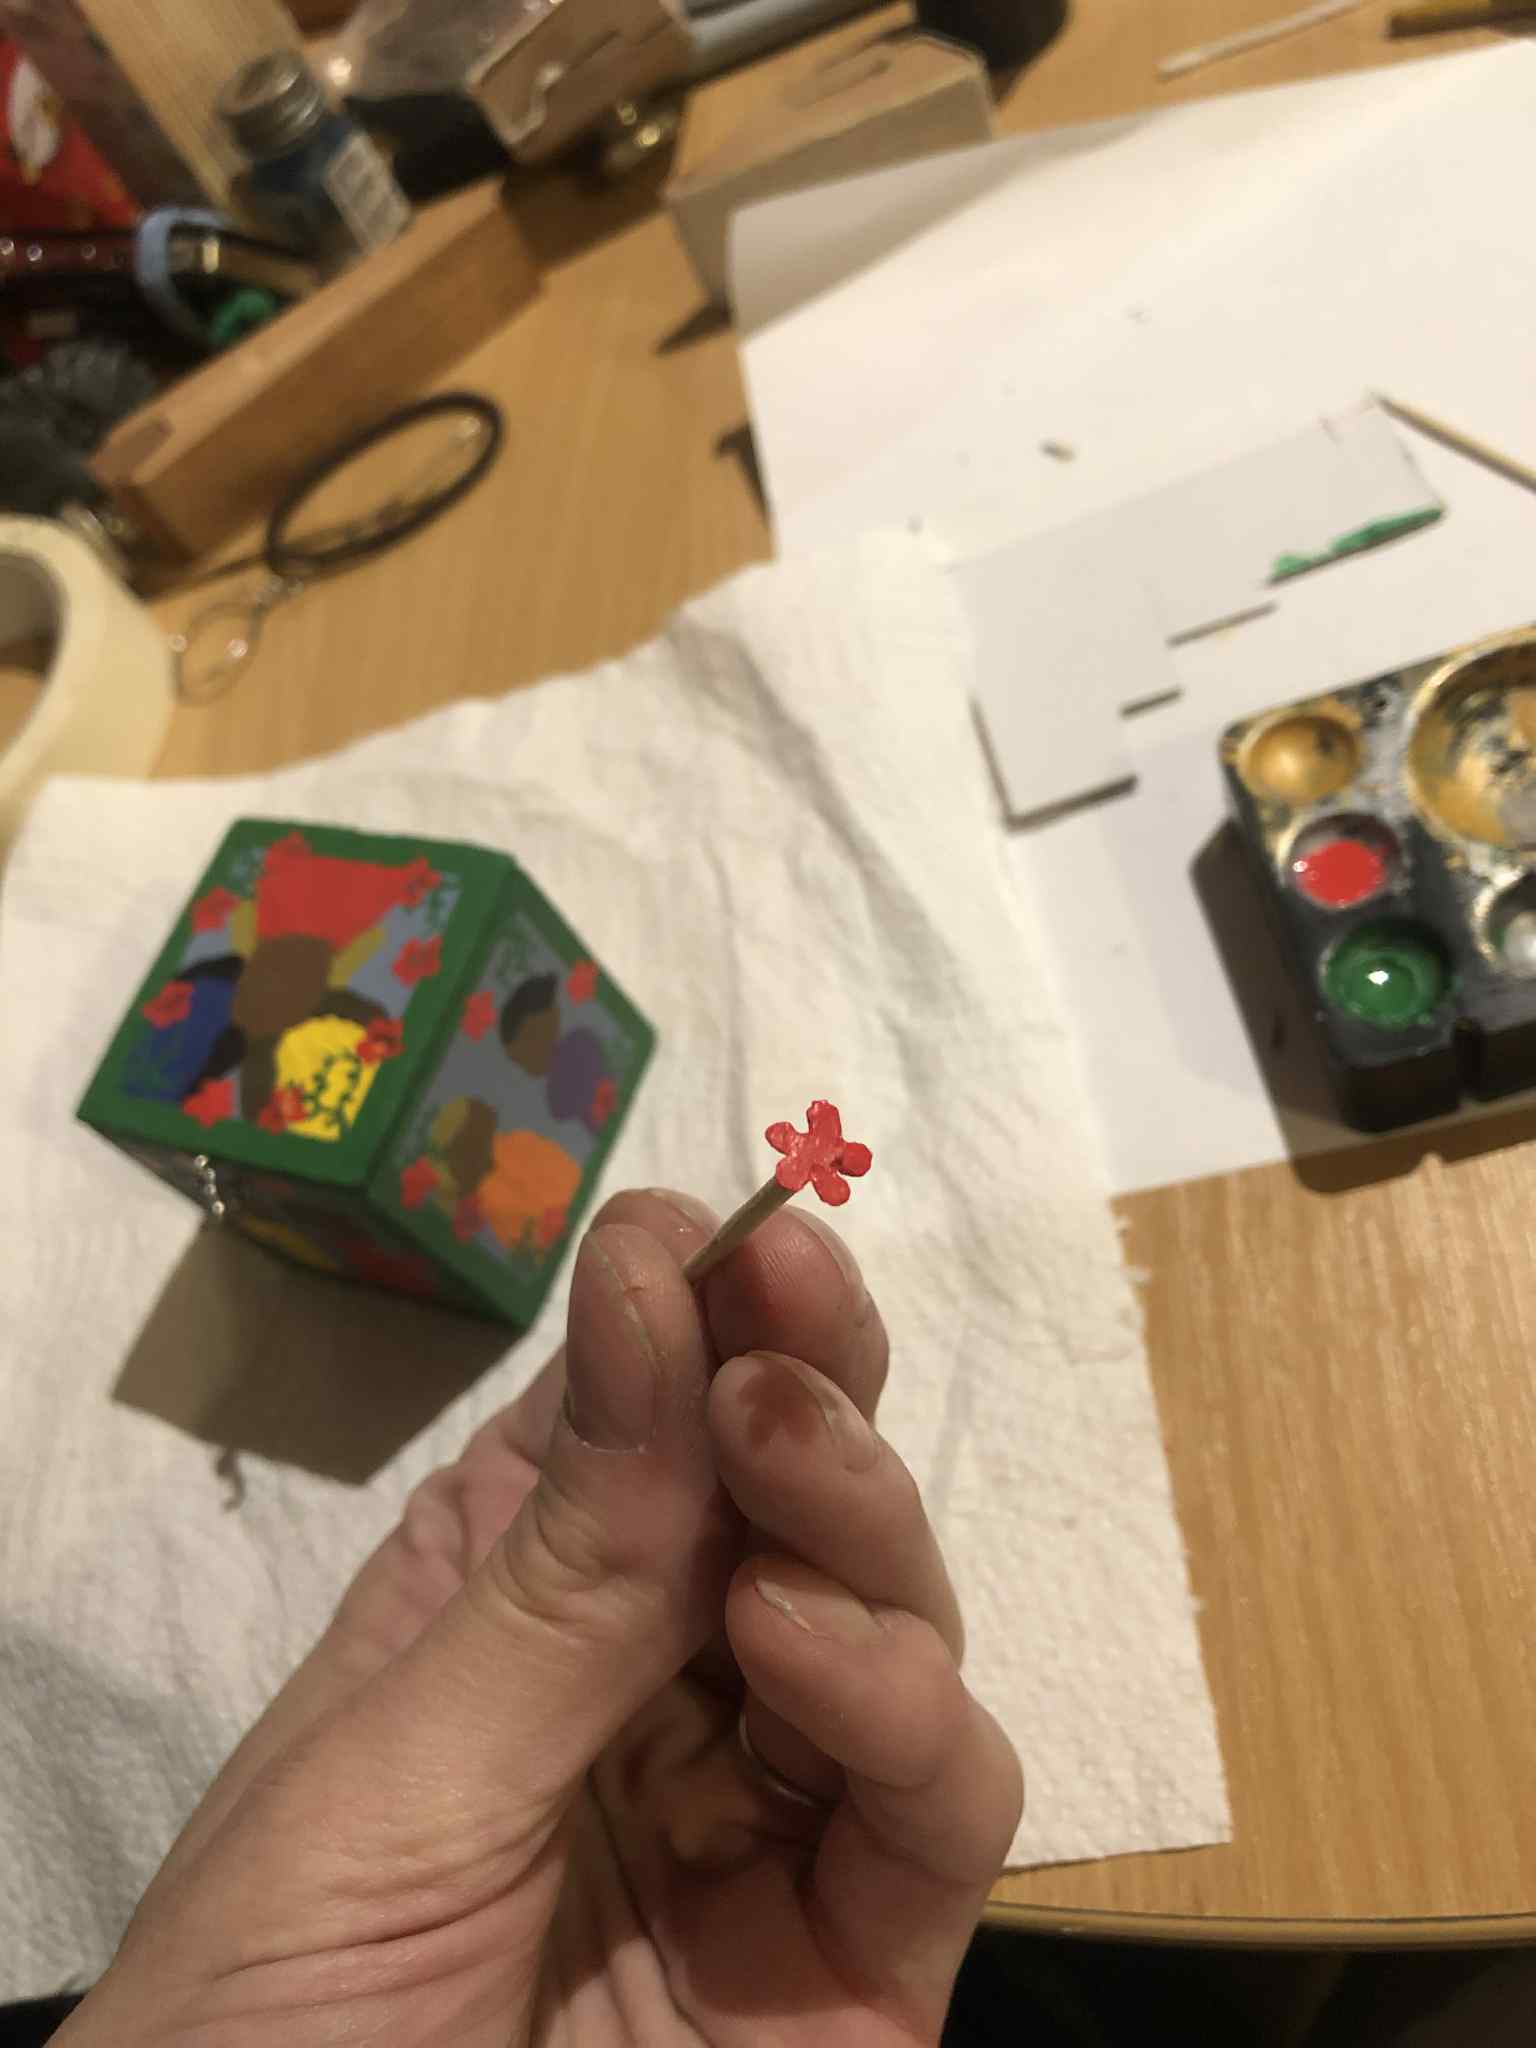
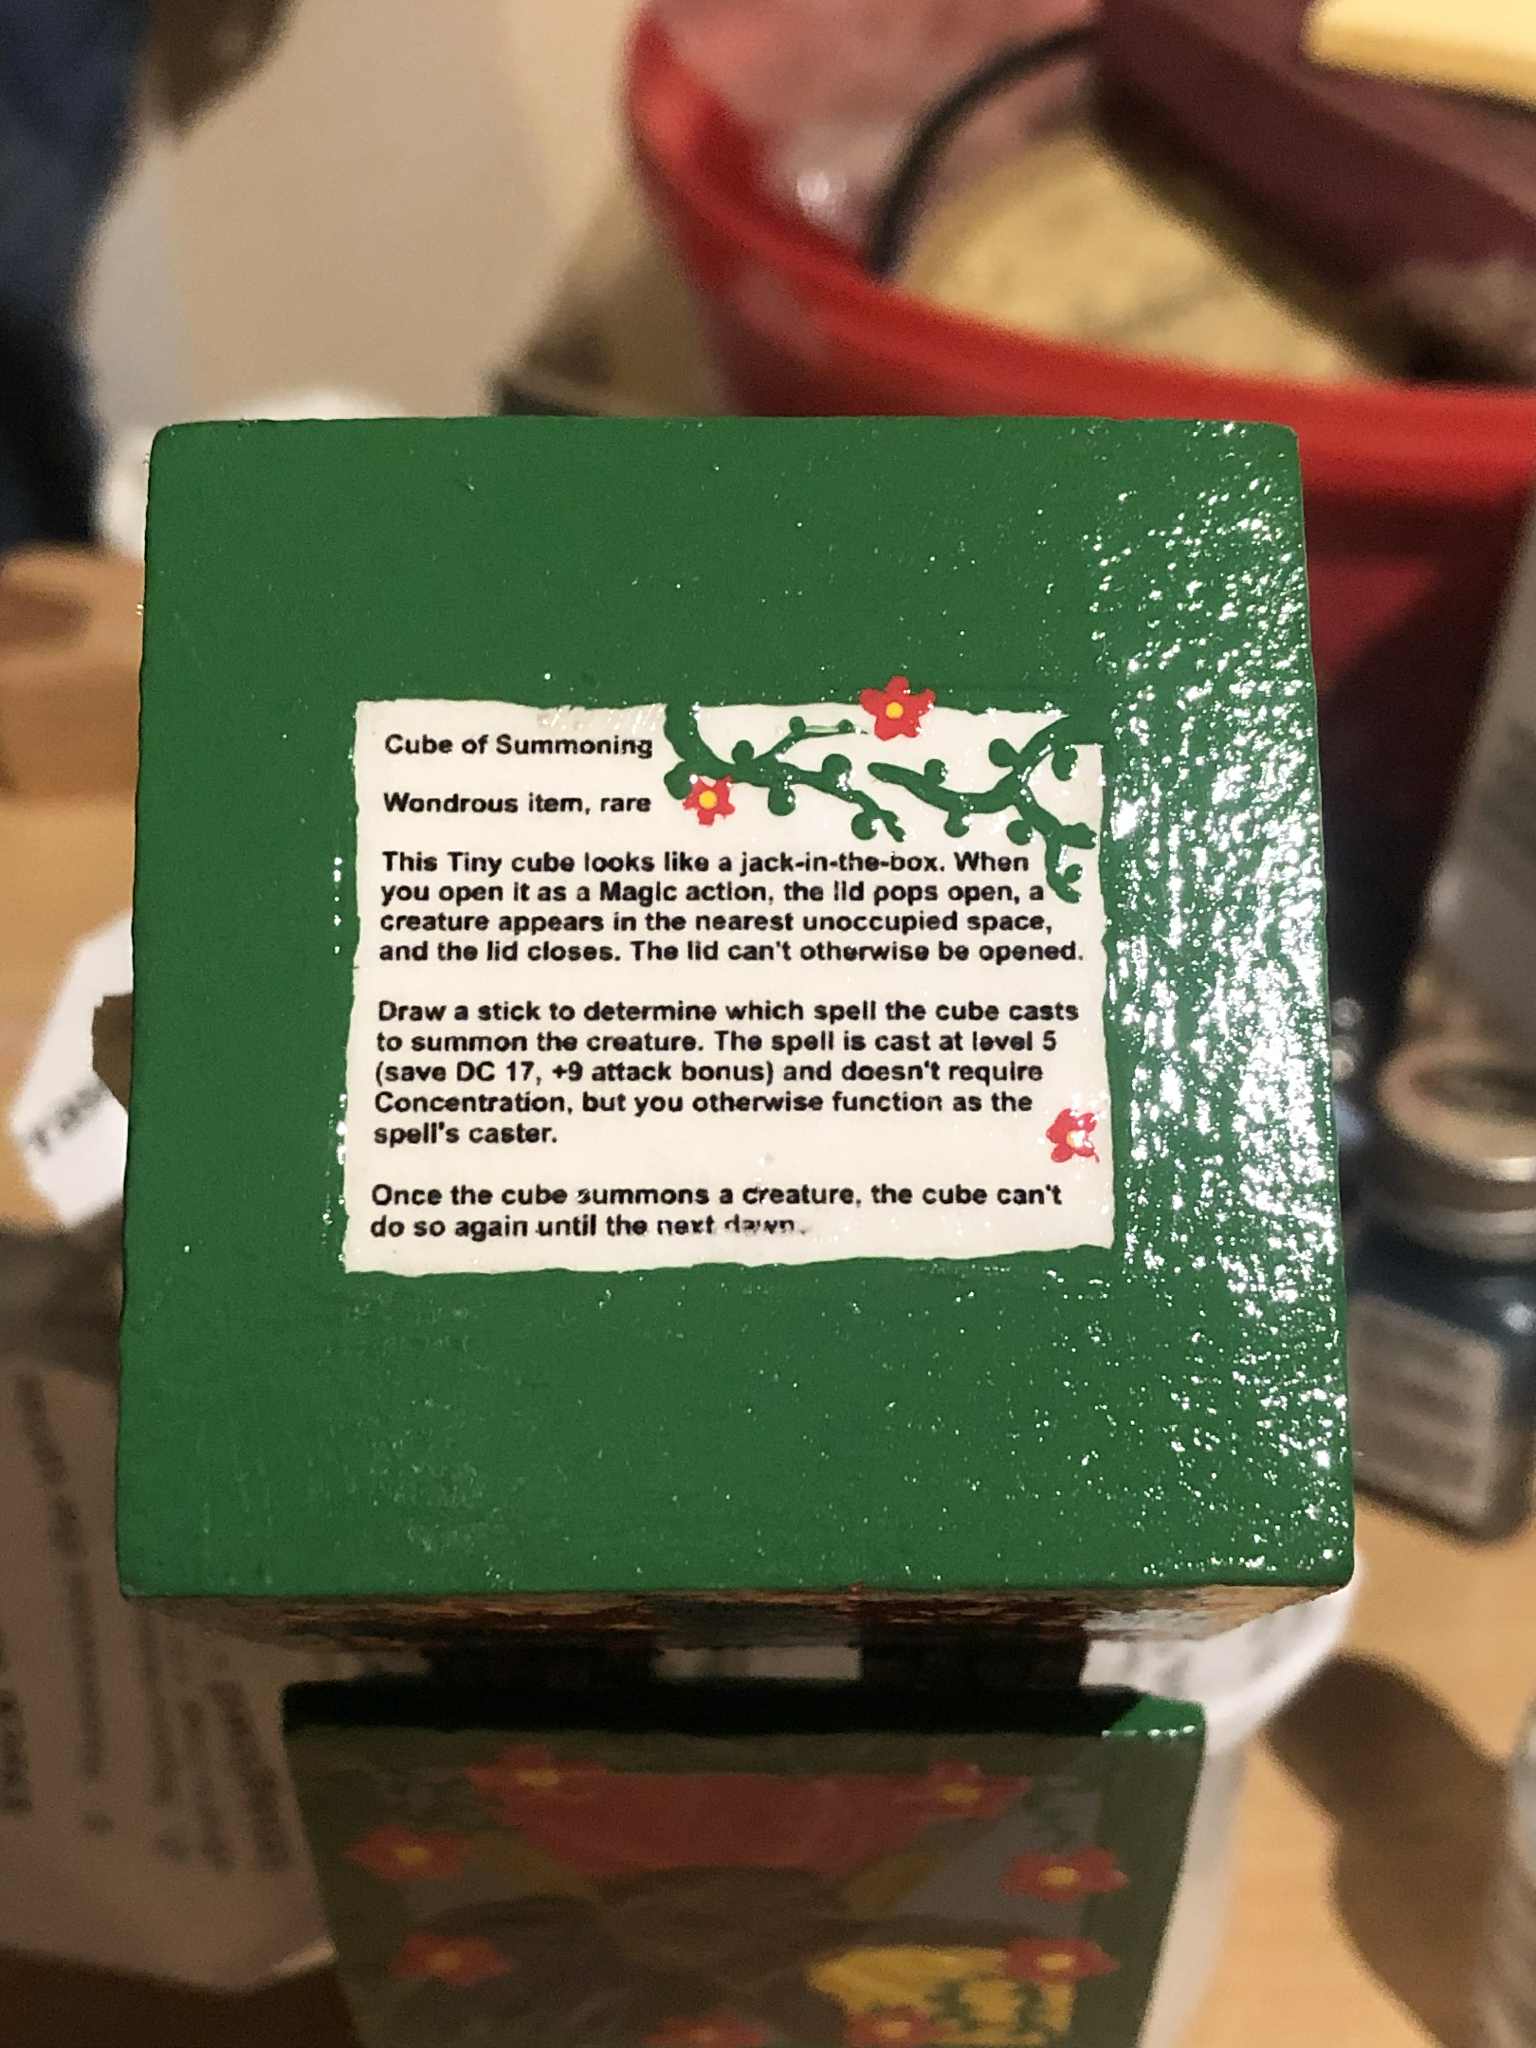
Ok, so we've got absract people (with a trippy three bodies one head thing on the lid, just kinda... there wasn't room for three heads so we just tried this, and it works with the creepy vibe in the end. Also heavy impasto for the same vibe), what else is on the official art? Green borders, aight. Actually, clasp first, we came up with what we want to do for that. I'd been rattling around like half a dozen ideas in my head for the lid, do I want to use a pen spring to pop it open (spring is much bigger than I expected), and settled on a simple hook and loop type clasp. We drilled some holes in the appropriate places, added the loops and hooks, and bent them over on the inside (filing partway through the wire to get it to bend at a nice 90 degree angle), and glued those inside the walls. Ok, back to the borders. We created a little corner cover with a pinhole 5mm from either side, and used that to mark a spot around all of the corners (taking into account the lid), and used masking tape to make a straight line between those, and slowly painted all of the borders in. What else we got, vinework in the corners. Let's get some of those going on in there, thank you painting with toothpicks. Flowers, did I want to attempt those red flowers? Let's test making a little stamp out of cardboard. All of the flowers will be more or less identical, but y'know I'm fine with that, theyre simple at best. We needed to blot off the stamp to make it stamp cleanly (making for a cute little blotting paper), and threw a handful of those around the frames, and used a cut off toothpick to yellow-dot the centers. Those hands at the top of the original, I originally planned to omit those for simple impossibility, but it looked... too happy without, not creepy enough. So we went with brown tentacle-like fingers stretching down from the three bodies on the lid, PERFECT! OOHH, that added a suitable level of creepy. That should have been *behind* the vines and flowers, so I needed to re-go over some of those afterwards to put them in front of the fingers again, and we were done, perfect! Amidst all of this the inside of the lid was painted white, the inside of the lip painted green as well, and then several coats of varnish spray overtop to seal it all in. Also, on the bottom we attached the instructions for the item, adding some tiny vinework and flowers onto the corner of that as well, because that looks awesome. It's inset about a half-millimeter into the box surface to keep from sticking out, too.
Only one step left before we can call this a wrap, I need to add that inner lining to keep the lid from sticking closed, a thin layer of felt. We have some 1mm white felt (which I've been using as a spacer throughout), put a layer of that to keep the jester face from sticking to the inside of the lid, and dyed some green to cut into thin strips to attach to the rim line after the varnishing is done.
And with a thin strand of wood glue applied with a thread, we attached thin strips of the felt to the underside of the lid around the lip, and decided on how to paint the crank. I'd debated green to match the frames, but that just didn't work. Red, to match the flowers? Yellow or blue to match a shirt? On the official art it's a plain wooden handle. Now, I'd already painted it green in my initial ponderings, but... well, let's throw a ton of scratches across the green to create a wood texture, and then paint brown over that. A little bit of a dark wash overtop will make it a darker brown than the faces (though I kinda liked the idea of it matching the colour of the skin to begin with), and give it a wooden texture and look, DONE! Two coats of topcoat later, and the Cube of Summoning is officially complete!
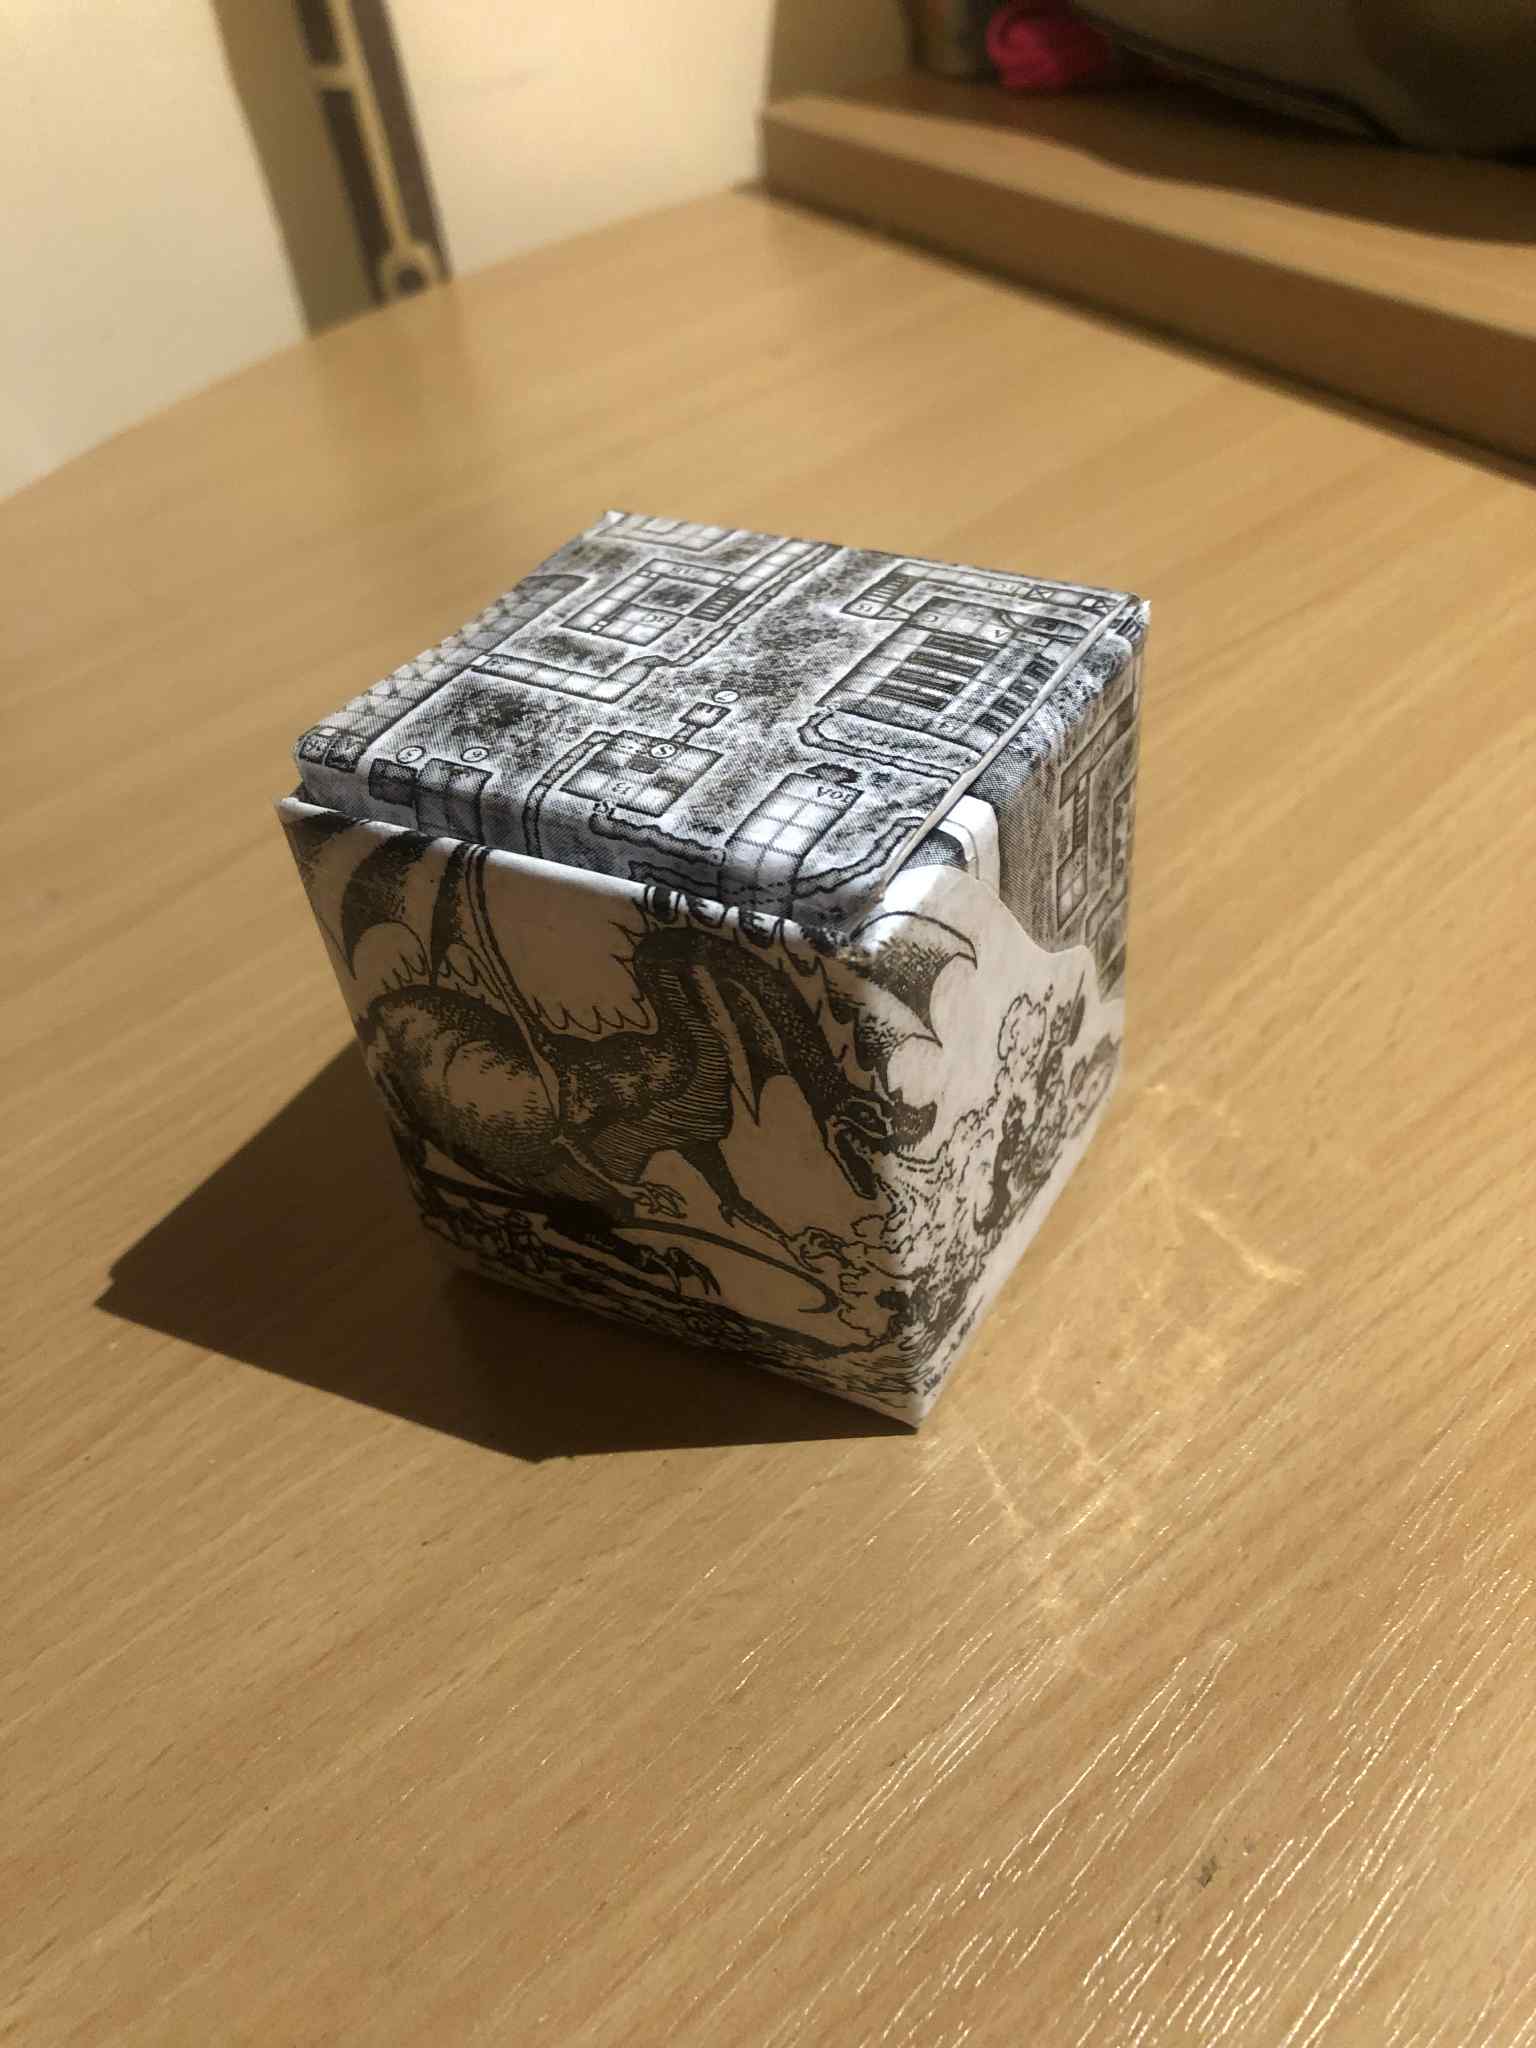
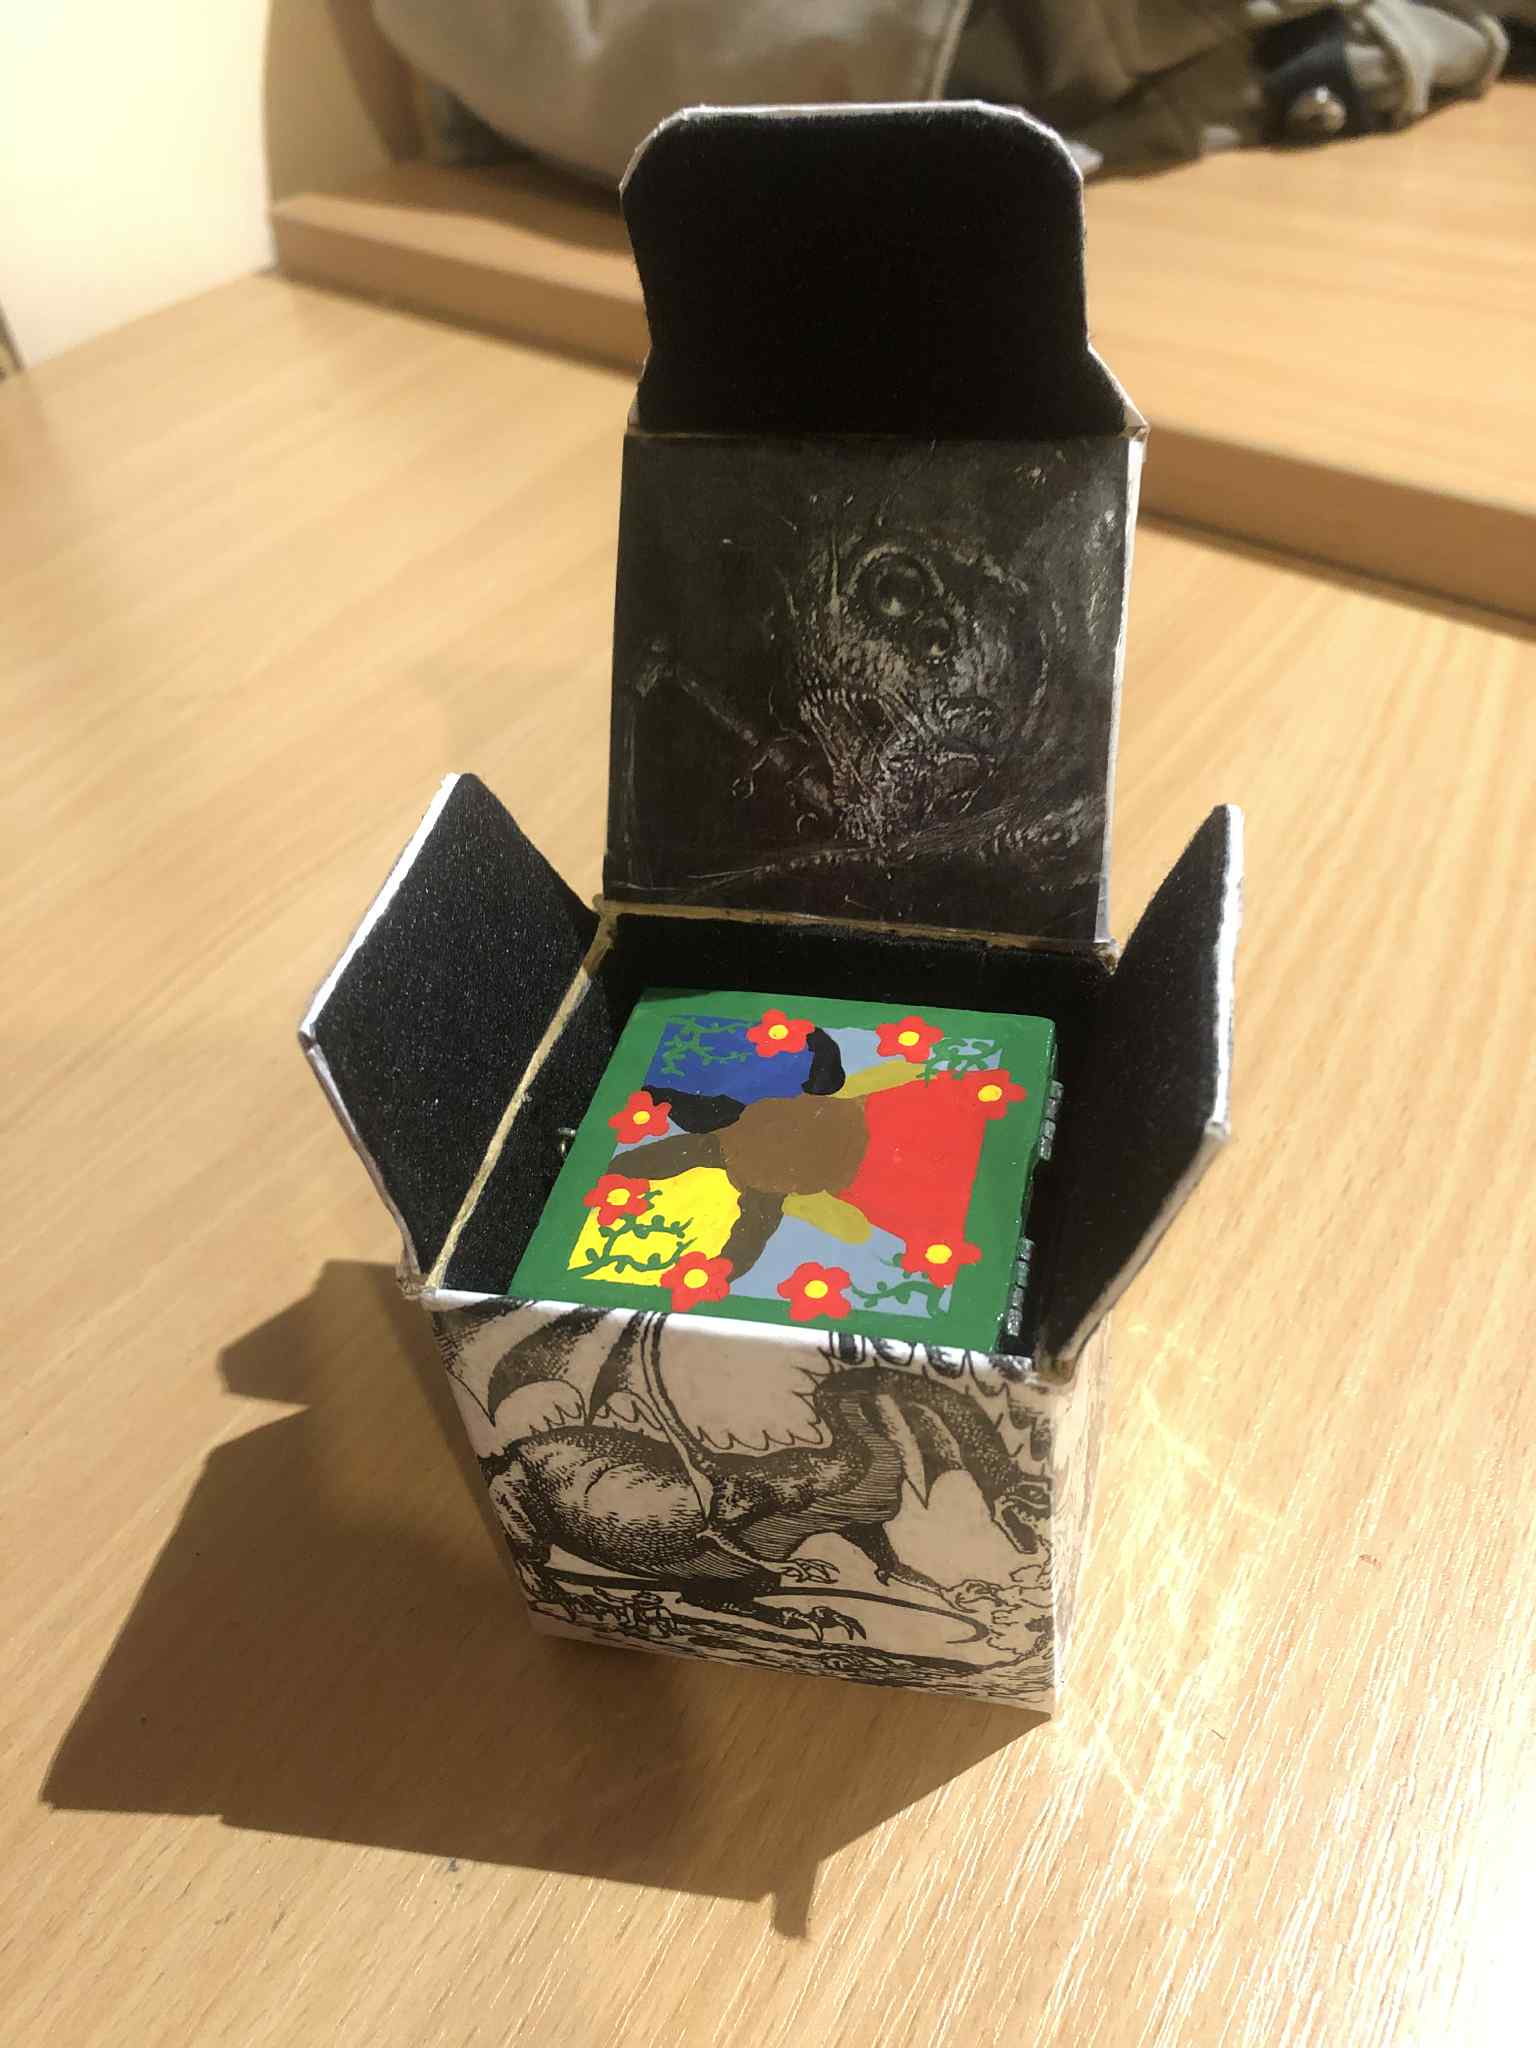
One more update to add to the bottom of this! So, much like with the Deck of Many Things box, I wanted to make a kinda carrying box for this as well, to avoid the sides getting scratched or gouged or dented or whatnot. So at the same time as the box of many things box, I made this as well! I didn't have a conveniently sized box to just cover, so I had to make this one completely from scratch. And so, finding a size that should fit the box and also the latch, hinges, and crank, and inner lining... 6cm on each side... I cut out the necessary shape from a sheet of cardboard, and glued the overlap sides together. Then, inconjunction with the adhesive felt inner lining, I made specific dents in the cardboard to accommodate the metal fixtures, and additionally for the crank made a separately indented piece of felt, completely flattening the cardboard beneath it. This allowed the box to slide easily in and out of the... box (wow I need to use the word box a lot lol), and not unduly press on the crank, my main concern. After lining the inside, I again pondered what to cover the outside with, and dug through the random images I have from extra pages/misprints from the pdf printouts, I found a map from the Tomb of Horrors (don't let the name scare you lol), and an arbitrary dragon from... I think the 1e DMG that half-printed before some error stopped it and I got the extra pages (where most of my printout cutouts are from). The inside upper lid I dunno, some spider monster that was in there (this box summons different monsters, whatever this is, it'll do!)
So anyways, I took those printouts, double-sided adhesive sheeted the thing, and took some time to arrange the map over the majority of it, though it wasn't quite tall enough, so the underside, where it's also labelled Cube of Summoning, is the map's symbol legend. After that was all well covered, we covered all of that in clear tape to protect it, and... DONE! It looks cool and mysterious, not that players will see the box box (unless I show them after, probably), and we are done! Cool stuff :D
Cube finished October 11, 2025, box on October 22
Naturally you can still open the cube.
(original pre-build draw page kept for style)


