The wax seal stamps
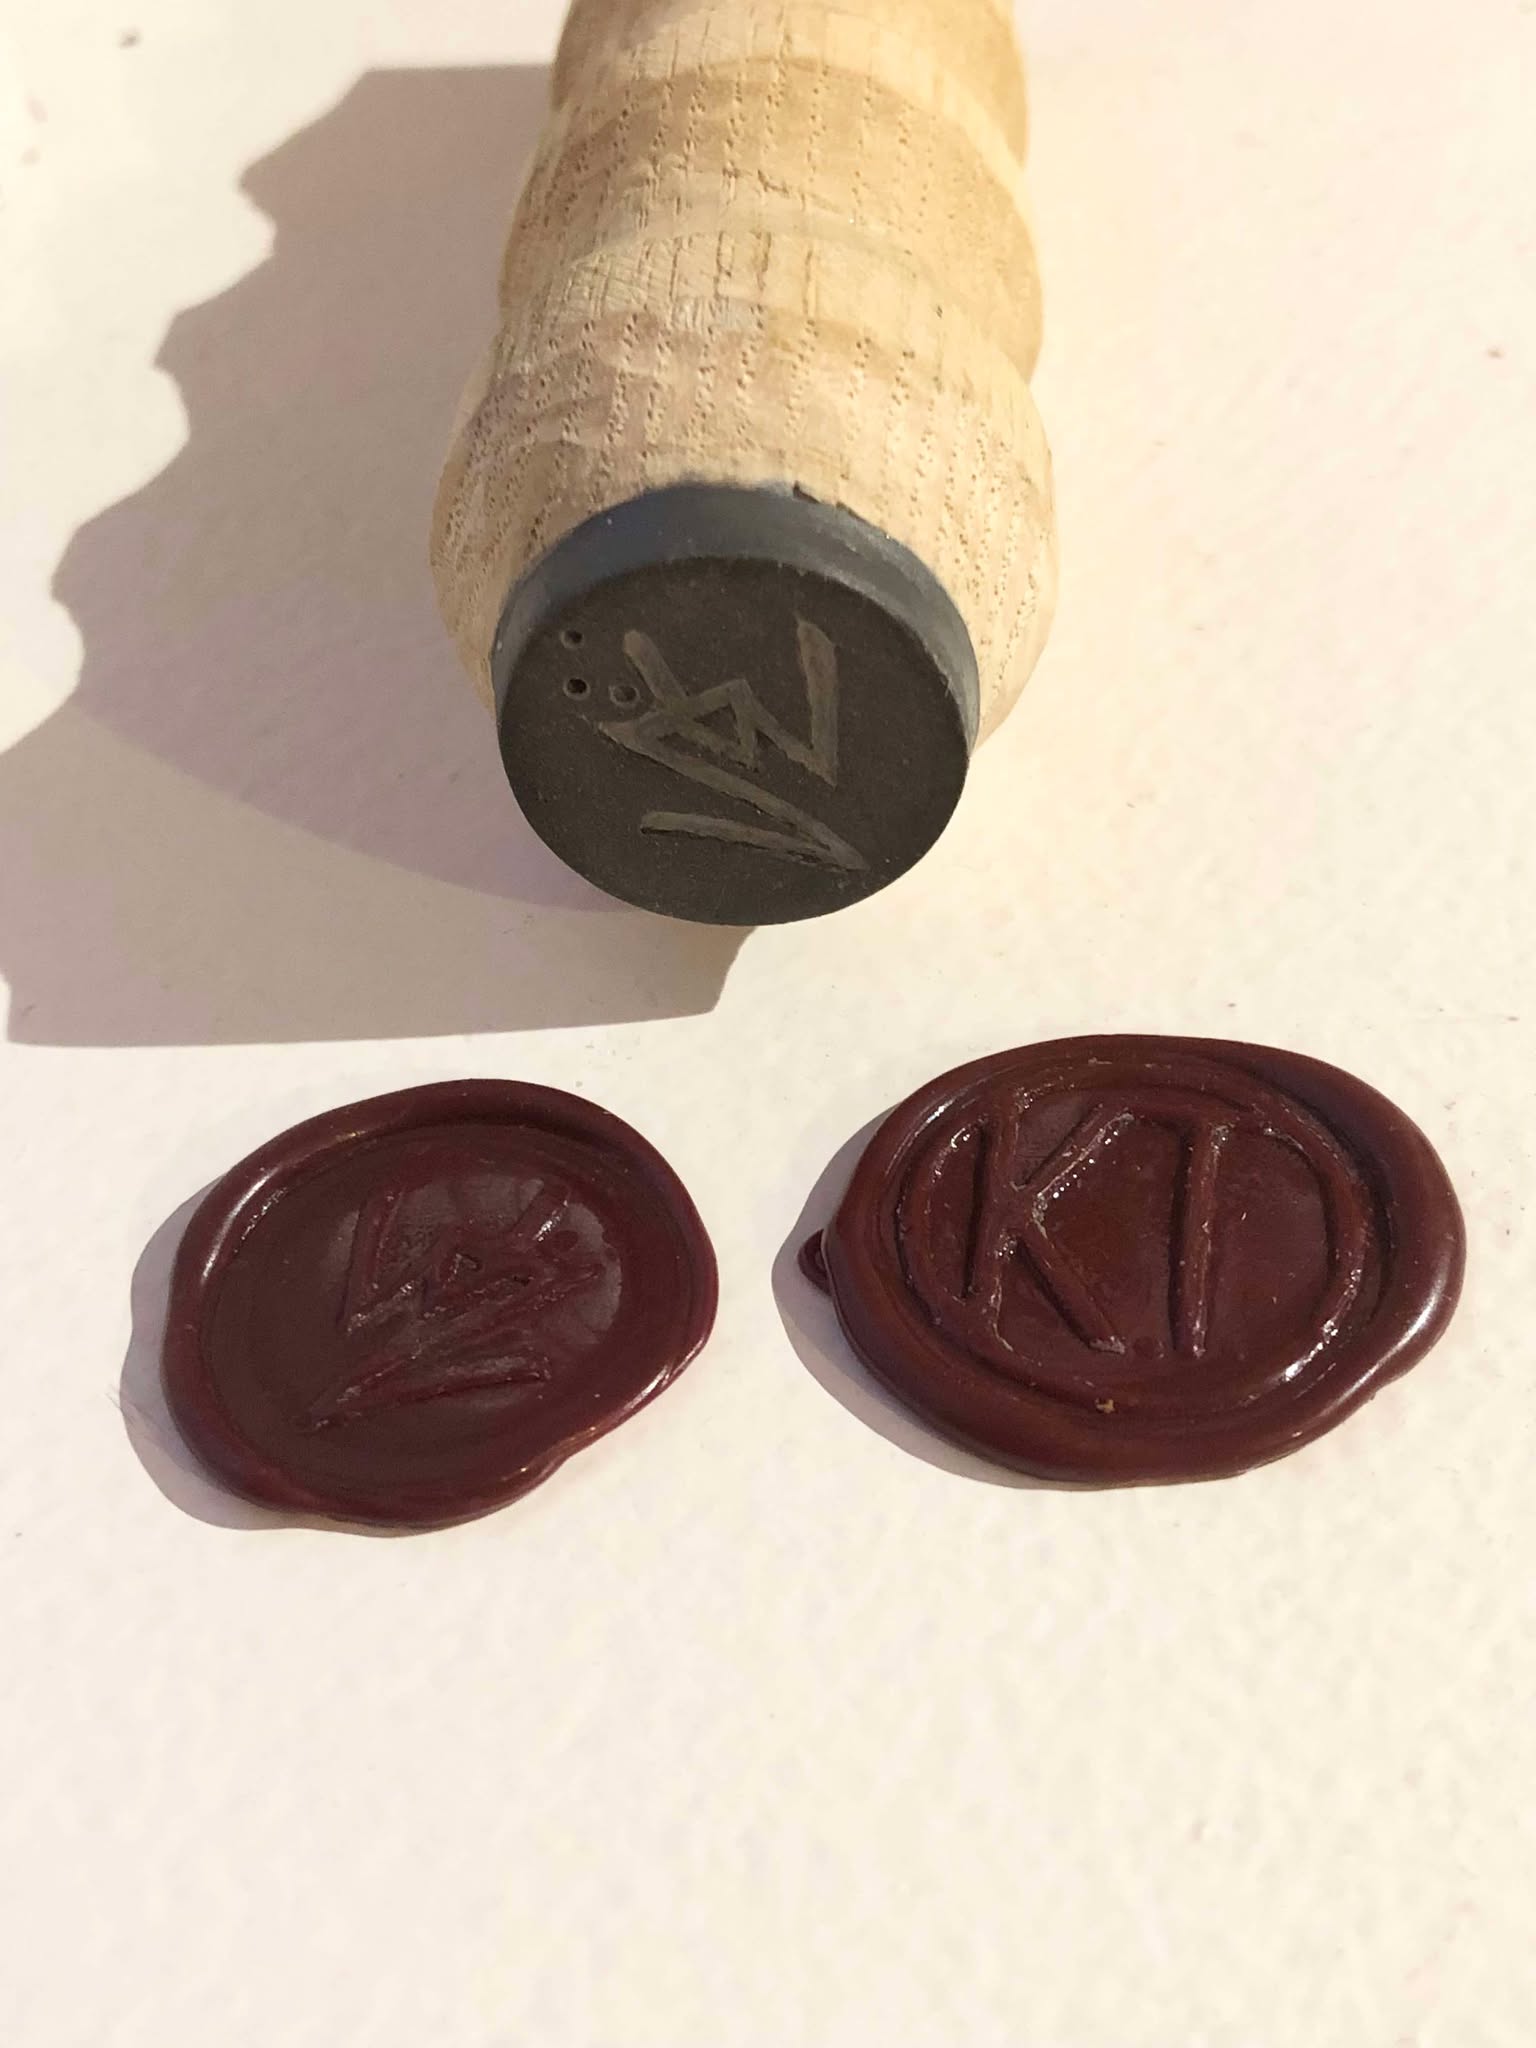

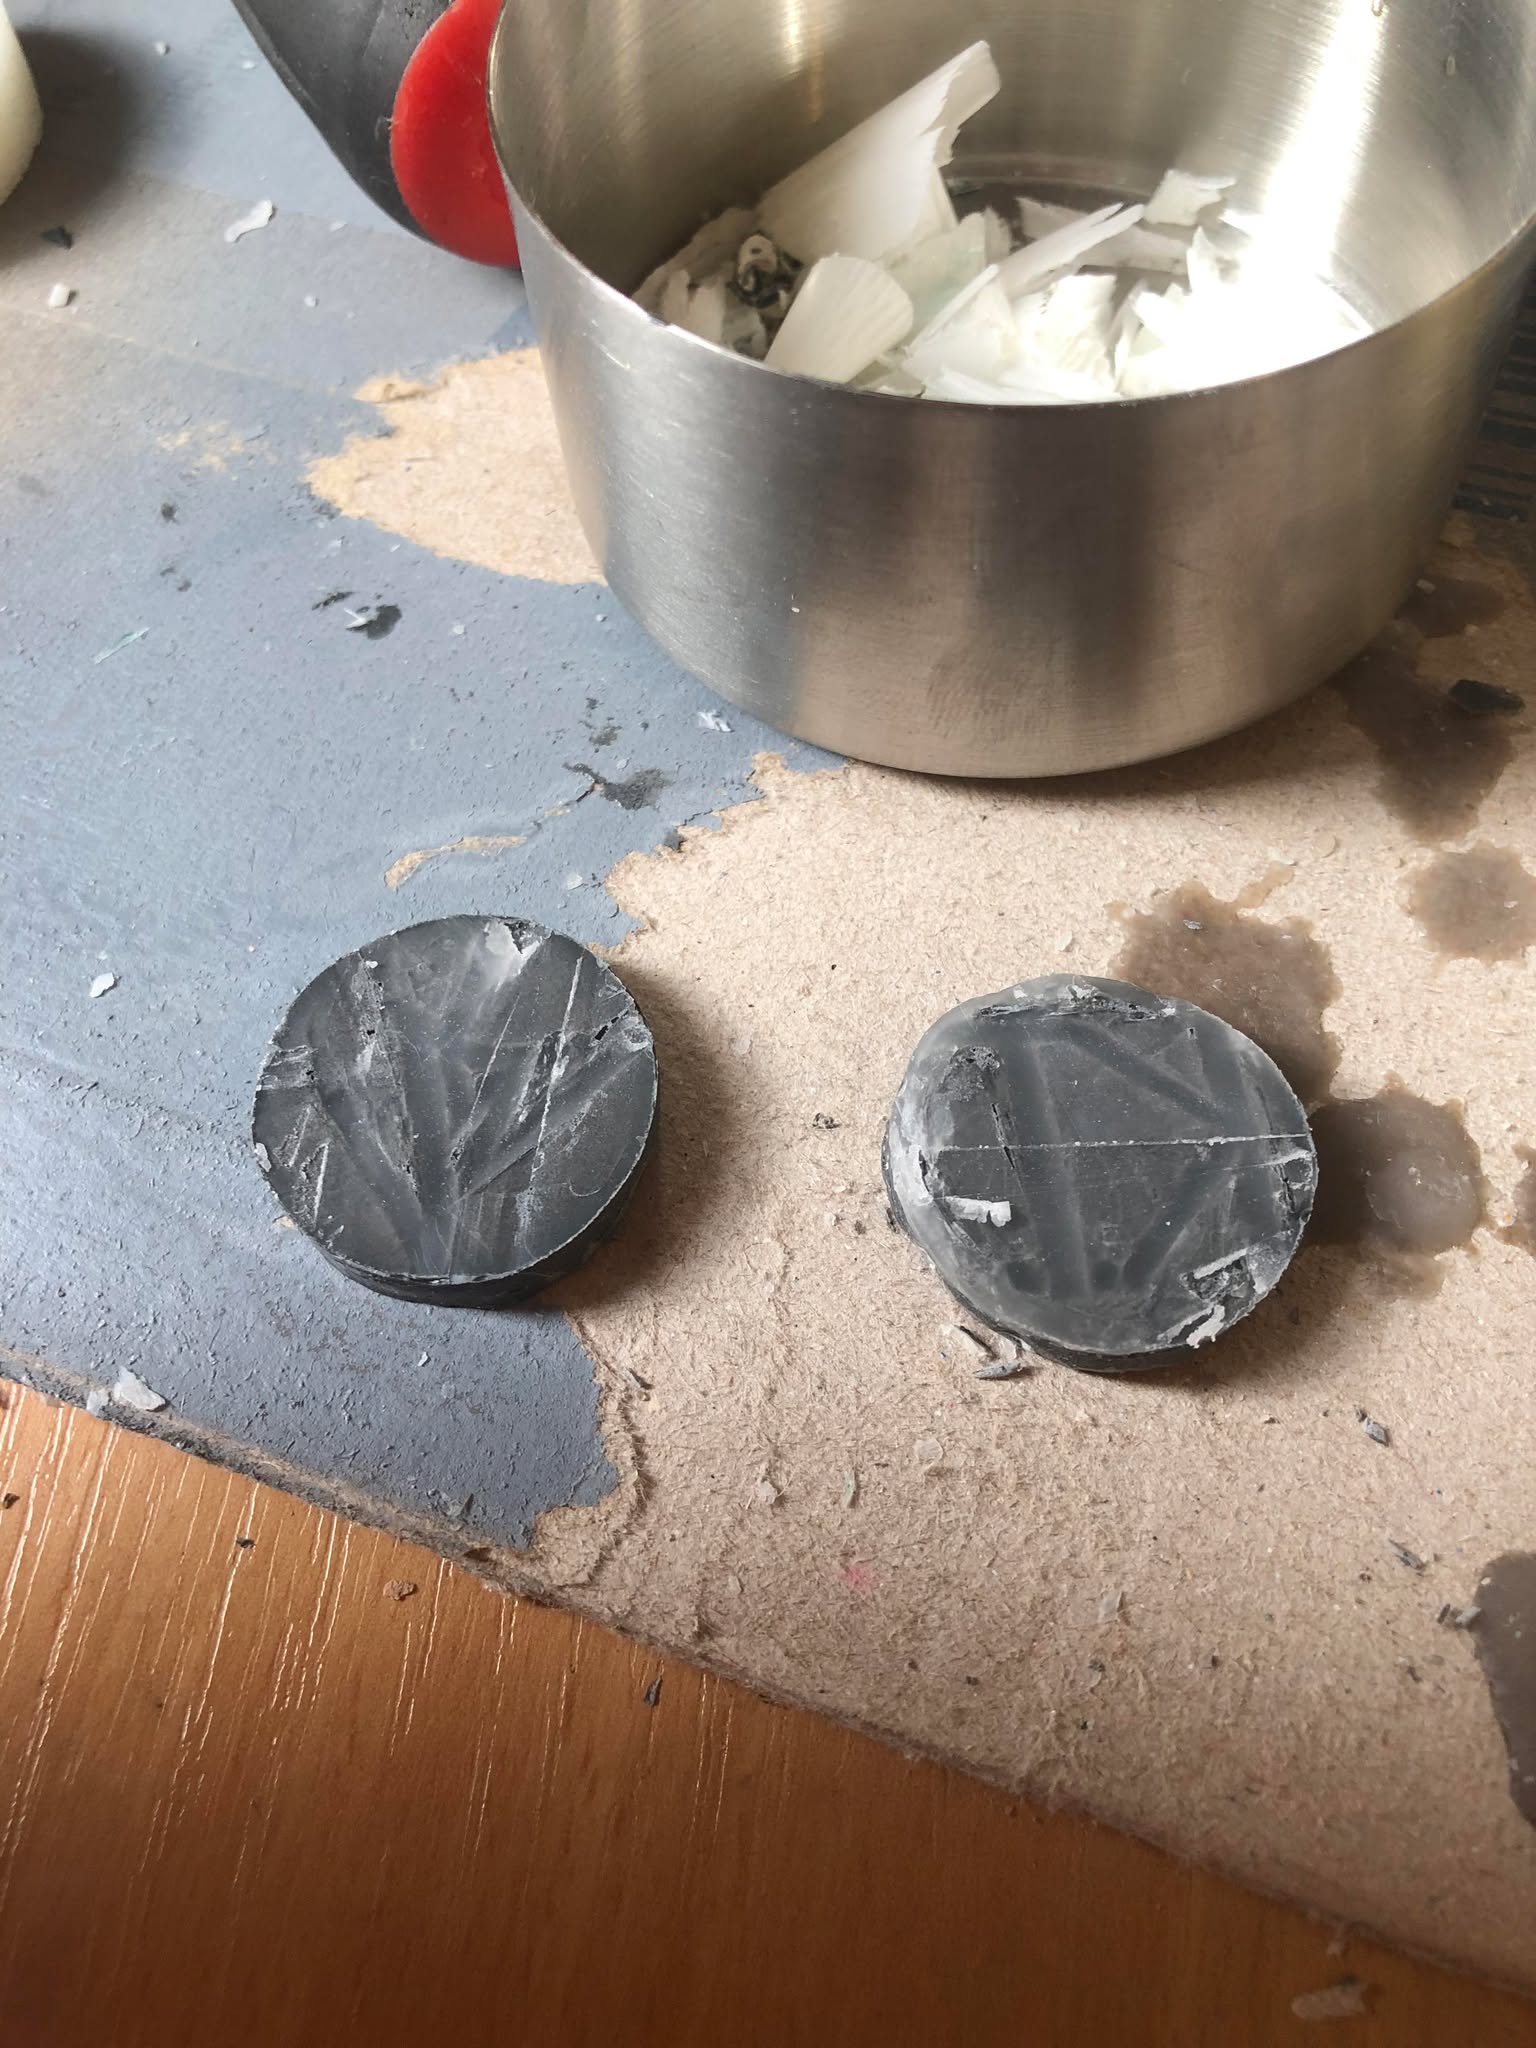
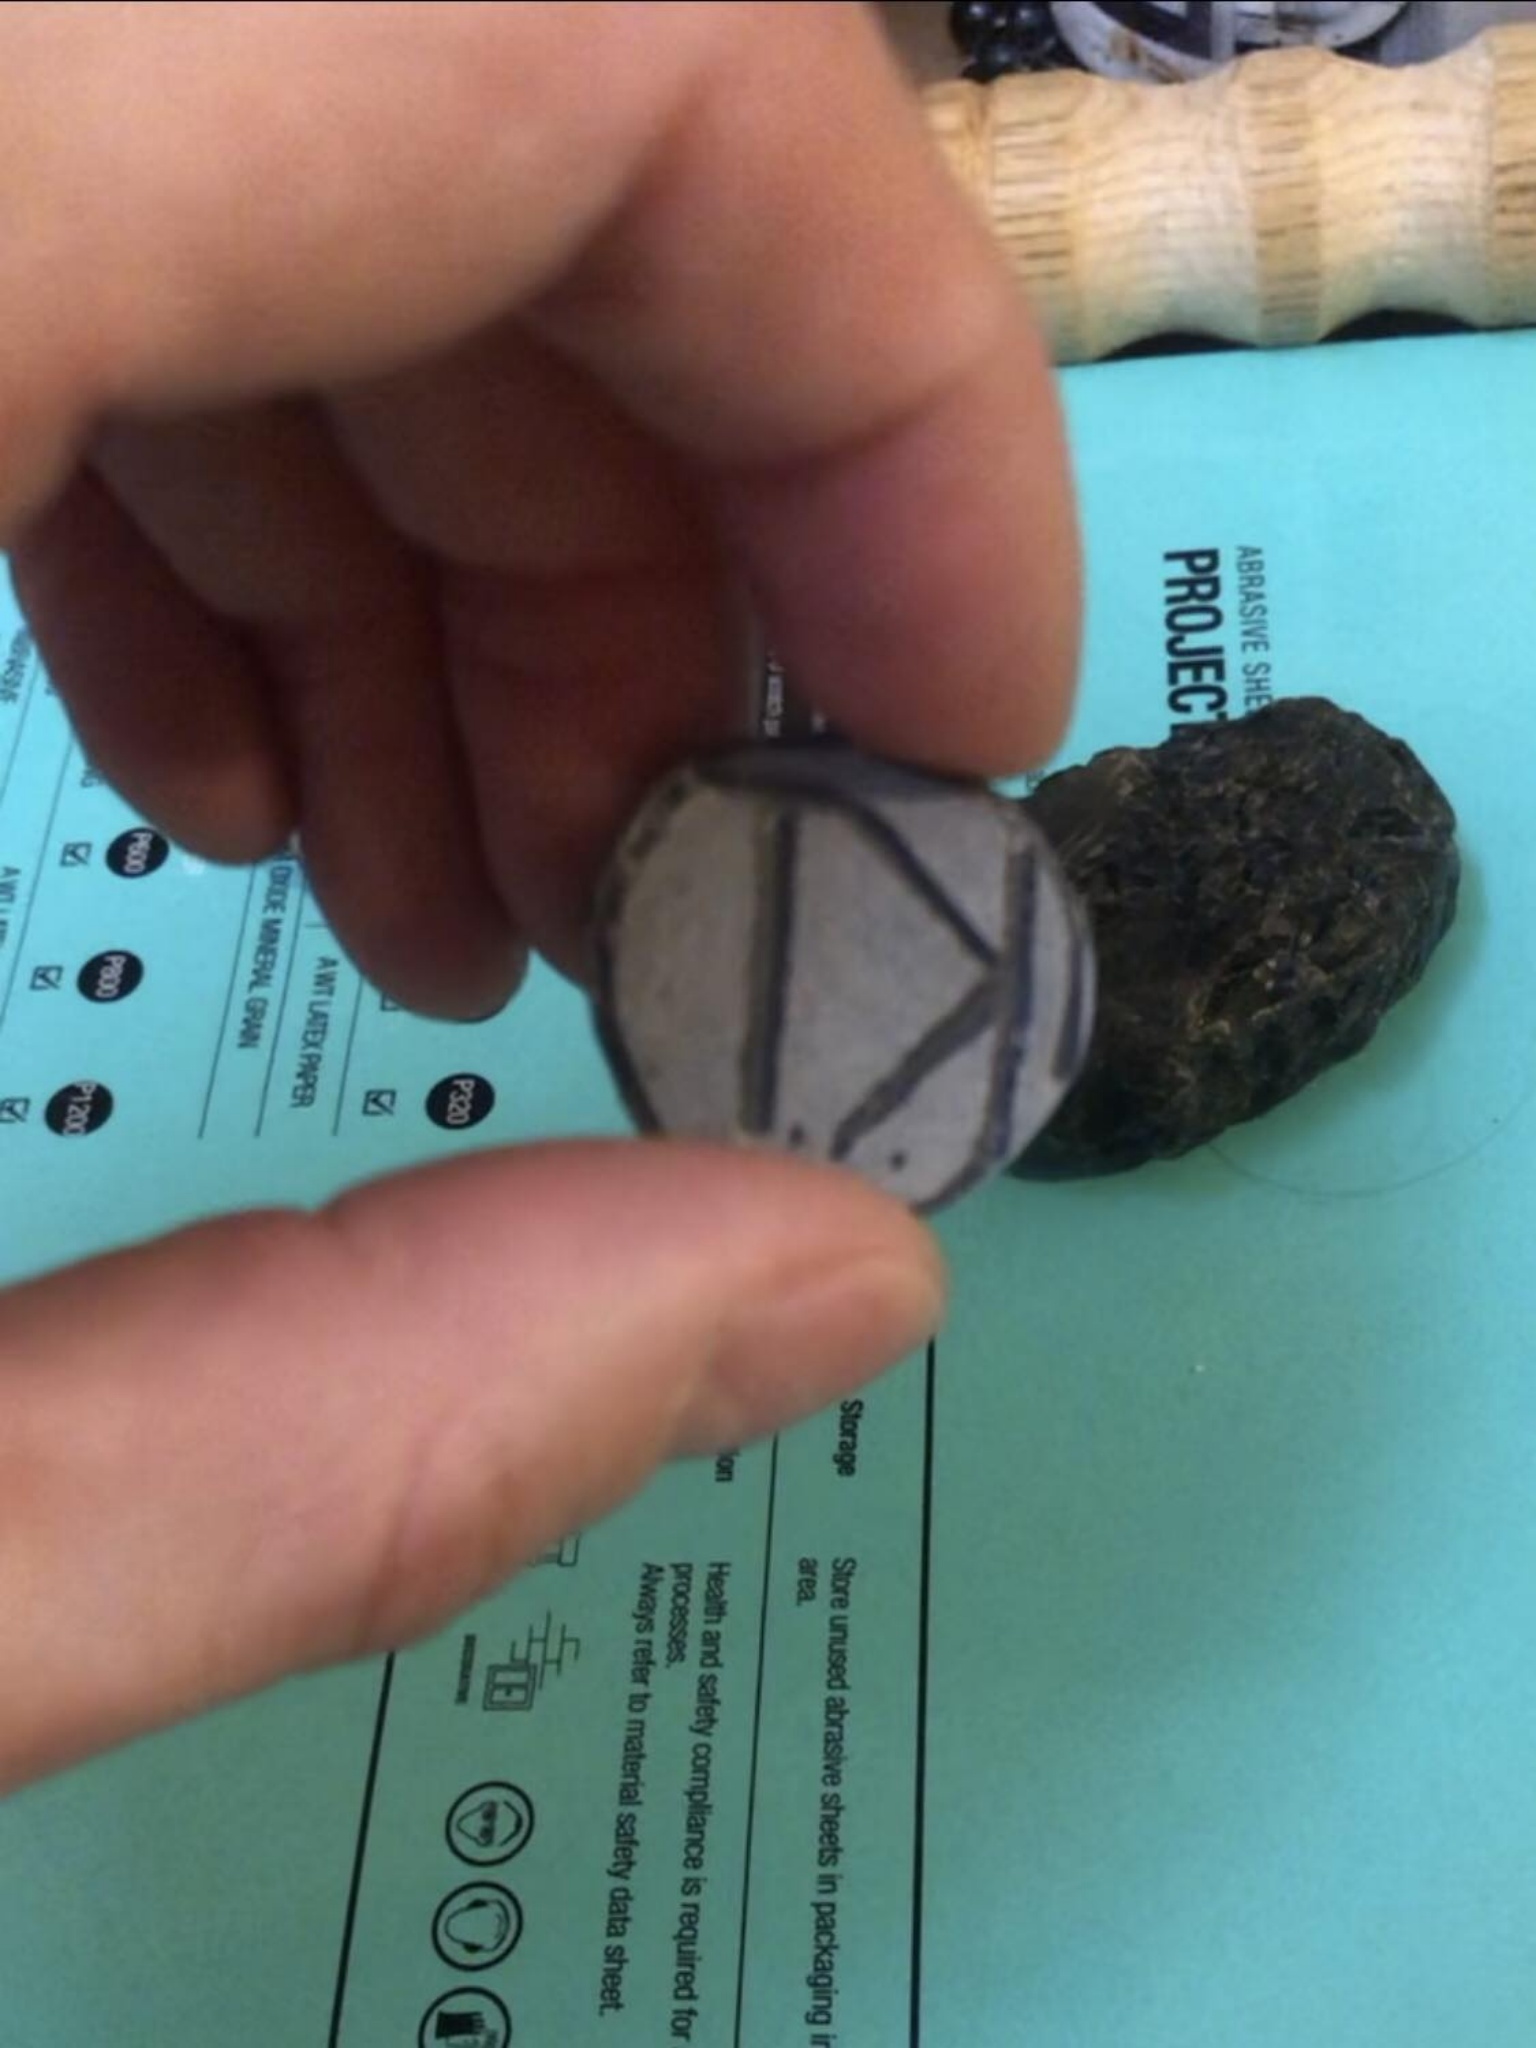
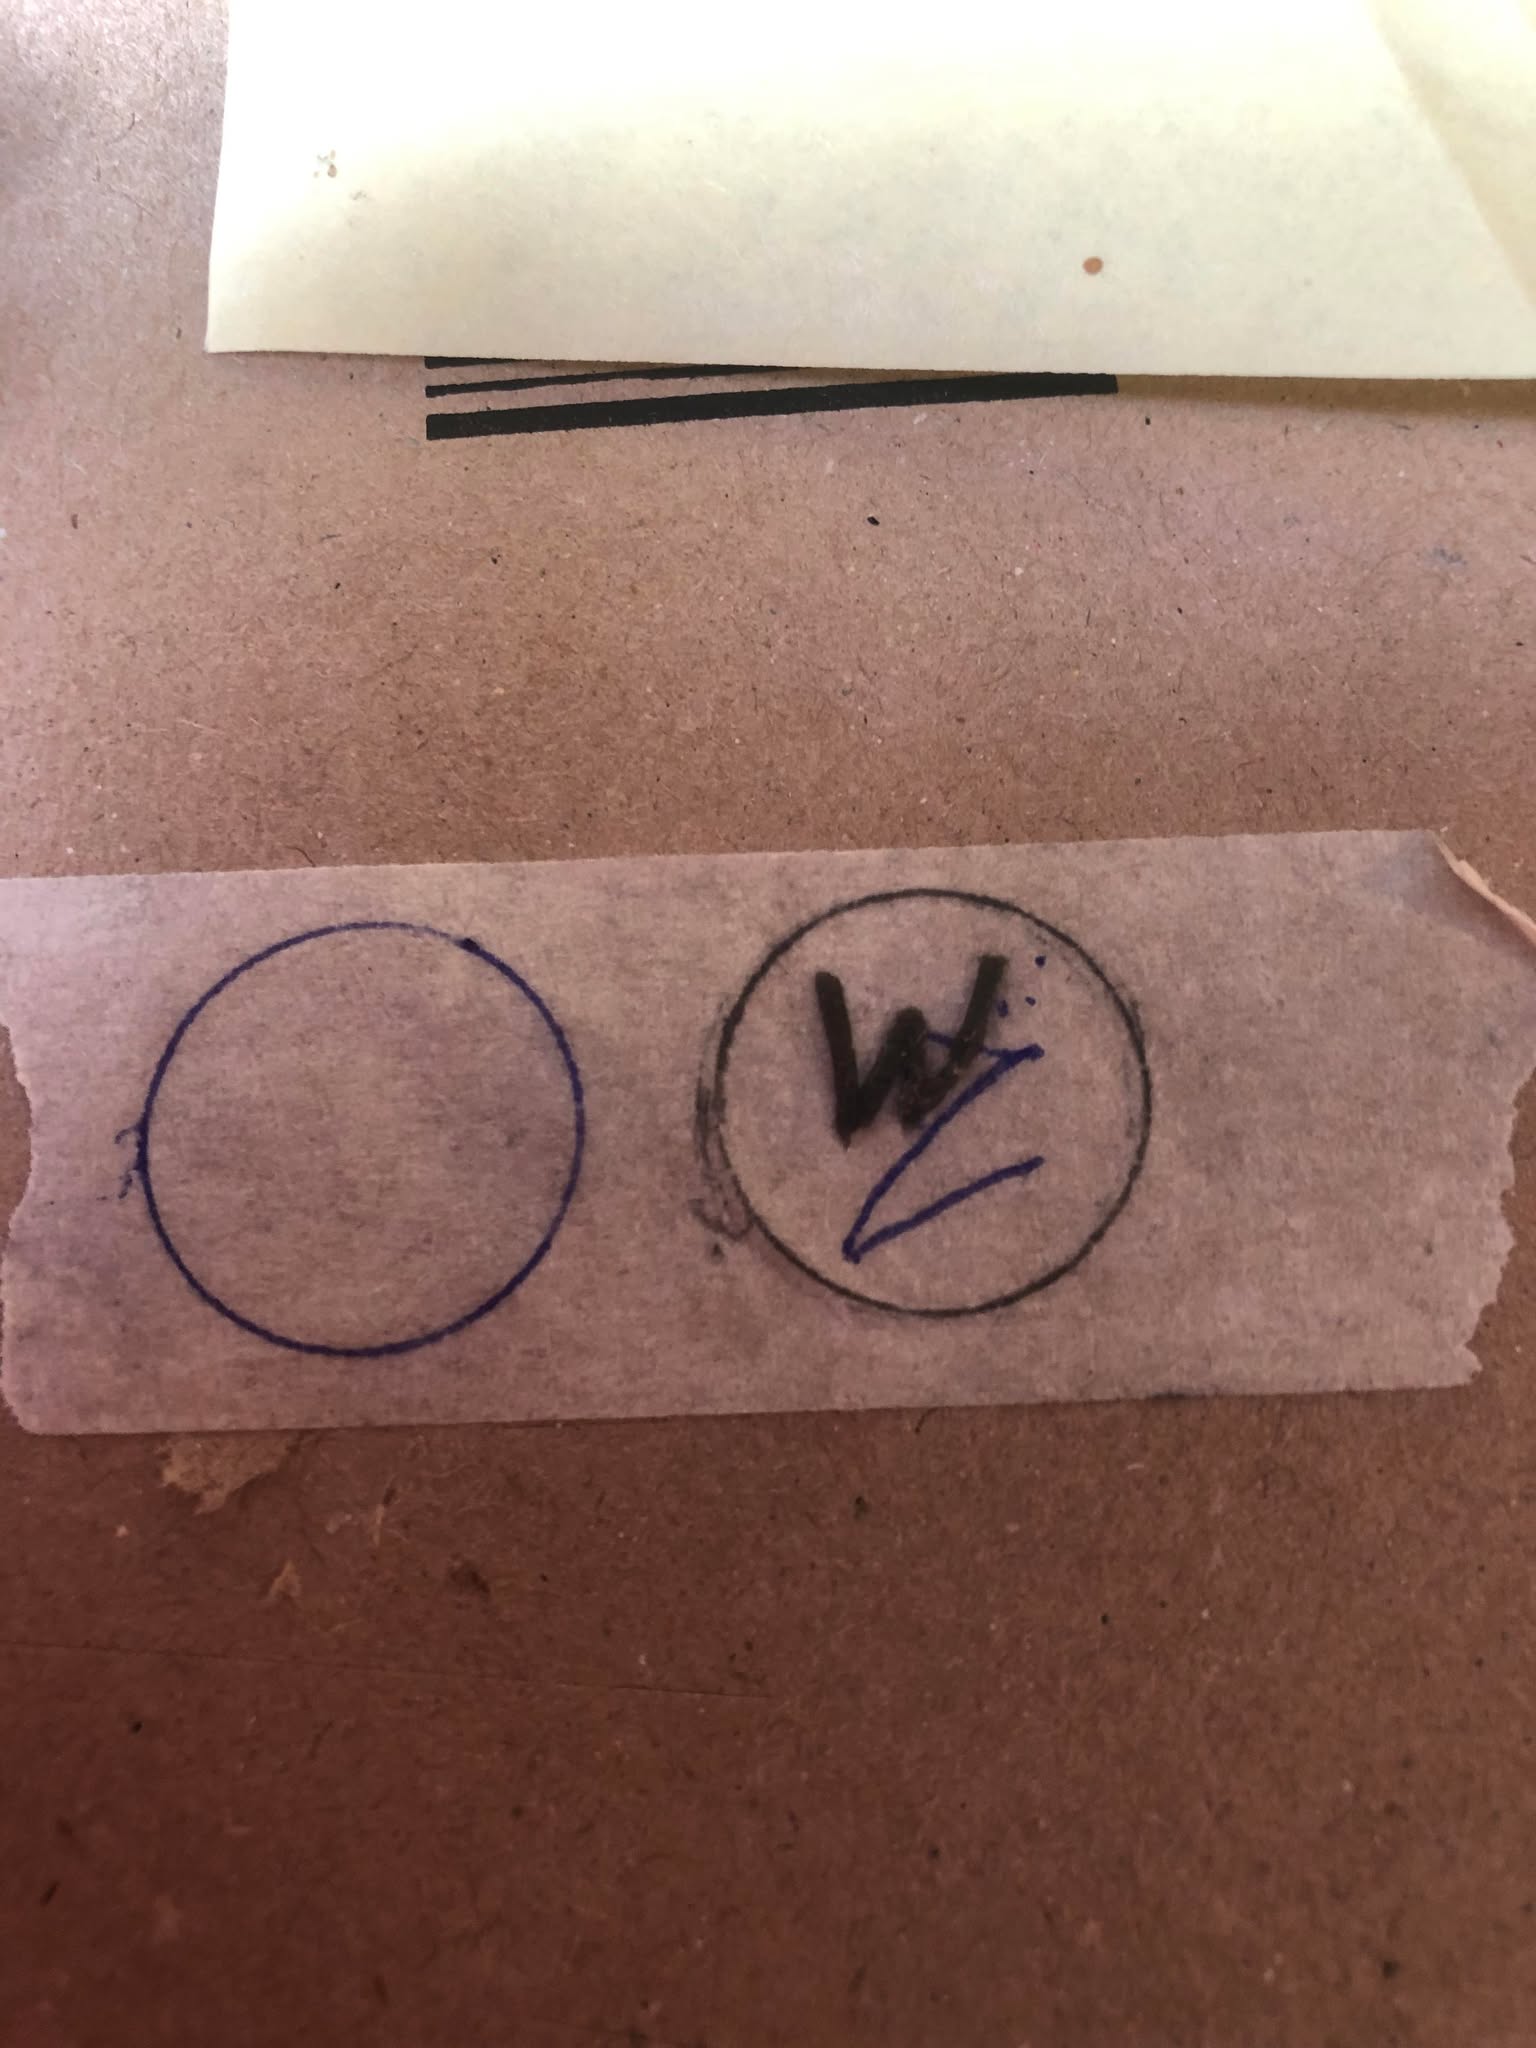
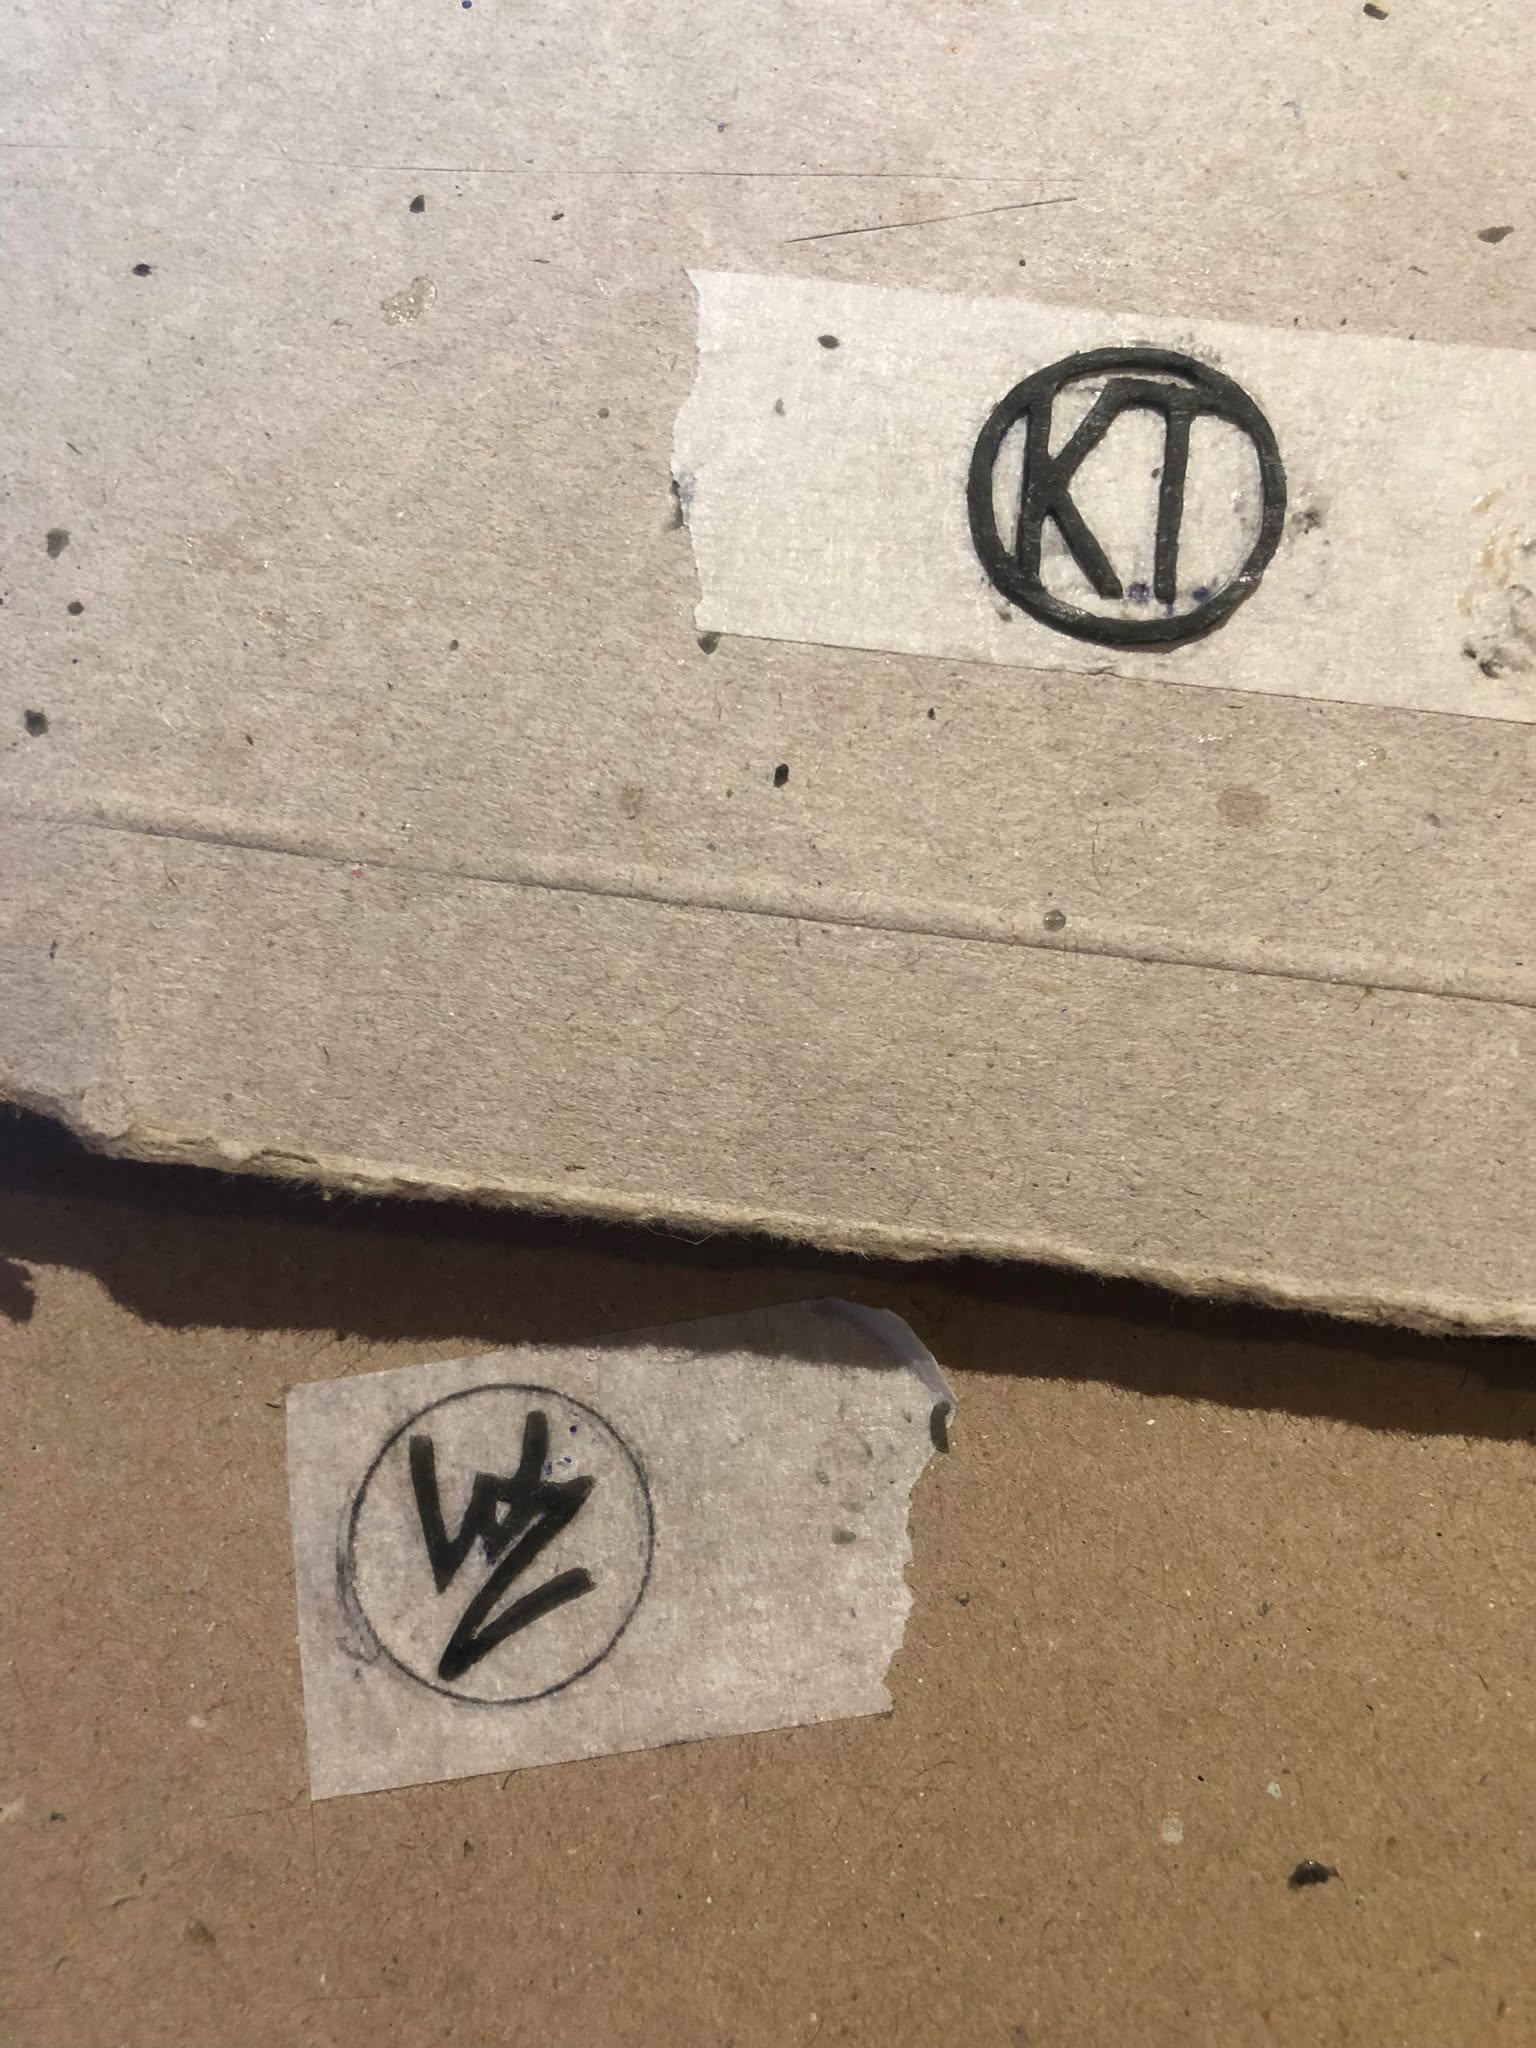
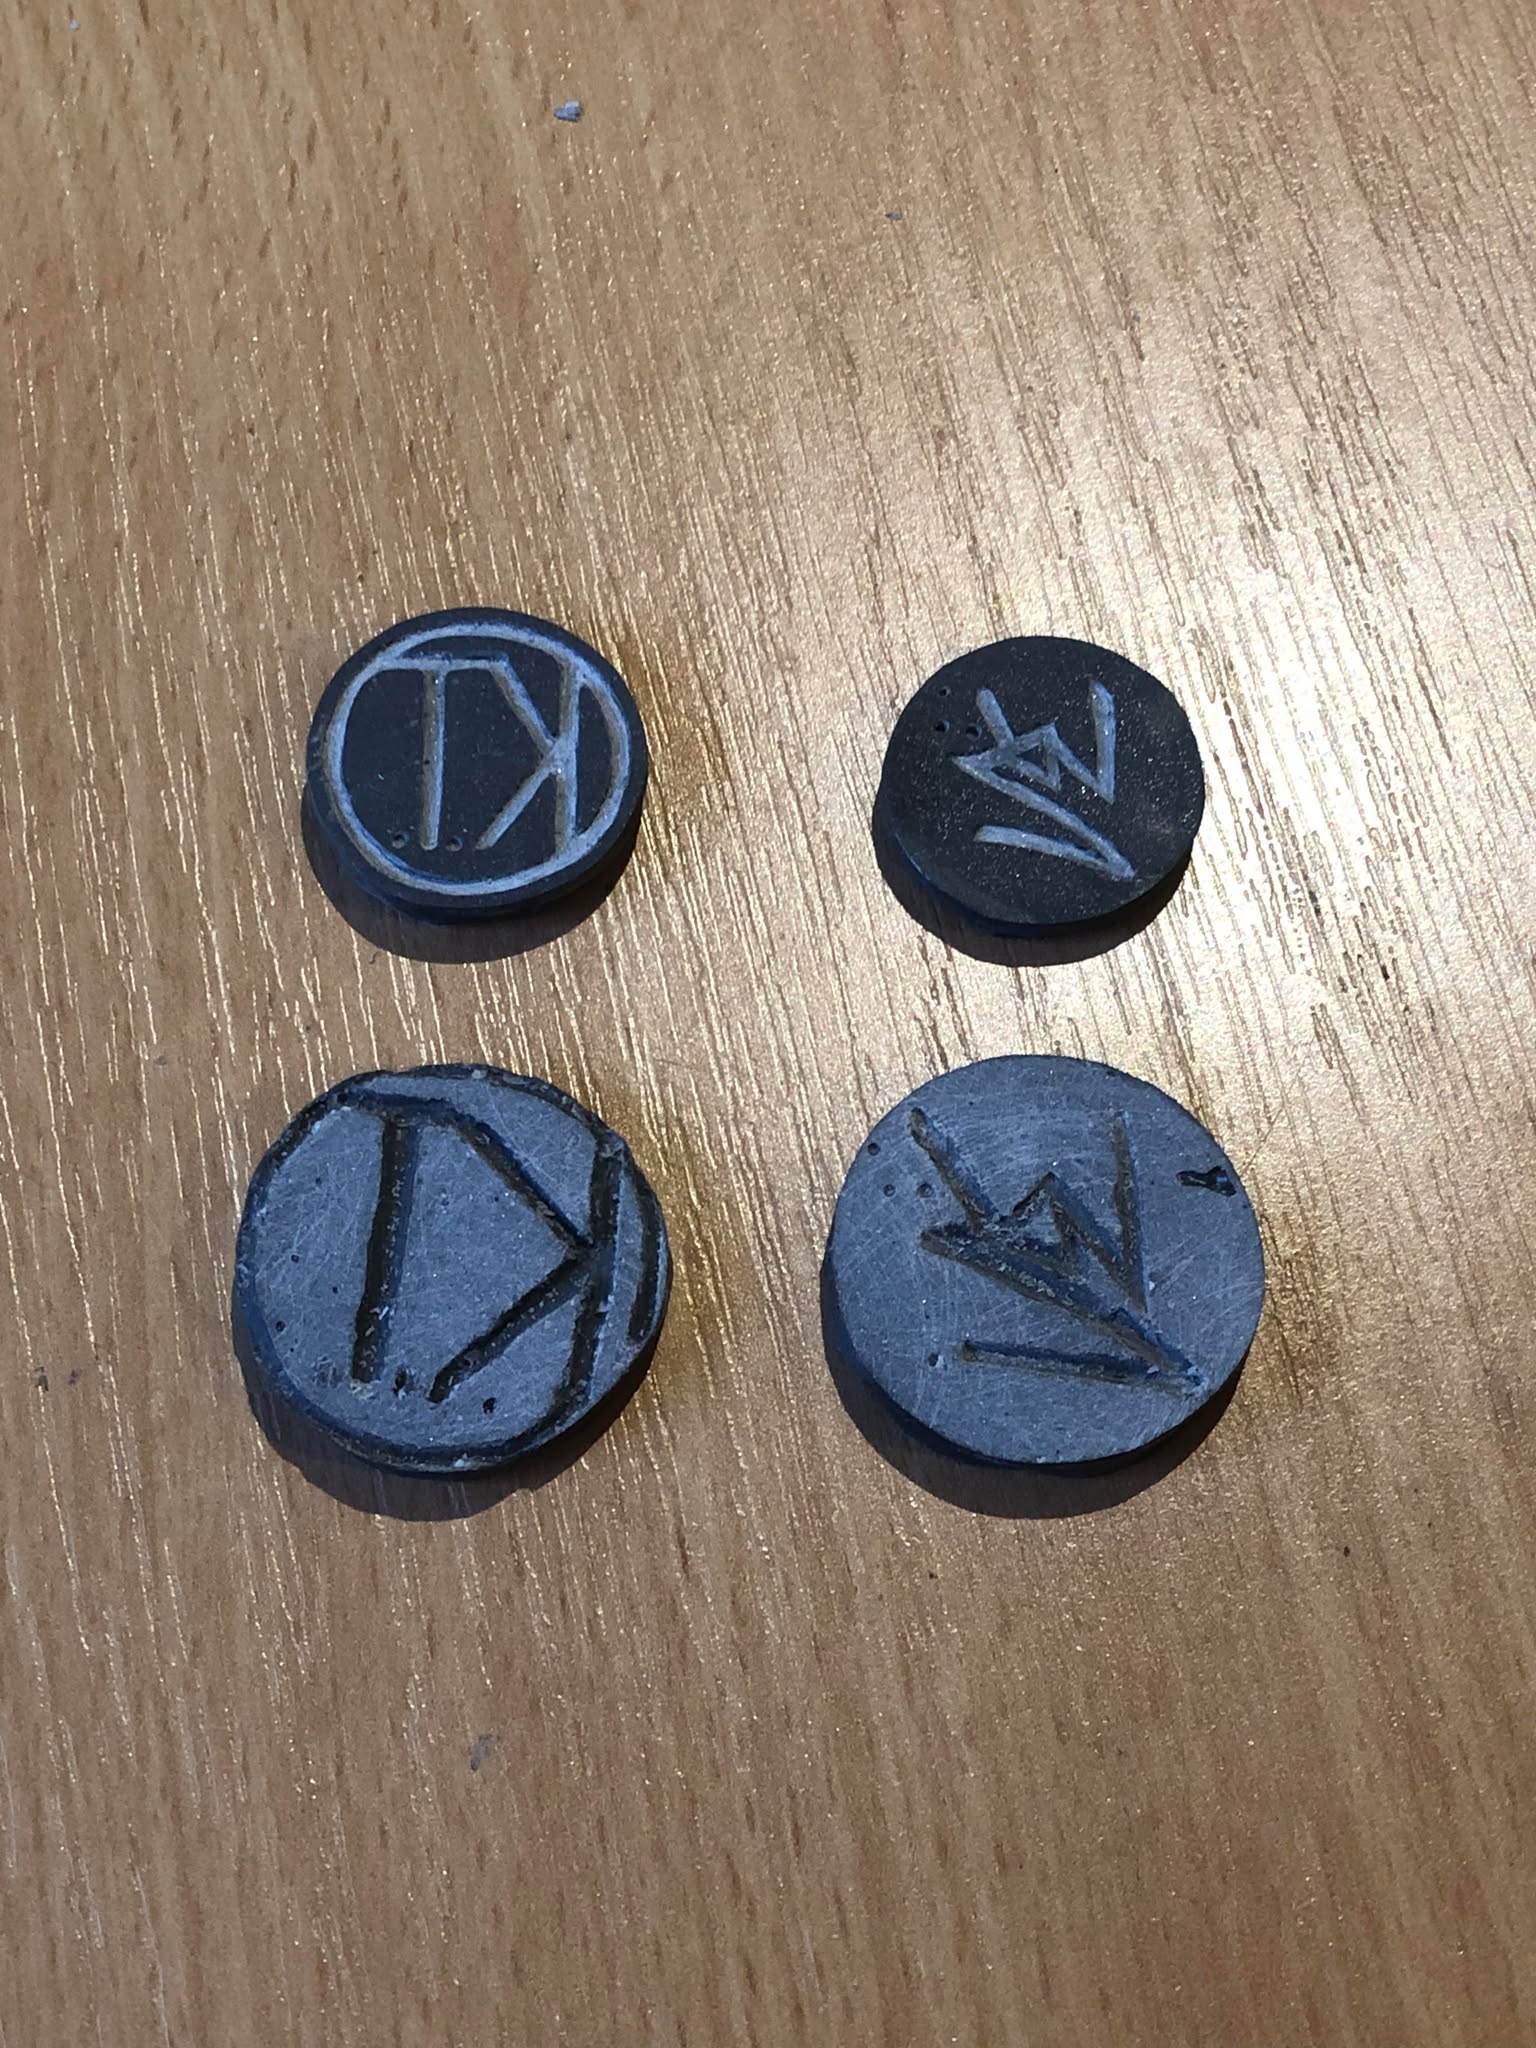
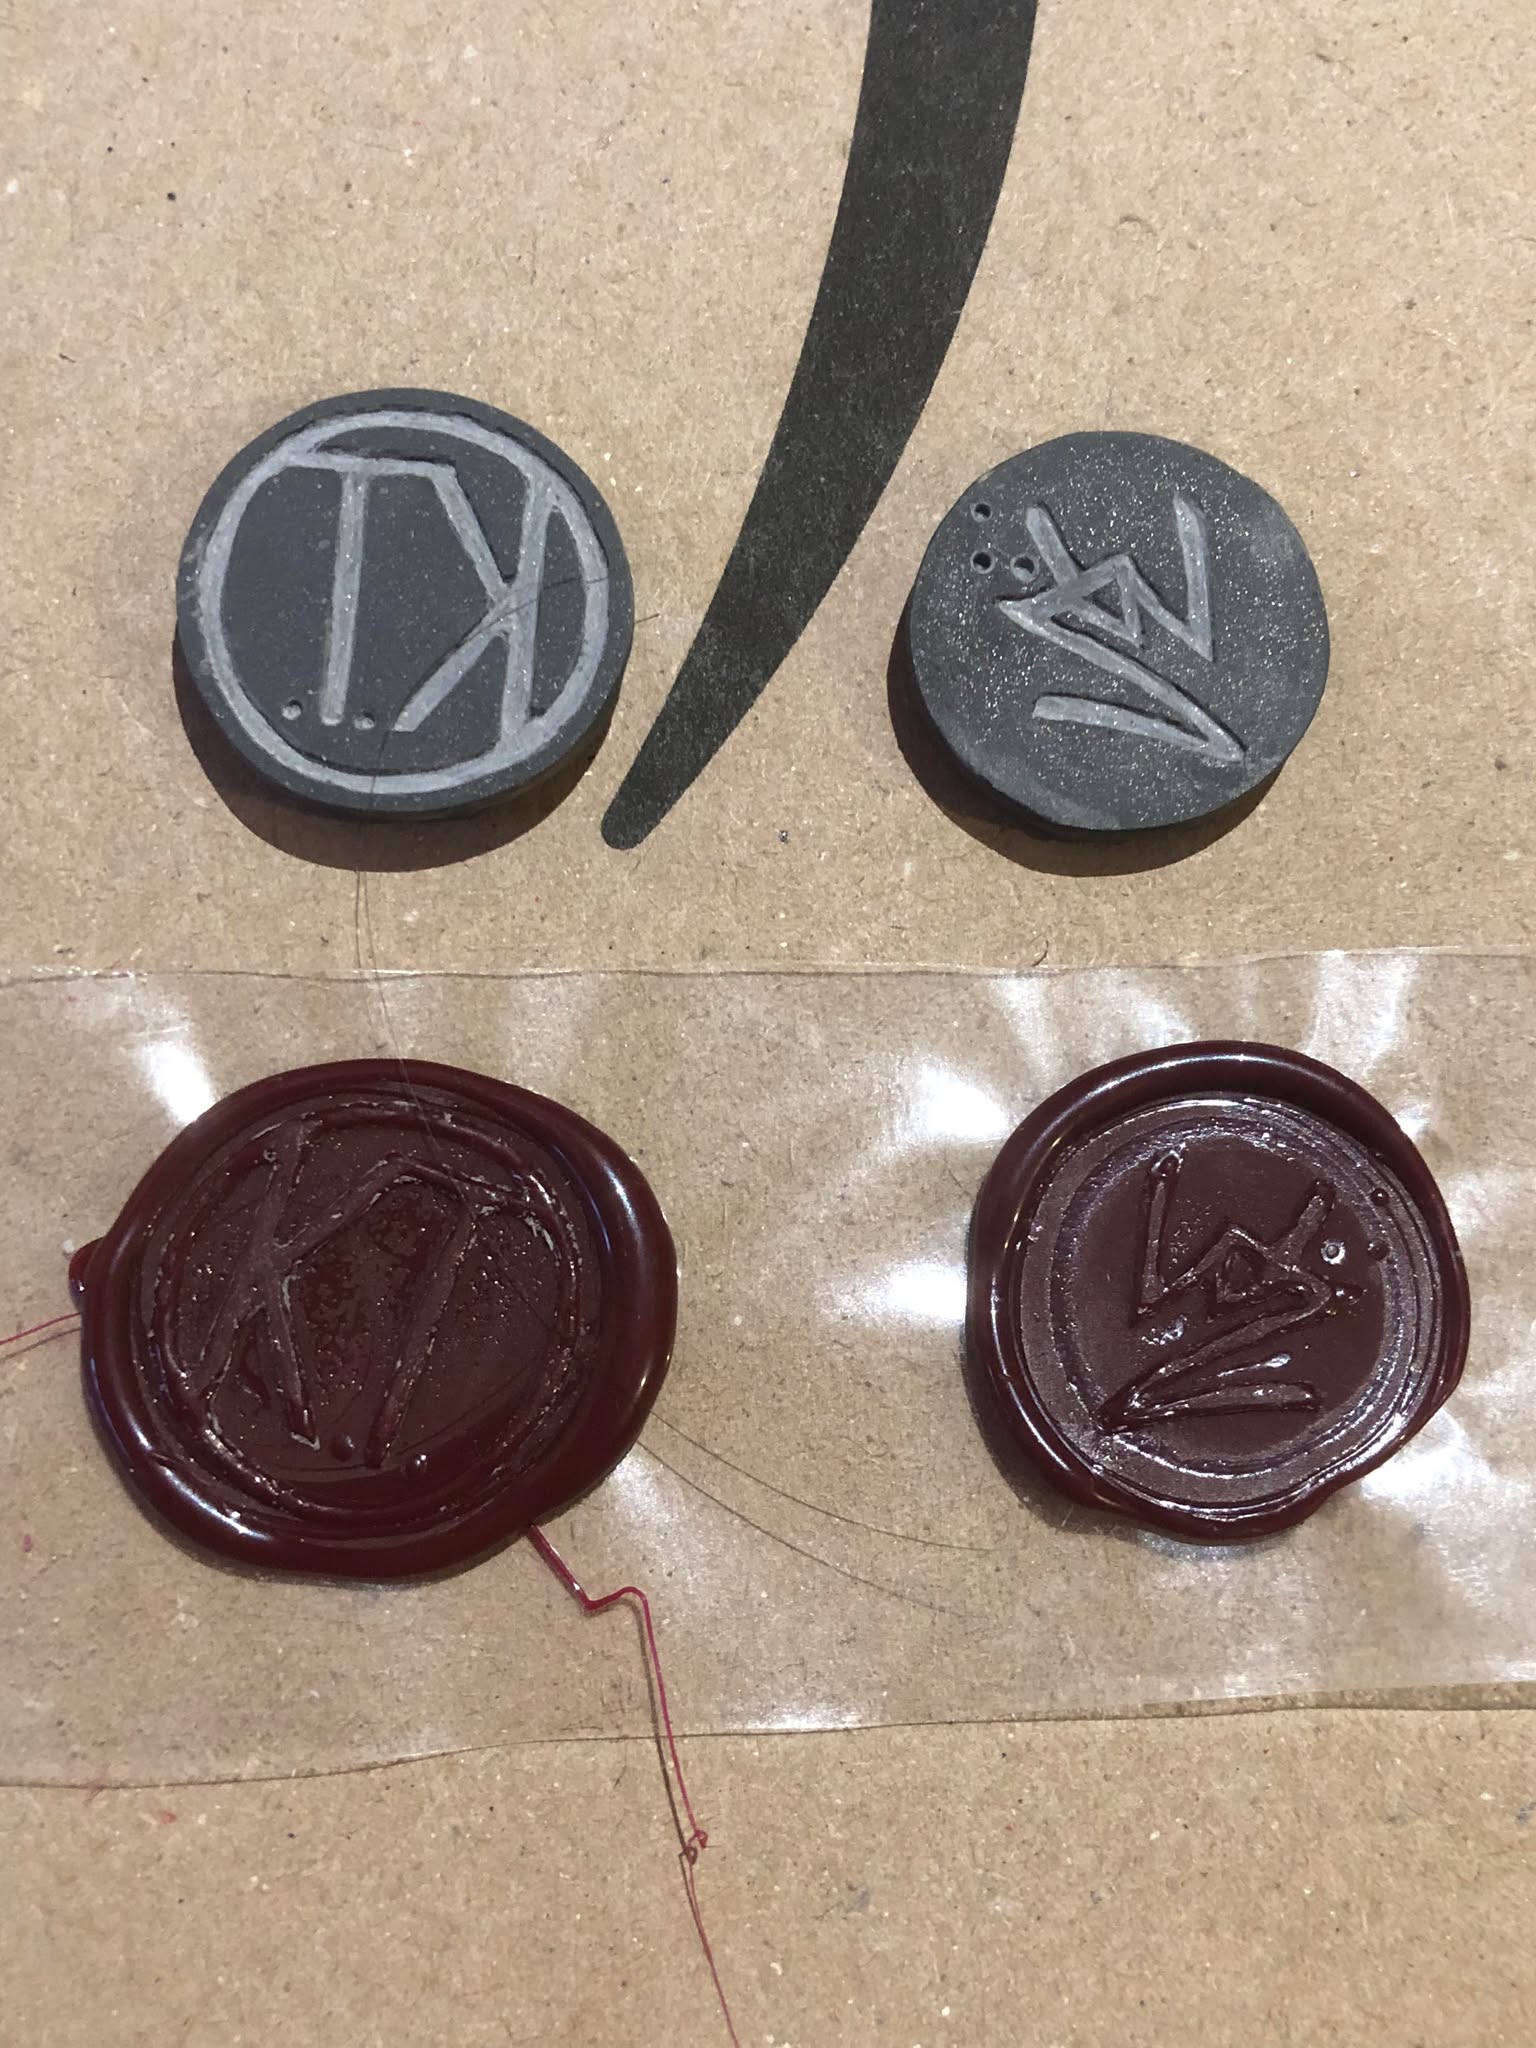
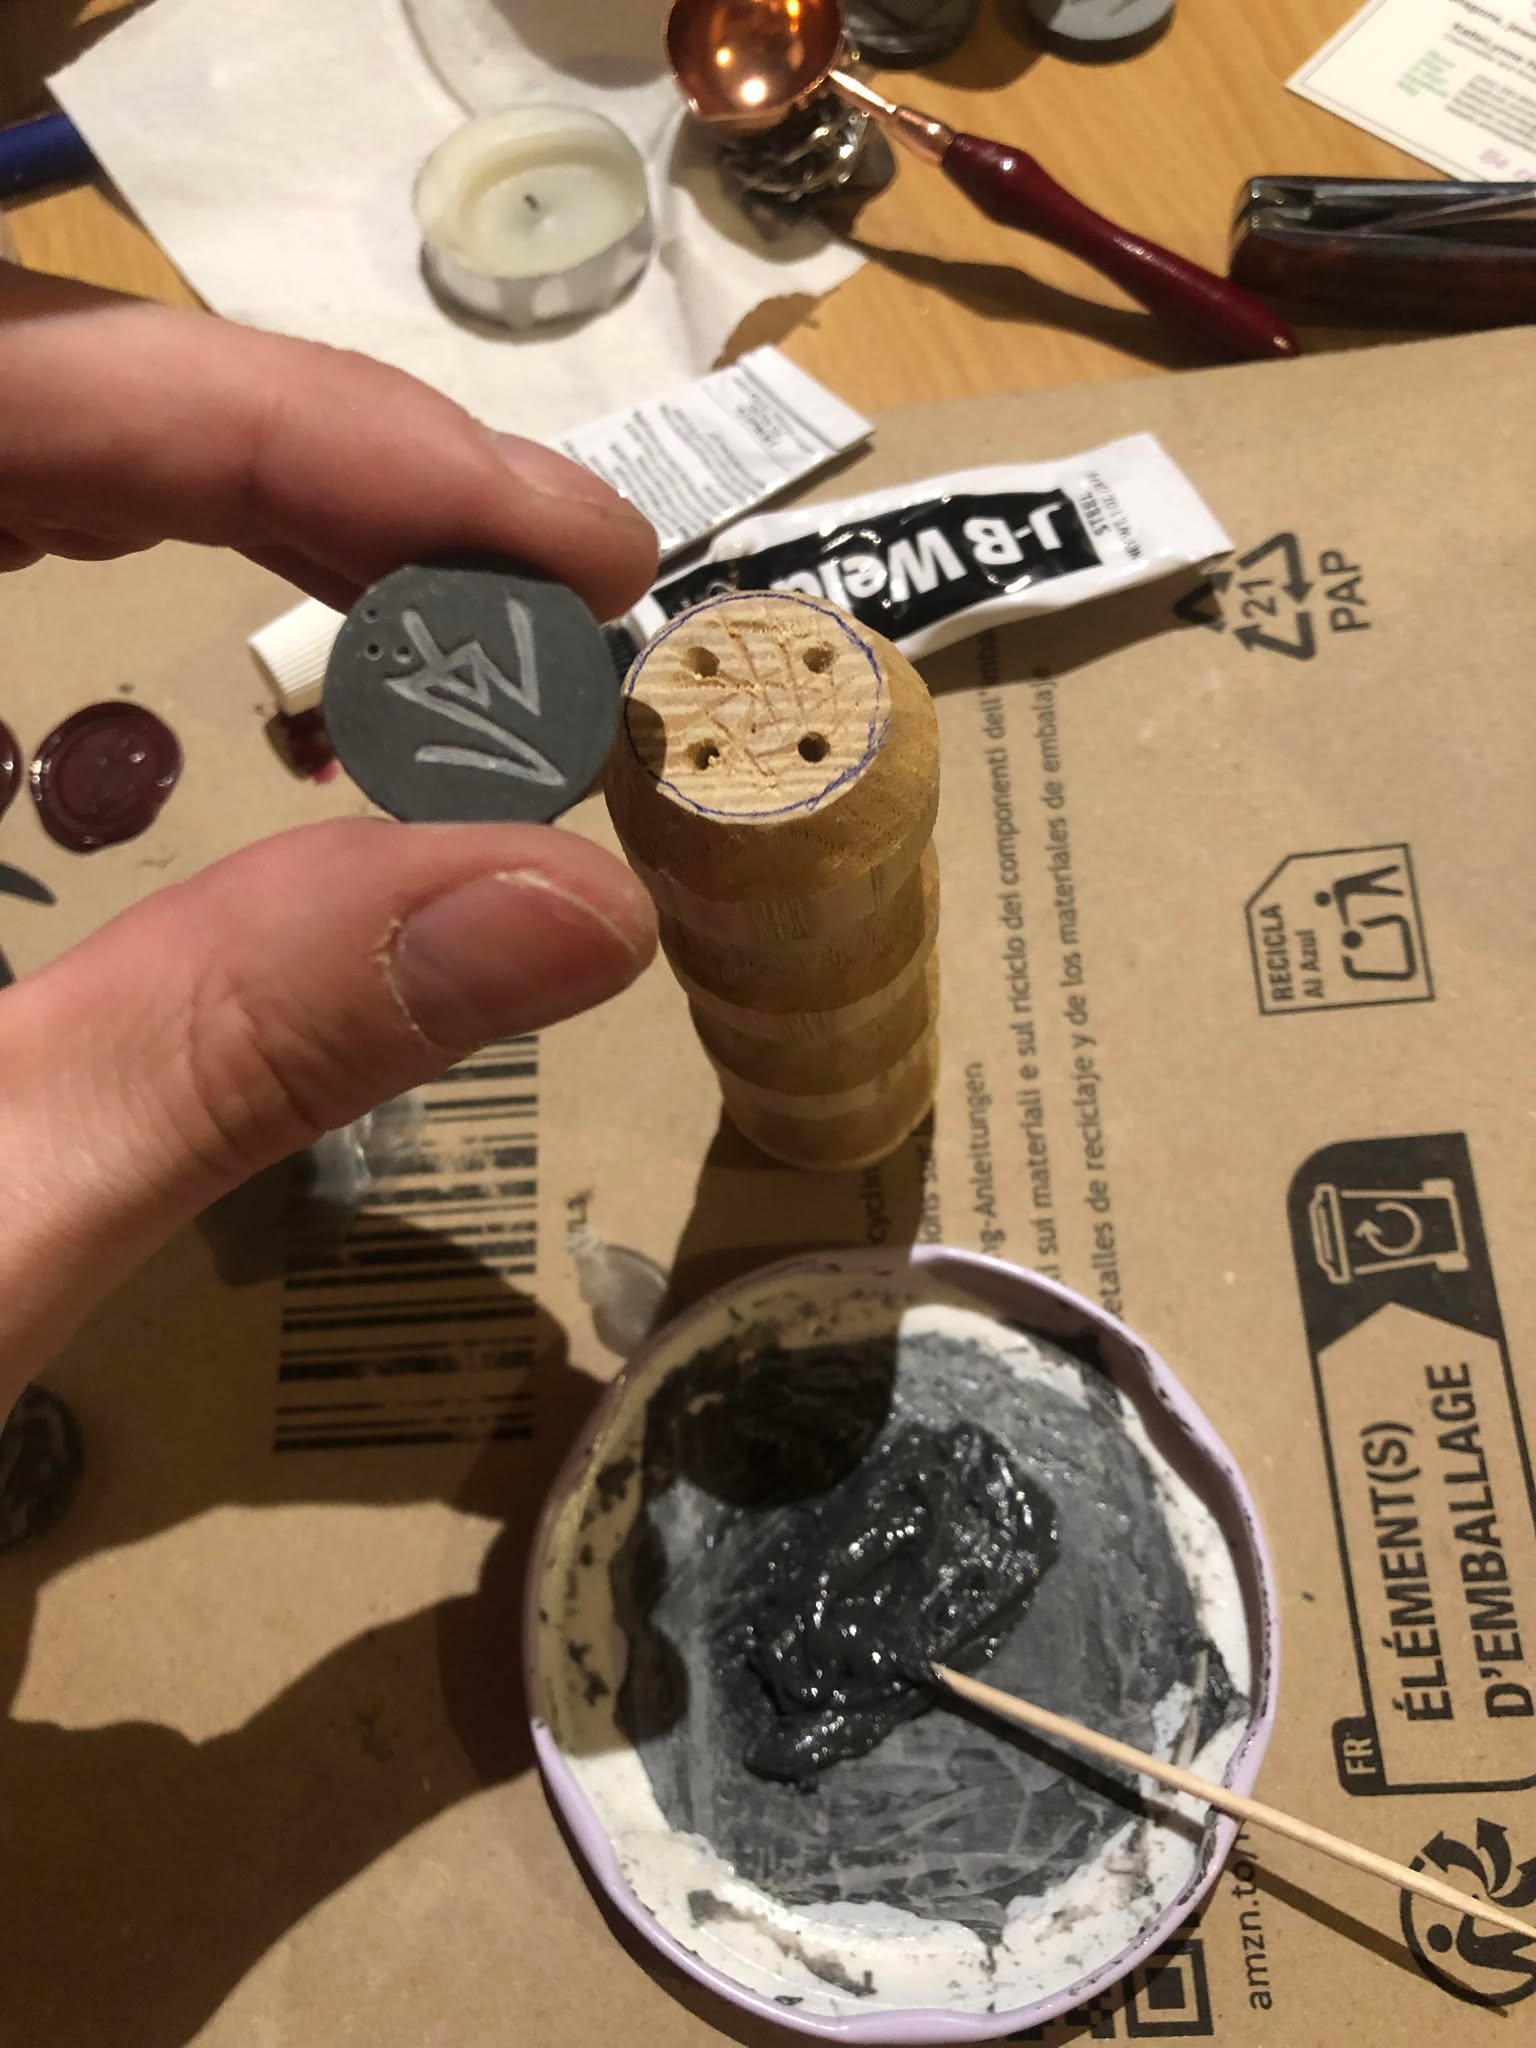
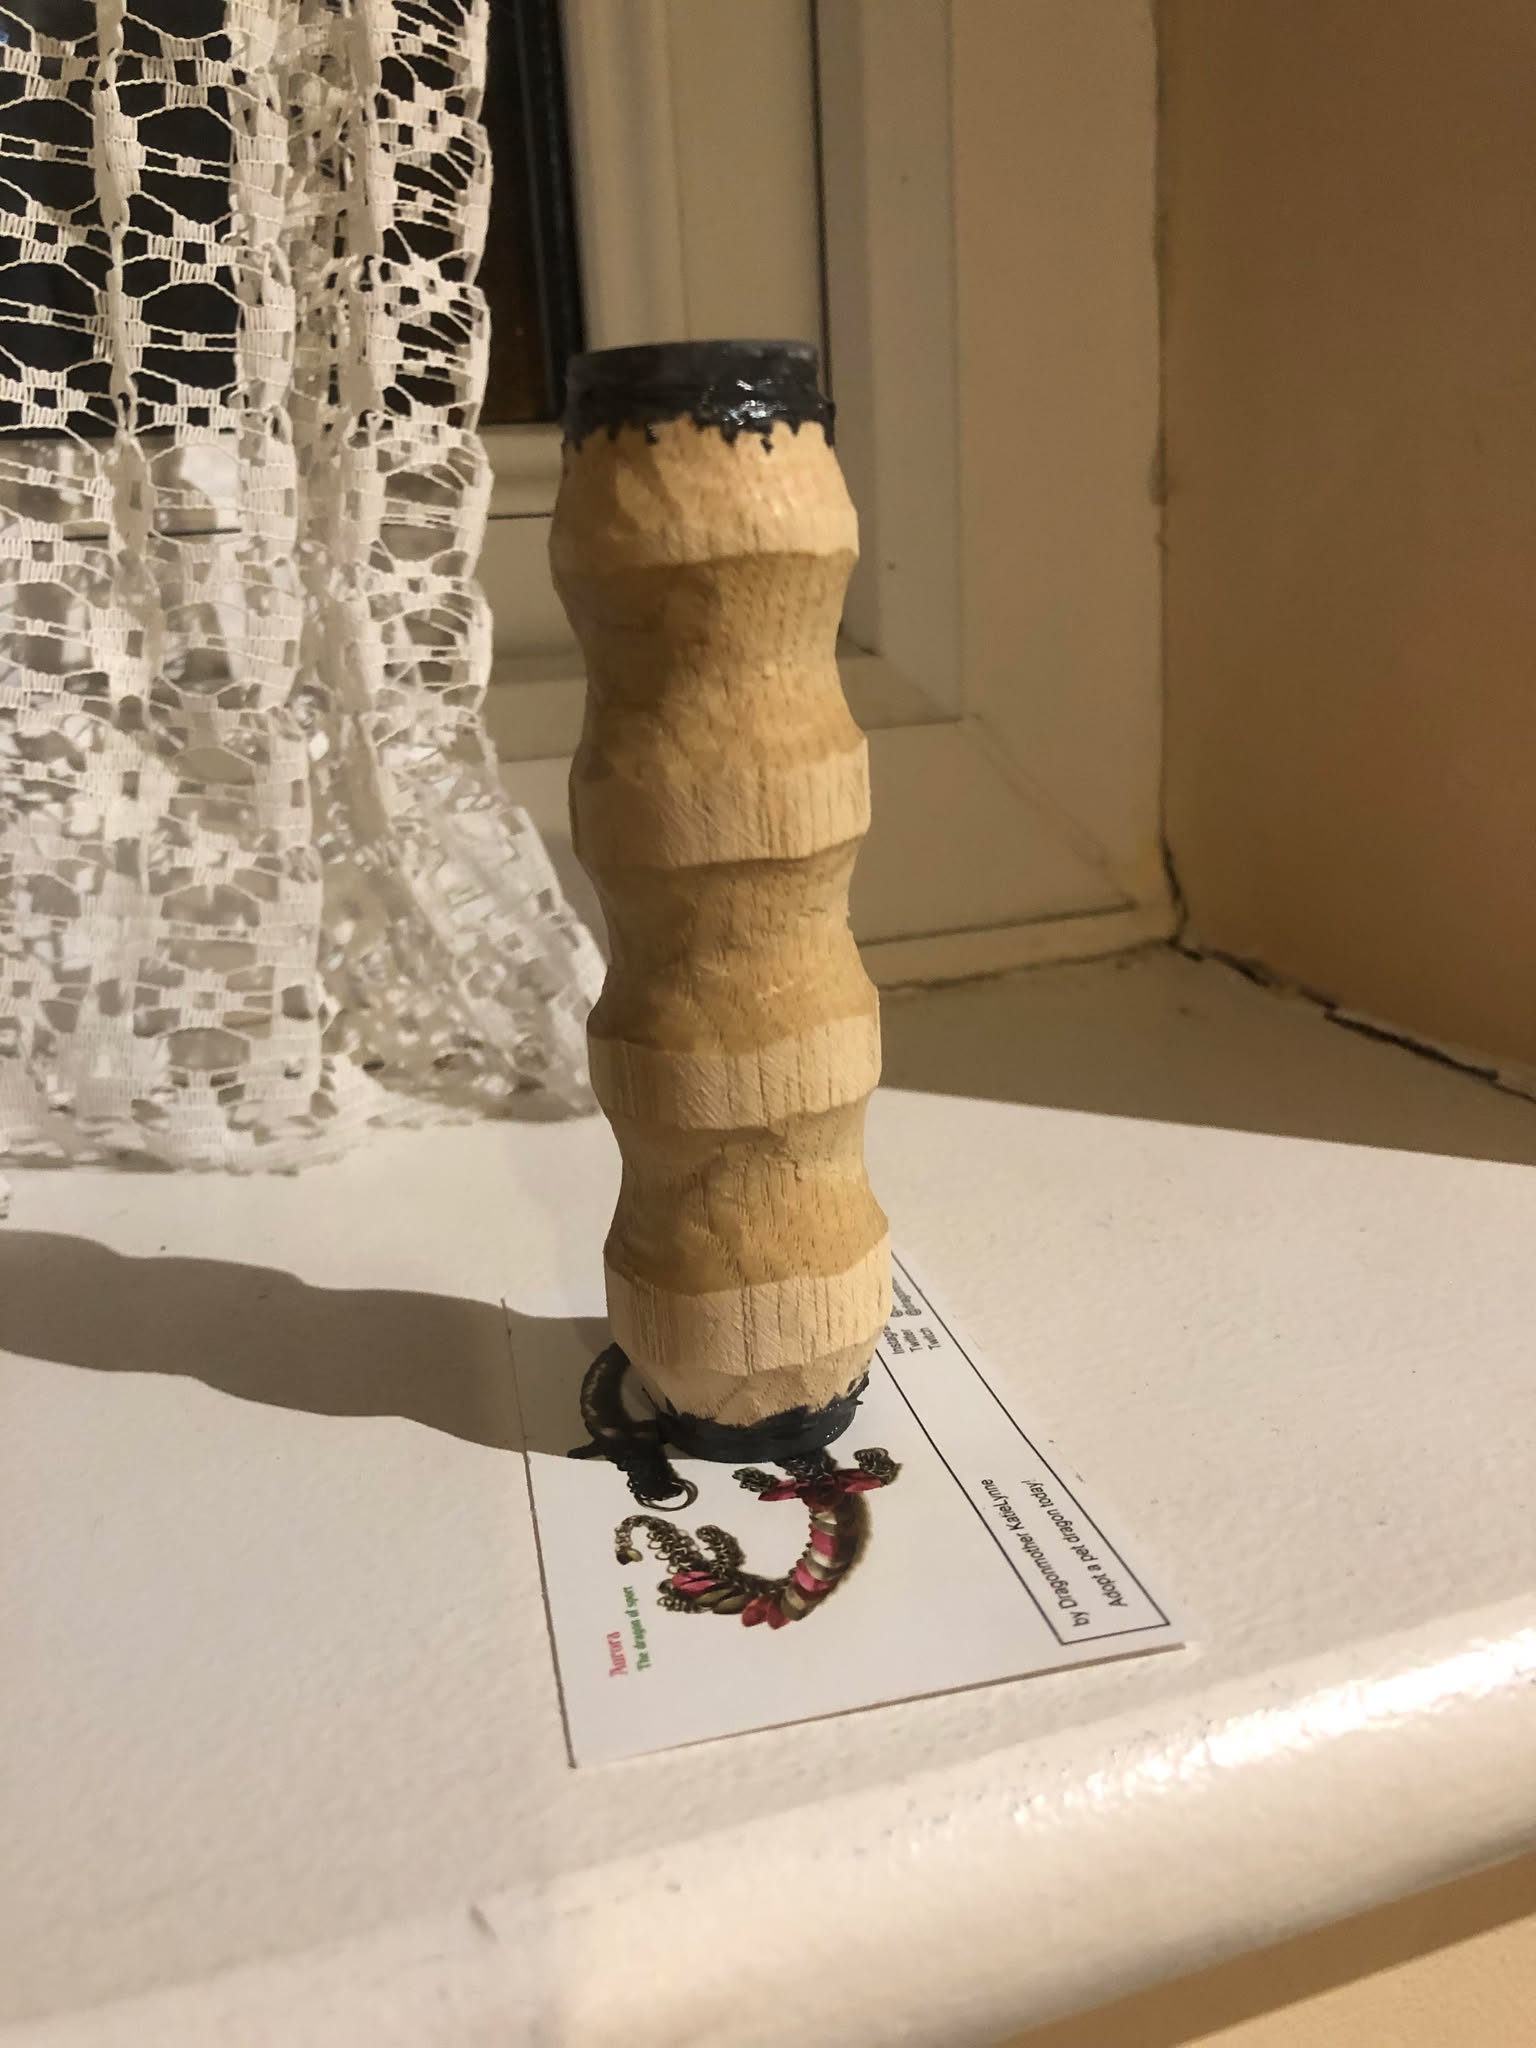
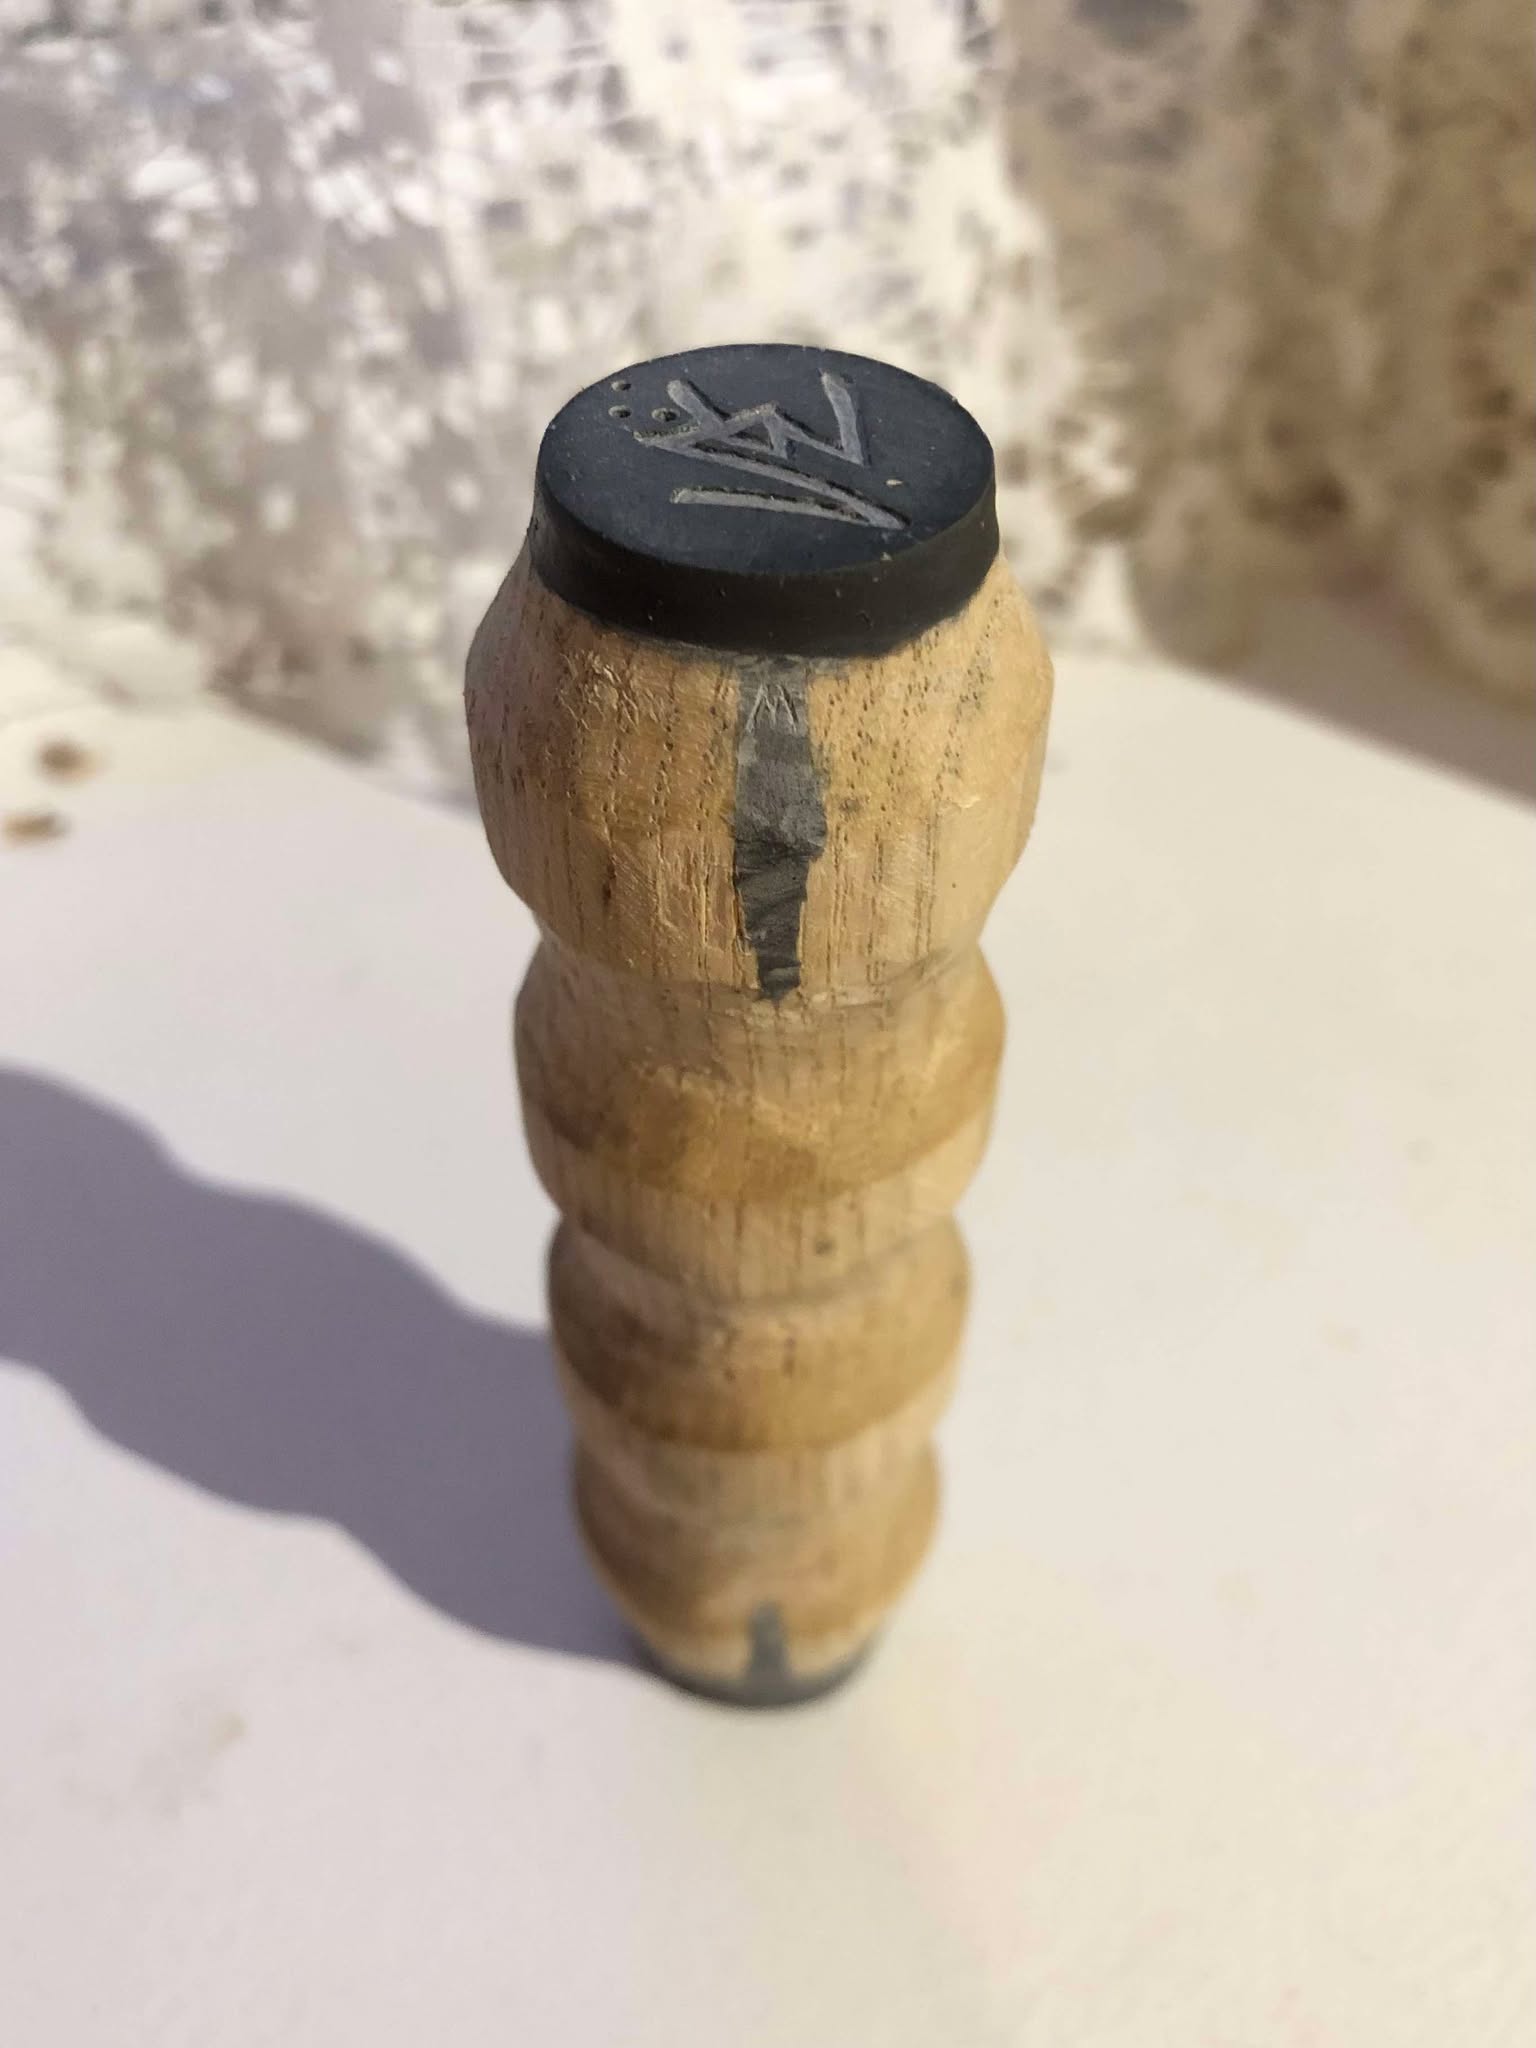
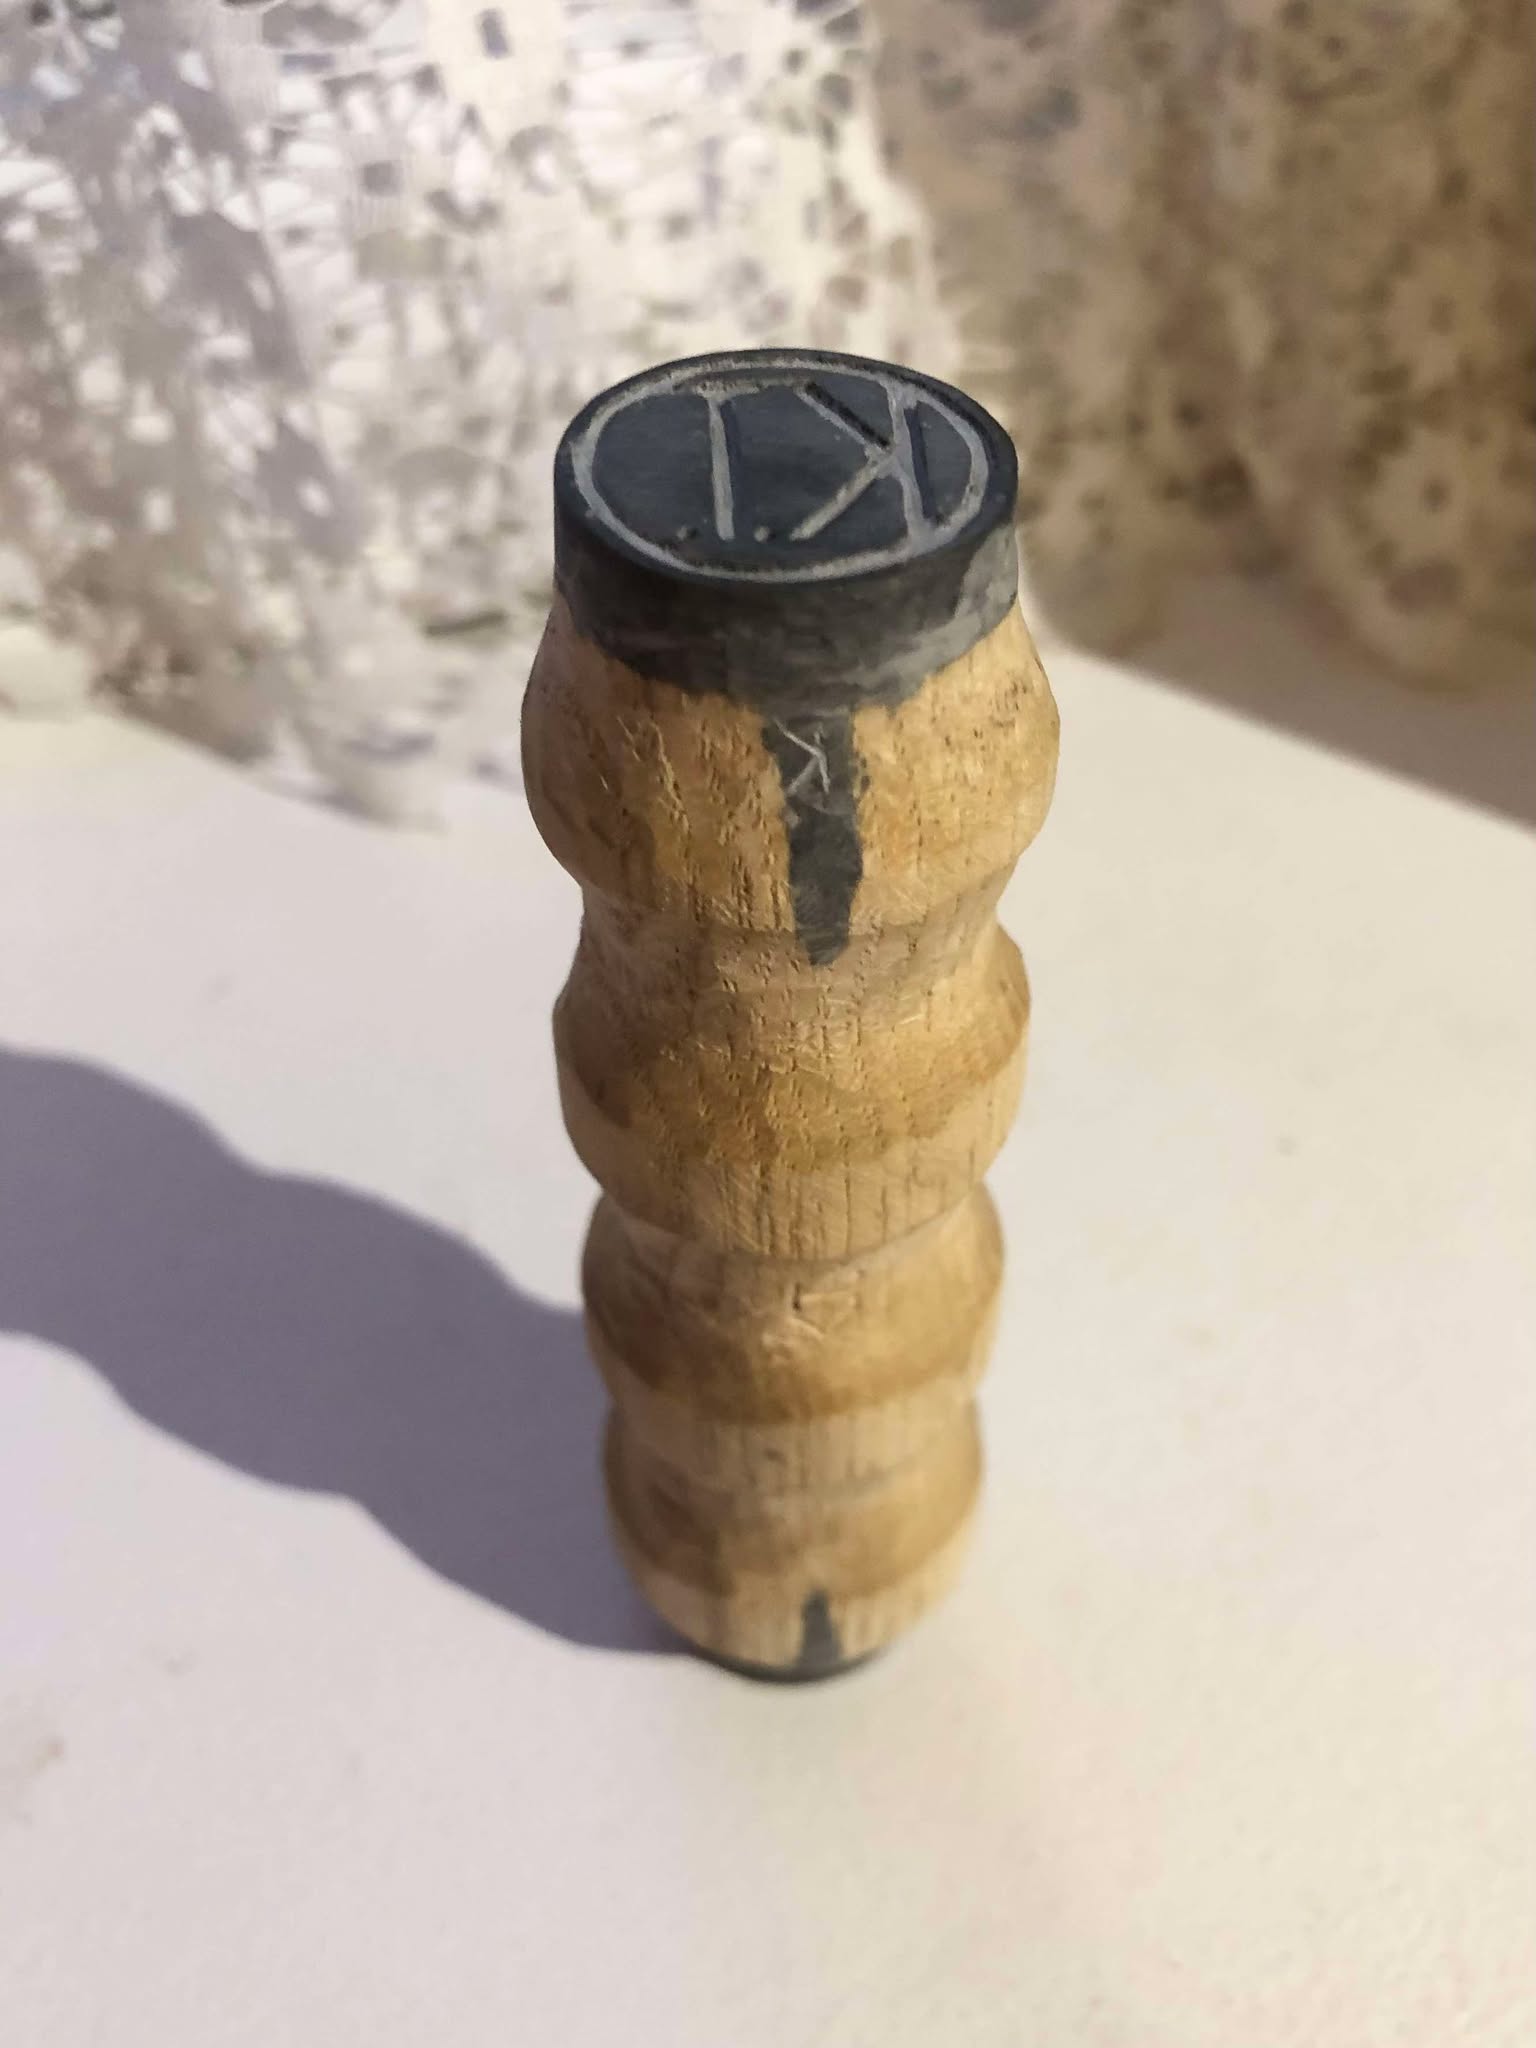
Now, I'd debated whether to try carving into a block of JB Weld, or how to carve the reverse in silicone or something, then put wax in there, then JB Weld over the wax, and quickly settled on just carving what I wanted the seal to look like out of wax, then putting JB Weld over that, and melting the wax out. So we meticulously (as we could) carved little circular disks of wax to look like how I want the seal to come out after stamping, and coated them in JB Weld. I figure that since I'm no longer using the name Thingies and Stuff, and the wood grain made that stick like mad to the wax (and also wasn't smooth), I could use the old wooden dowel as the main handle to attach the epoxy stamps to. Aaaaand I didn't like the result. Lines were uneven, the stamps were just overall too big, we've gotta start over with better wax. Cue the beeswax (from my pysanky painting kit. Oh WOW this works so much better! Precise, crisp lines, I can add or remove bare slivers of wax as needed, I can use the pysanky kistka to draw more wax in where needed! Ooohhh, so we made some stamps that are FAR more precise, like a centimeter smaller (one-pence sized rather than two-pence sized), and far cleaner and smoother. This'll do. Now, to avoid missing getting JB Weld into the corners and crevices, I sacked a paintbrush to paint the epoxy into all the little spots, and left that to dry. Now, let's see how round 2 comes out... And the verdict is... SUCCESS! Oh my goodness, bees wax was the key, the lines are CRISP, and since I used a brush to add the JB Weld, there was virtually no bubbles! There were a few tiny ones, which were filled with sanded JB Weld powder and crazy glue, and the face was sanded smoooooth as silk with 600 grit sandpaper. The insides of the lines, both to even them out and remove the remainder of the beeswax, we carved/scraped flat with a sharp carving knife, and now the insides are smooth as silk too (and visually looks incredible now, with the light grey linework and the dark grey background. And on testing, it came out BEAUTIFULLY! Nice crisp lines in the wax, eminently readable, there's some residual dust from the build process in the text wax seals, but they came out nice. With a little bit of practice, they will start looking poif. Added bonus, the Wizards and Zounds stamp, when held at an angle, looks like a VE for vegan :D Last step, attach them to the wax seal dowel! We first of all hacked off the face of the old dowel a bit, because evidently it was cut fairly unevenly originally, so we made that level, and narrowed the faces to better fit the new stamps. and carved some grooves in the faces to add extra surface area for the JB Weld to grip into. Also, we put four holes in each side angled inwards, to fill with JB Weld as well and make sure it can't just pop off of the wood face. So with that extra support added in, we added a layer of JB Weld to the back of the stamp and the face of the wood (really filling up those angled holes), and pressed the two together, and stood it upright to make sure that both the top and the bottom were perfectly level. Also, I made sure that the stamps are aligned exactly the same on either side, so on the dowel I will be able to have a top and bottom indicator to make sure that it's stamped straight. And that's exactly what we did after the initial drying, we carved in some indicator marks at the exact bottom of the stamps, filled them in with JB Weld, cleaned them up and filed them level with the wood, and cleaned up the lines between the wood and the stamps. There's some slight darkness differences between the sides of the two stamps, but that's because the WZ didn't have enough epoxy added initially and needed another seam, so we added that and I decided against filing it down only to "change the colour slightly". The side of the sigil already has some minor colour differences in itself, but it'll just make it uneven if I try to adjust anything further, so I can live with this. The differences will help me tell which side is which at a glance, at which point we also etched a small W and K into the appropriate indicators, to let me know absolutely sure which side I'm stamping with, since that's facing towards me. And so, with that little bit of indicator etching, the wax seal stamps are done!!! Completed April 12, 2025 |


