Instructions to create Wilbert Weave
Created in honour of my late father, Wilbert Harder
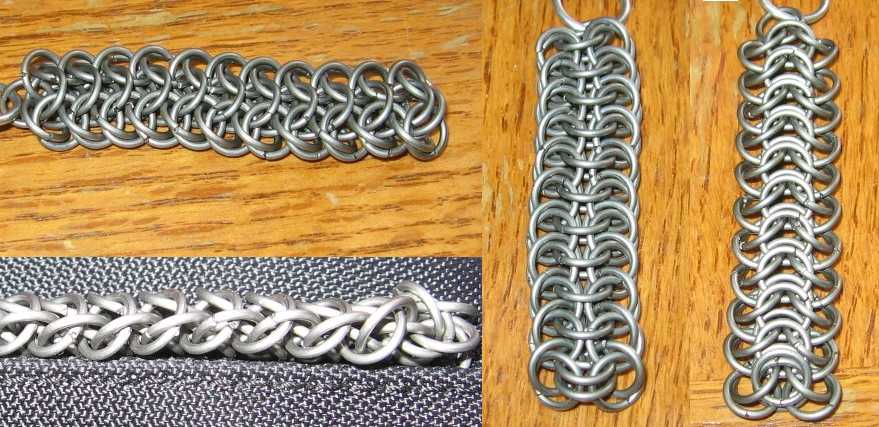 Here, we will learn a weave I created in honour of my father... Wilbert Weave (that being the name of the weave... the father is just "Wilbert" :P ). You can find the weave on Maille Artisans here. I find it easiest to describe it as one side being E4-1, and the other side being... something entirely different. I'm pretty sure it's some mix of persian and double-maille somehow. It's curved on the E4-1 side, and flat on the other, so it makes for a good bracelet or choker weave. Nonetheless... the weave shown here was made with titanium 18ga, 3/16" rings. Anything larger should be possible, but it will just keep getting looser. Try to keep above an AR of about 4.0, otherwise it will get too tight.
Also, ignore the very large ring in the pictures in this article. It was placed there to temporarily be able to easily hold and move it around.
Step 1:
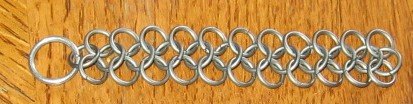
First up... make a strip of European 4-1. You can continue it later, or just make it a little bit longer than the full size you want the Wilbert Weave to be.
Step 2:
Now we're wanting to add an additional ring above the center rings in the E4-1, hooking to only two of the outside rings. Basically, as if you were making one strip of Double Maille 4-1 (see Maille Artisans for instructions and definitions if you don't recognize some terms/names).
Step 3:
Complete this pattern all the way down the E4-1 strip. Just follow it like the picture and you'll be fine. As long as these new rings only go through two side-rings, you're good.
Step 4:
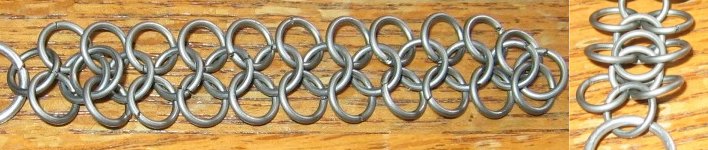
Here's where it can get tricky... but if you have a strip several inches long, it makes it easy to hold and work with. Basically, we want to put a ring through two of the center rings we just finished adding, going up-through the bottom-side ring, and UNDER-through the top-right side ring. It's usually just easiest to get this first ring to look like the right part of the picture below.
Step 5:
Complete that all the way down the side. Once you get the first few, it makes a lot more sense. After about ring 4 or 5, if you had problems before, you'll wonder how you did after this point :P
Step 6:
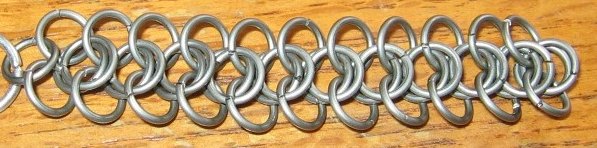
Just like step 4, except we're doing the other side now. If you're wanting a 'vertical' picture, just take the pic from step 4 and mirror it in mspaint or wherever :P. But same theory... up-through the bottom-side, around-through the top-side, and just... through the two center rings.

Step 7 (final step):
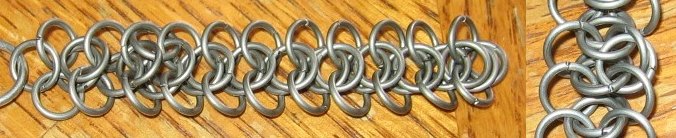
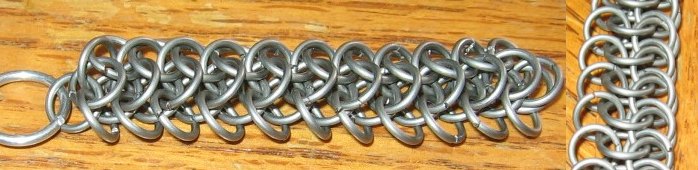
As in step 5, complete the side. Once you've got that done, your weave is complete! Below are pictures of the non E4-1 side (top-left and vertical-left). The vertical-right picture is what the E4-1 side should look like, and the bottom-left is the side view of the weave.
And there ya go. If using an AR of 4 or higher, it will have enough flexibility to work with either side facing upwards. However, since one side is flat and the other side will curve, it tends to make sense to wear it with the flat side towards your skin... but it's not like this is written in stone here. Generally, it has the advantage of being useable where a flat side is preferred (belt, hat-lining, etc), but will show a curve on the outside. This is the first weave I've created, and quite likely won't be the last.
