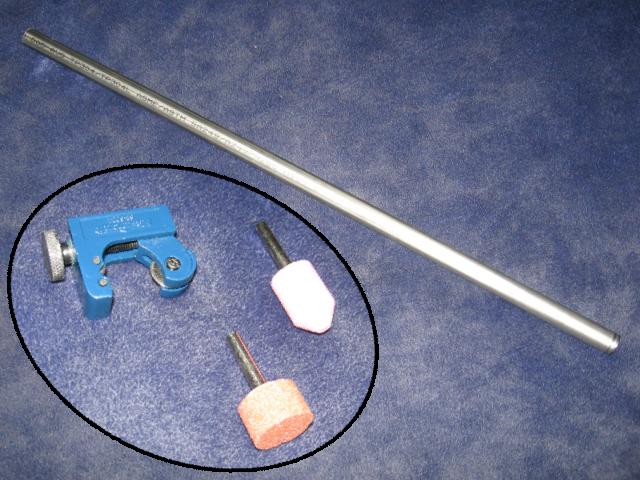
| For the longest time, I've been on a quest to find an actual stainless steel chainmailing ring tool. Unfortunately everything is just coated brass. Even those advertised as stainless steel were just stainless-coated brass. The reason for my wanting actual full-stainless is that brass turns my skin green (since I like wearing it as a pinky-ring, where it fits perfectly, and means I always have half of my chainmailing tools with me). Eventually, the coating wears off, and then... yeah, my skin will turn green underneath. Brass (an alloy of copper) will corrode from the sweat on your hands, under your ring. Corroded copper is green. Thus, being pressed against your skin on the underside of your ring, your skin turns green. After much searching, I FINALLY found a place that sells the exact right size of 304 grade (a common, high-grade) stainless steel pipe. 2 feet of pipe, a pipe-cutter, and some grinding tools later, and I'm on my way to not looking like my finger has gangrene :P. | |
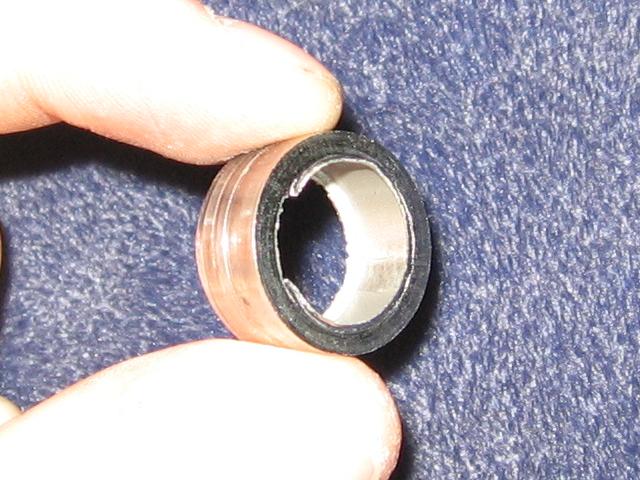
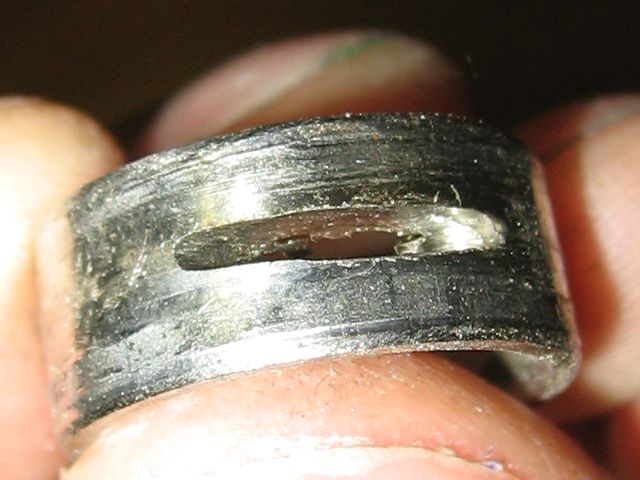
| Pfft, made for copper and aluminum pipe only my ass. The tube-cutter indeed managed to cut through the stainless steel, but it wasn't very happy about it. I had to do a quarter-twist of the knob... which I could only accomplish with some pliers... and rotate the pipe-cutter around a half-dozen times before another quarter-twist. For the purposes of having some "test rings", I cut off several. The very first cut took me about a half-hour, after which I refined my method slightly (a bit more twisting, holding the pipe-cutter differently, etc), I was able to do the last cut in about 5 minutes. However, as what naturally happens when cutting a pipe like this, we now have sharp burrs on the inside of the ring. Before I can do anything else, I've got to get rid of that so it doesn't slice my finger apart while trying to work with it. And the lines you see running all the way around the outside of the ring near the center are from the pipe-cutter's 'flat' roller pressing into the pipe. Nothing I can do about that, but oh well... no great problem. Half of that will be gone when I put the slots in anyway. | |
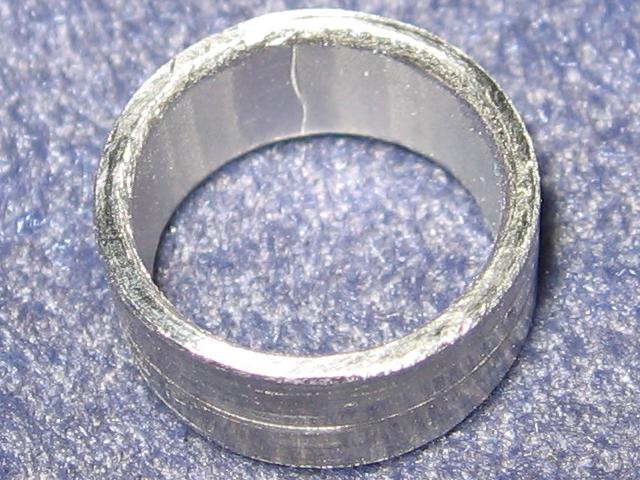
| And that's where the previously shown grinding bits for my drill come into play. Unfortunately, the 'flat' one didn't do all that much, and was basically a waste of $3. A flat metal file ended up doing more in regards to flattening it out and filing it down to the size that I wanted. The beveled grinding bit however... ahh, that was worth it's weight in gold! In about 20 seconds (broken apart a few times to quench the ring's heat in water), the inside edge of the ring was not only burr-less, but also tapered outwards to make a less sharp edge as a whole. I attempted to use the flat grinding bit again to taper the outside edge of the ring, but it failed at that too :(. Again, that task ended up going to a flat metal file, and me meticulously rotating and running the edge of the ring along it. Turned out quite nice in the end. No sharp corners = good for wearing as a pinky-ring. | |
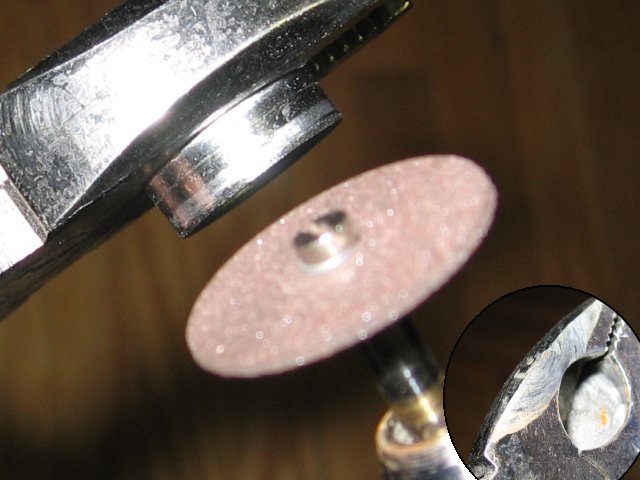
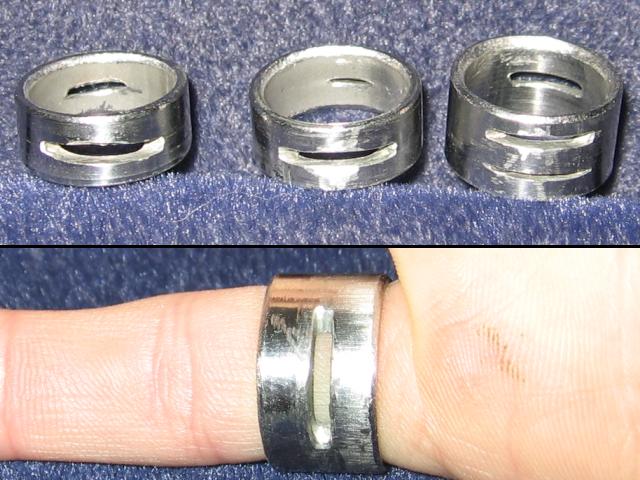
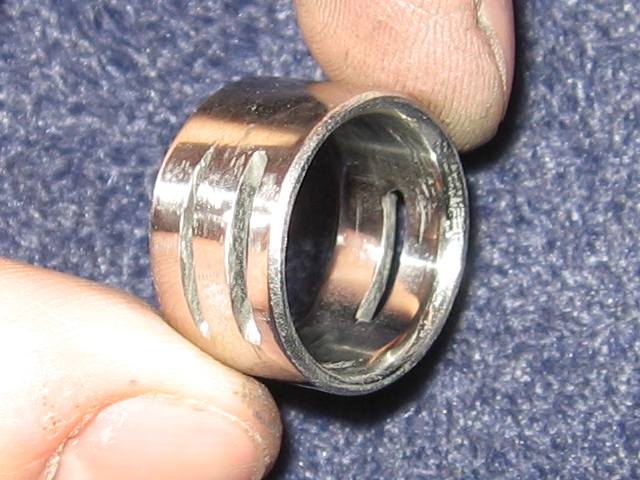
| Now comes the interesting part... making the chainmail-ring slots. Since I had access to a (small, handheld multi-purpose cutting tool), I figured that'd be my best bet. Unfortunatly, I've always had 'shaky hands', which I think I inhereted from my dad. This doesn't help when trying to line up a 1/64" wide cutting disk with a slot you started. Needless to say, sliding the cutting disk just along the edge of my pliers helped a lot. It shined my pliers up in that one spot like nobody's business, too! But at least I was able to make the cuts needed, which was for the record very, VERY slow work. Given how strong the stainless steel is, and how fragile the cutting disks are. I used 1/64" for the 24-gauge slot, and 1/34" or 1/16" for the 18 and 16 gauge slots. Since I only had a single 1/16" disk left, and about 60 1/32" disks, I tended to just use the 1/32" for the most part, to avoid shattering my only disk that was used mostly on the 16-gauge slot. Keep in mind I made multiple rings, several slots each, for practice (and for others who wanted one). | |
| At which point... thank god for practice rings! The very first slot I made wasn't very clean in general, and was somewhat crooked to boot. The second slot wasn't much better, but by the third, it was starting to look almost like I knew what I was doing. By the time I made the slots on my "final" ring, I had gotten my technique down to a science... which basically involved never removing the ring from the pliers (I just dipped the pliers into water with the ring to quench the heat), and finding a decent position to hold the tools. After cutting the various slots (7 in total... there's 3 slots on my final ring), I had to remove the burrs of metal on the inside of the ring, where the blade cut all the way through. Thankfully, I had a tiny grinding bit, and managed to keep my hand steady enough to make it smooth as silk. For the hell of it, I polished all of the rings, since I had Dremel accessories for that. Hey, why not... makes them shiny. | |
| And thus, we have 3 rings. The left was where I did my 'first attempts', the middle where I did my 'second attempts', and the right is my final ring. I made it wider, so that it's easier on my index/middle finger when I'm actually chainmailling with it. All of them have little 'scuff' marks here and there from where my unsteady hands touched the cutting blade down wrong a bit. Eh, it gives them character... makes it look more 'homemade' as opposed to 'machine-made', as it were :P. Aside from that, there's a minor problem with the 'final' ring, in that the slots aren't on exact opposite sides of the ring from eachother... they're a bit off-set to one side. I'm planning to etch in my initials or something into the middle of the more 'open' spot, but we'll see if I ever actually get around to that. It doesn't bother me one way or the other, but should the urge come up, at least there's a space to etch something. And the bottom-half is it on my pinky... it's new home. And so, my quest has been completed :D. | |
| Added final note... I've discovered that if one obtains some extremely high-grit sandpaper (in my case, 1500-grit), wrap a bit of it around a cylinder-type attachment of a Dremel, followed by running that for a bit on the inside of the ring, you get a very mirror-finish (minus of course the deeper scratches from other tooling). I also gave it a healthy run on the outside of the ring too, so it's all nice and shiny now... no more 'lines' where the flat part of the pipe-cutter rolled against :D. As an added benifit, the extremely smooth surface on the inside makes it very easy and comfy to slide onto my finger! Ehehehehe... shiny. | |
